The Humble Kitchen Torch.   Permalink

August 25th, 2012

Like me, you’ve probably received one, two or three creme brulée torches as gifts for birthdays or Christmas; most likely because of the simple fact that people know you love food. I will heretofore refer to them as “kitchen torches”.

Butane Derringer of Flamey Love

And again like me, you probably believe there’s not much you can use them for, other than melting sugar. Well, I used to believe that. Not so much anymore.

So what are they good for?

Setting things on fire, for one. Okay, so I’m not recommending that you go out and torch someone’s house (unless they are your nemesis). They are great however, for starting a smoulder on wood chips for stovetop smoking of foods. In order to get wood chips smoking, you need a lot of heat, which can be provided by a stovetop. But the actual act of smoking is best at lower temperatures, as higher ones can create nasty bitter and tar-like flavours in foods. You’re best to start your wood at a high temperature and reduce down to keep the smoulder going. This can be done in a better and more controlled manner by lighting the wood chips with a kitchen torch first.

What else are they good for?

Sterilization. If, like me, you’ve done some canning in your lifetime, you’ve no doubt spilt some food on the lip of a freshly sterilized jar. This means after the jar is full, you’ve now got to wipe the edge down with a wet cloth or paper towel. Who knows if you’re introducing new microbes to what was once a sterile jar. Worry not. The flame of that torch will instantly sterilize a jar’s lip! Caution must be taken though. The heat is strong enough to crack or shatter the glass if held in one spot for too long. Use quick passes.

You can also sterilize away those nasty microbes hiding in the gaps in your evil, riveted cookware. Just run the torch over the rivets until well hot. This shouldn’t be done on non-stick cookware however, as the high heat can damage the surface. Use a bleach/water mix with a stiff non-metal brush and hope to hell you kill everything. Or, you could toss it away and get some nice welded cookware. But who am I to say welded handles are better? (But really, they are.)

Hehehe, Fire!

Is there something else I can use a torch for?

Destroying bubbles. It’s a technique used by pastry cooks, actually. When something like a setting custard (like a flan, creme caramel or creme brûlée) is portioned into ramekins or moulds, its high protein content causes it to have a tendency to foam or bubble at the surface when poured. Unfortunately, the protein also makes those bubbles quite resilient, and many will remain throughout the cooking process, as the slow heat that custards are cook at means “skin” of the bubble ends up setting before the air within it gets hot enough to expand and break it. The solution? The magic kitchen torch, of course! Running the flame of a torch near the liquid surface (but not directly touching) causes the bubbles to heat up, expand and burst, leaving you with a pristine, smooth surface ready to go into the oven. 

This doesn’t just apply to custards. It works for just about anything where bubbles can be problematic. Filling molds with bubbly chocolate? Torch to the rescue! Worried the bubbles will set in your fresh grape jelly? It’s a bird, it’s a plane. It’s kitchen torch! Creating a naturally flavoured fruit syrup and bubbles getting you down? Get Commissioner Gordon on the phone and point the torch-signal to the sky.

What shouldn’t I use it for?

Browning meats. I’m sure you’ve seen a sous-vide or low-temperature cooking demonstration where a cook browns the surface of a steak or a roast with a blowtorch. Well, it’s likely that torch is propane or oxygen based, and burns at a much higher temperature than your standard butane creme brulee torch. Unfortunately, your humble kitchen torch isn’t powerful enough for browning meats, making it uneven, prone to burning meat and just plain time consuming. Not to mention that butane can leave a distinctive flavour on meats.

Anything else I should know?

Of course, there are other things you can do with a torch, but I’ll leave that to another post at another time. Or you can discover others on your own. Just rest assured that butane derringer of flamey love need not sit in a cupboard collecting dust forever. It can have many uses if you just give it a chance.

From the Pantry of Absurdity: Frozen Cooked Rice.   Permalink

August 22nd, 2012

Yep, you can actually find par-cooked rice.

And not par-boiled minute rice, but actual cooked, frozen rice.

Rice is not a hard thing to cook. It’s quite simply one ingredient plus water and a pinch of salt. It doesn’t take long to cook, doesn’t require special equipment or a lot of attention. It needs no mixing, no special technique. It is, matter-of-factly, easier than boiling an egg.

So why is it that we don’t find this product completely absurd? I’m quite certain pre-cooked rice would be laughed off the shelves in just about every Asian country.

I’d like to blame the manufacturer for producing this, but in reality it’s our own fault. We have demanded convenience and speed. We have deemed cooking a chore.

Perhaps it’s time we learn to both eat to live, and live to eat.

Food is the great social equalizer. It’s a focal point for personal interaction. It fuels us, it pleasures us, it’s a representation of love.

Take the time to cook. It makes your life, and the lives of those you feed, richer.

It’s All In The Name.   Permalink

August 20th, 2012

I balk any time someone calls me “Chef”.

I graduated from “George Brown Chef School” (it’s actually in the title) and have worked in some of the best kitchens, for some of the best Chefs in the city.

As “Chef” means boss, it generally refers to someone who runs a kitchen. I am not a Chef, and likely never will be. I am a cook.

I have been a “Chef-de-Partie”; meaning I have run a station. I believe I earned that title being senior cook on a 3 man garde-manger station. I am still not a “Chef” in the common use of the word and I still call myself a cook.

This past Friday, Chow.com posted a great article on the resurgence of the title “Chef” amongst both cooks and the general populace. It was brought to my attention by a twitter post made by a former Chef Instructor of mine. Funny enough, she has told me in the past that because I’m no longer her student, I can address her by her first name. Yet, I still call her “Chef”.

Yes, the word means “boss” in French, and she is no longer my boss (well, teacher). But she is someone who worked through the ranks to become the head of the French Culinary Arts post-grad program at George Brown.

To me, that deserves respect.

Kitchens are hard places to work. If it isn’t abusive superiors (yes, they still exist), it’s the long hours, the constant speed and level of consistency required, picky customers, inept front-of-house staff, low pay, lackadaisical attitude of other cooks, language issues, stresses on the body from heat, no breaks, lack of a normal life, etc. It can really get to you over time, and people don’t always deal with it well. There’s a high level of drug and alcohol abuse amongst cooks. I have personally seen a cook leave the line mid-shift to go snort some cocaine. I even know a Chef or two with coke issues. While I believe the drug and alcohol abuses in professional kitchens are lesser than they used to be in the past, they are still quite prevalent.

So, when someone survives the kitchen life long enough to earn the title Chef, I believe they should be called it, and those who don’t earn it, don’t deserve it.

I know of one person in particular, who began calling themselves a “chef” straight out of culinary school. Their argument was because it’s a “chef school”, those who graduate are chefs. The logic astounds me, as those who take Executive MBA classes are not called “executives” and entitled to all the perks of being an executive, simply because of their choice of educational stream. This person however, had felt that their mere 2-years of schooling entitled them to be referred to as something that (regardless of schooling or not) can take decades to achieve in the real world. I too took the same schooling, ended up with better marks and have learned such an immense amount about cooking post-college that in a just a few years later I feel that what I learned in school was minuscule compared to the real world. And I still wouldn’t consider myself worthy of the title.

So, if you ever call me Chef and I correct you, don’t take it as an insult. Just call me something else. Mouth Filler? Accurate but kinda boring. Culinary artist? It’s hyperbolic and perhaps too close to “sandwich artist”. Tummy-teaser? Sounds like a term Rachel Ray would use. Just anything but “Chef”,

You know, Gastronaut is pretty cool. Call me that.

Recipe: Corn Chowder   Permalink

August 18th, 2012

It’s mid-August, and that means that we’re hitting the peak of corn season in this part of North America.

Go shuck yourself.

But why would I want to talk about corn? Corn’s bad. Well, at least it’s been portrayed that way in the last decade or so. And there’s good reason for thinking unkindly of this absurdly mutated grain. There’s corn’s over use as cheap filler, high fructose corn syrup, etc. Most of corn’s problems can be attributed to the massive subsidy given to corn farmers in North America. If corn weren’t subsidized, it wouldn’t be cheap (the full cost of growing it would be reflected in the price), and thus there’d be less incentive to try and turn it into anything and everything. Sadly, when a food is cheap, this is a pretty common occurrence in the food industry.[1. Dragon fruit (AKA Pitaya) is expensive to produce and ship, and are often $7-$8 per one piece of fruit. Thus, dragon fruit appears as pretty much only dragon fruit.

Apples and pears are cheap to produce, thus apple and pears are used as a filler in everything from Fruit Roll-Ups to jams. Their mild taste lends particularly well to being covered up with artificial strawberry flavour and other fake stuff.]

Despite corn’s abuses in fakery, we can’t forget that it started out as a pretty humble food. Like rice was to Asian cultures, and bread was to Europeans, corn was an important staple for American indigenous cultures. It was so important that when the Spanish showed up, they left the Americas with holds full of corn. The unfortunate part is they forgot to take the process of nixtamalization with them, and killed themselves with pellagra.

Silly conquistadores, nixtamalization is for Aztecs!

Worry not, today’s sweet corn varieties don’t need to be specially treated before eating; though cooking is highly recommended as it can be rather bulky in the digestive system. Cooking will break down some of the starches and make it a little easier to digest. ‘Cause we all know that, uh, forensically speaking, it’s already pretty easy to tell that outer bran doesn’t get digested all that well in the gastrointestinal pathway.

Don’t give it more reasons by eating it raw.

Corn doesn’t have to be relegated to canned side dishes, tex-mex and something you serve on the cob at barbecues. The fact that it works well equally in sweet or savoury dishes means it can be quite a versatile ingredient that can be used in a wide range of applications. Even as the main star.

I love corn chowder, and I’m of the belief that this dish started out because someone misheard the word “clam” for “corn”. They’re pretty much the same dish. Bacon? Check. Cream or milk? Check. Potatoes? Check. Onion? Check. Clams/Corn/Clorn? Check.

Despite being so associated with New England, chowder is undeniably French in origin, ingredients and flavour. The soup itself has existed in Europe for a long time, and the word is generally thought to come from “chaudière”, which is the French word for a large cooking pot. The first time the word was used for a soup is apparently by Breton fishermen in Newfoundland.

That’s right. Fuck you New England. Booya!

Sorry. Canadians aren’t allowed to be patriotic. I’ll go hide in the corner for the remainder of this recipe.

Corn Chowder

INGREDIENTS:

100g (3.5 oz) pancetta, salt pork or unsmoked bacon, cut into small cubes.
150g (5.3 oz) onion, finely chopped
325g (11.5 oz) corn kernels (use whole cobs; 3 should do it)
1 clove garlic
10mL (2 tbsp) parsley, roughly chopped (should yield about 5mL/1 tbsp)
3 parsley stems
1 bay leaf
6 peppercorns
500mL (2 cups) chicken or vegetable stock
335g (11.8 oz) waxy potatoes, peeled and diced to 1 cm (a small ½ in)
250mL (1 cup) 35% cream
5mL (1 tbsp) flour
salt to taste
green onion, thinly sliced, for garnish

EQUIPMENT:

1 heavy bottom dutch oven
1 large sauce pan with lid
1 spoon (wooden is best)
1 roasting pan or sheet pan, preferably lined with parchment
1 sharp knife
1 large cutting board
8cm (3 inch) square of cheesecloth
kitchen string

DIRECTIONS:

1. Preheat an oven to 400°F. Put the parsley stems, bay leaf and peppercorns into the center of square of cheese cloth. Bring up the corners and tie with a piece of the string to make a sachet. Set aside.

2. Shuck the corn and cut the stem ends flat. On a large cutting board, stand the cobs up on end and slice off the kernels. Set them aside for now and keep the cobs.

3. Place the now kernel-less cobs on the pan and roast them in the oven until they’re turning nicely brown (about 20mins or so, but keep an eye on them them as the high sugar content means they can burn quickly).

4. When the cobs are nicely roasted, combine them with the stock and sachet in a sauce pot and place over medium-high heat. If the cobs are too big to fit, cut them in half. Put a lid on the sauce pot; we don’t want to lose any of that liquid or flavour. If it boils, turn it down to a simmer. Doing this to the cobs will help give the soup a subtle toasted corn flavour.

5. In a dutch oven over medium-low heat, render the pancetta until it’s dark mahogany and crispy. Pull the pan from heat, drain but reserve 5mL (1 tsp) of the rendered fat. Set the pancetta aside. DO NOT clean the pan of any of the lovely darkness left on the bottom of the pan. Unless of course it’s burnt to a black colour. Only then should you clean your pan.

6. Add the onions to pan with reserved fat and return them to the burner. Set the heat on medium low and sweat the onions down until they’re soft.

7. Stuff the corn into the stock pot and cook for about 5 minutes stirring occasionally. Add the garlic and stir constantly for about 1 minute, then sprinkle in the flour and continue stirring for about another minute.

8. Remove the cobs and sachet from stock, and pour it into the dutch oven along with the potatoes. Check the salt level and season accordingly. Bring it up to a simmer, stirring occasionally. After about 10-15 minutes, add the cream and let it continue to simmer.

9. Take the dutch oven from the heat when the potatoes have softened and have reached a stage of being edible. Add the fresh parsley leaves. Check the seasoning and re-season if necessary.

Serve hot, garnished with green onion. With bread on the side. Corn bread is nice.

Makes a scant 1L (1 qt).

Ways to Maximize Flavour   Permalink

August 15th, 2012

So, your dish sucks. It lacks flavour, and adding salt only makes it taste salty. What can you do next time to avoid this situation?

Add a touch of butter, extra virgin olive oil or other flavourful fat to your flavourless oils.

Let’s face it, canola and grapeseed oils are great for not imparting a flavour and have a high heat tolerance, but that’s about it. They won’t add much to how your dish tastes. This is why it’s a good idea to add something else.

Due to its acid and protein content, butter helps aid the browning of food, as well as adding luscious flavour. Extra virgin olive oil ads an earthiness. Nut and seed oils can be added to other cooking oils and will add a small bit of flavour. In fact, a few drops of sesame oil to canola when searing serves to accentuate the classic flavour pairing of tuna and sesame seeds.

Brown your meats thoroughly.

This means browning the edges of a steak, not just the flat sides. Easy. Don’t stop at grey, make sure you can get as much brown on your meat as possible (short of burning it, of course). Use a high heat to get a brown crust without overcooking the interior.

Buy fresh local produce, preferably from the farm itself.

The longer a distance that produce has to travel to get to you, the earlier it needs to be plucked from the tree/vine/earth. A lot of flavour and sugar in produce is made in the few days between “underripe” and “fully ripened”. If that fruit or vegetable isn’t on the vine while it ripens, it doesn’t end up with as high a concentration of sugar or flavour components.

Beef short ribs.

Buy dry-aged beef.

As meats age, they lose water through natural evaporation. In doing so, non-water soluble flavour components end up being concentrated. A freshly slaughtered animal is drained of all blood and hung in a cool, humidity controlled environment for an amount of time. Almost all meat is aged for some period of time, simply to allow the stages of rigormortis to occur before sale, but longer period aging is done for flavour. Beef can be aged for 60 days or longer, concentrating those compounds creates an intensely beefy, nutty flavour. This is most of the reason why steakhouse steaks usually taste far better than those you can buy from the average grocery store. In addition to evaporation, enzymatic and bacterial action occurs. The enzymes begin breaking down the meat (increased tenderness is an added bonus), and the small amount of bacteria that invades the beef adds a blue-cheesy, slightly acidic flavour. Don’t worry though, the environment is heavily controlled and safe. Always cooking with dry aged beef can be cost prohibitive, but it’s well worth it for dinner parties, special occasions or those days when you really want a nice, flavourful steak or roast.

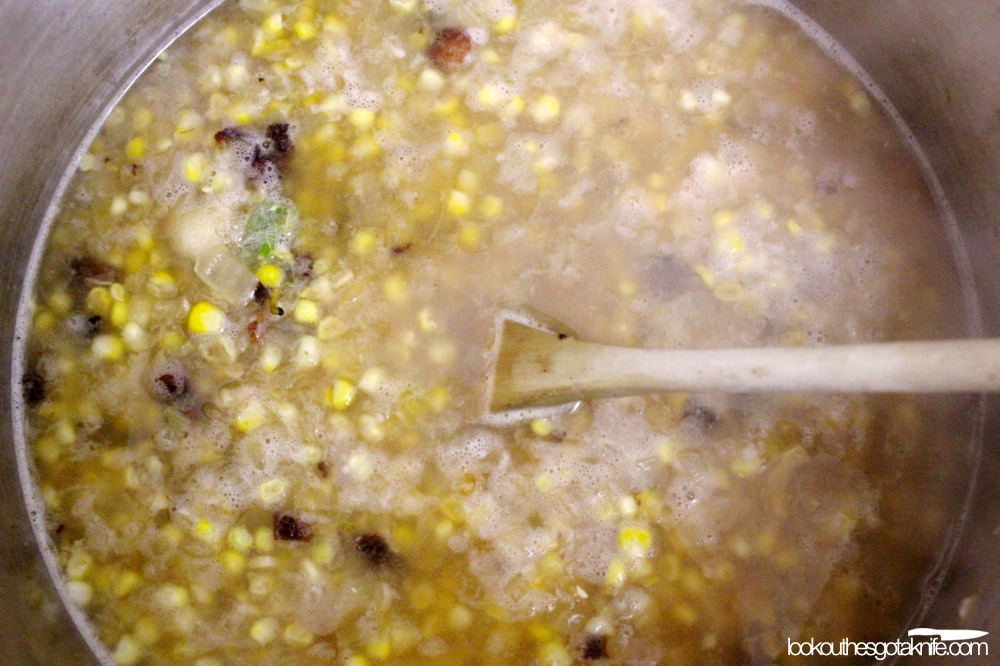
Reduce stocks down before using.

The whole reason we add stock to sauces is to add flavour. Reducing them just concentrates that flavour. If your recipe calls for 2 cups of stock, use 3 cups and reduce down to 2 before using. Simple as that.

If using packaged stocks, buy low- or no-salt varieties and taste regularly while reducing. If they start tasting salty, take them off the heat and add a few tablespoons of water. Don’t reduce further.

Make your own stock.

Home made stocks almost always have more intensely meaty flavour than the store bought varieties. Part of this is because commercial stocks are usually reduced as little as possible. But another part is the fact that most of them aren’t just meat and vegetables. Often, flavouring agents and soy are used as flavour fillers. A homemade stock is generally meat and/or bones, vegetables and herbs, nothing more. As such, you can control the reduction and salt content, and thus the flavour.

Make your own demi-glace and use it regularly.

If you reduce down a homemade stock, it will eventually develop a dark colour and sticky texture, and when refrigerated will solidify into a dense gelatinous solid. That state is called “demi-glace”. The stickiness is a concentration of the collagen (AKA gelatin) removed from the bones and meats. It adds a wonderful, finger-lickin’ good, full texture to sauces. With that reduction also comes a concentration of flavour. A few drops of demi-glace on a plate can be more than sufficient. In fact, it’s so concentrated that demi-glace is extremely high in umami. Which is why it’s a great addition to many foods. It freezes well, so it can be frozen in an ice cube tray, then stored in a freezer bag. Adding a cube of demi-glace to a sauce dramatically increases and magnifies the flavour.

Note: most commercial stocks cannot be made into demi-glace as all the natural gelatin has been removed.

Reduce your sauces.

If you add a 63mL (¼ cup) of heavy cream to 250mL (1 cup) of stock, you’ll have a product that tastes like slightly creamy, weak stock.

If you however take 187mL (¾ cup) of heavy cream and 750mL (3 cups) of stock, and reduce that down to 313mL (1 ¼ cup), what you’ll taste is magic. Cream/stock reductions are lucious, rich and are a flavour far beyond that of their two components. Reduction concentrates flavour, but can also create new ones.

Make gravies from stock, not drippings.

My mother used to make her gravies from pan drippings, but it wasn’t always flavourful. Not to mention that if the drippings burn on the bottom of the pan at all, you’ll add some bitterness when you deglaze the pan.

My preference is to buy a bag of {insert meat type here} bones, roast them very well (just short of burning them), add water to make a stock, reduce that down and make a gravy from that. You’ll end up with a more predictable, better tasting product.

Use the right cut of meat.

If you make a lamb stew, tenderloin is a terrible cut of meat to use. It’s got a light flavour that can be overpowered easily. Shoulder is better, but shank or neck is best. For stews, soups, braises and stocks you generally want cuts of meat from parts of the animal that do the most work. Tougher cuts like these have more flavour, but will tenderize with long, slow cooking.

Likewise, if you want a light flavour, you choose cuts that come from lesser-used muscles, like loin, tenderloin, flank and belly.

Use a bay leaf.

Just about any savoury liquid can benefit from being cooked with a bay leaf or two. Really.

Put a lid on non-reducing liquids.

Evaporation means that water soluble flavours escape into the air. If you’re not reducing a liquid, like say, if you’re making a béchamel or a soup, put a lid on it. This helps trap in volatile flavour components and as the evaporated water condenses on the lid, it will fall back into the liquid and take the flavour components with it.

Yes, this idea is counter to reducing (which concentrates flavour), but reducing too releases water-soluble flavour components. The goal with reduction is to concentrate those non-water soluble flavours, as well as any water-soluble ones that may remain.

Green tomatoes on the vine.

Cook with all parts of the plant.

There’s a reason “sprigs” of fresh herbs are sometimes called for in recipes, rather than just the leaves; the stems contain a great amount of flavour, usually the same or complimentary to what’s offered in what’s attached to them. This doesn’t just apply to herbs.

Tomato stems and branches add an extra complimentary earthiness to tomato dishes.

The hard, woody stems you generally cut off from asparagus are an excellent addition to asparagus soups, either blended in or steeped with the stock you add.

Broccoli stems taste almost identical to the florets, but have a smoother texture when cooked. Peel the stem and cut it into thin discs so that it cooks quickly, and serve mixed in with the florets.

Carrot tops can be finely chopped and tossed into glazed carrots in place of parsley. They are remarkably similar in flavour as they’re in the same family.

Use both fresh and dried herbs when herbs are called for in liquid-based foods.

Use dried herbs during cooking, and fresh herbs at the very end. Dried herbs don’t discolour and release flavour well over longer periods of time. Fresh herbs have a brighter flavour which can be lost through cooking. Cook a tomato sauce with dried basil and then add fresh to garnish, or use dried tarragon for the vinegar reduction stage of a béarnaise sauce, then add some fresh chopped to the sauce just before serving.

Look at other similar recipes.

If you’re making a ratatouille and have a specific recipe you’re using, looking at other ratatouille recipes can give you ideas on how to increase your flavour.

Chicken & waffles; an example of salty, sweet, fatty and spicy balance.

Aim for balance.

Balance is regarded as an equilibrium between one or more flavour senses; salty, sour, sweet, bitter, umami (savoury) and increasingly recognized “fatty”. Generally, “spicy” is considered part of balance as well, though we have no specific taste receptors for it. A good homemade salad dressing is an excellent example of balance. If done well, it will be sweet, salty, sour and fatty in a way that none of those four sensations stand out, but exist in harmony. Asian foods tend to aim for a similar balance of sensations.

If a savoury food is lacking something, try a splash of vinegar, lemon juice or dry wine. Often, this will brighten the flavour substantially, and bring the dish closer to balance.

I’ve got more to say about balance, but that’ll have to wait for another post.

The Five, Day 5 – Low and Slow   Permalink

August 14th, 2012

[Day 1 can be found here.]
[Day 2 can be found here.]
[Day 3 can be found here.]
[Day 4 can be found here.]

I really want to write that the best cooking technique one can learn is continually educating yourself about food, but despite its truth, it sounds like a copout. So I can’t do that. But I really, really wanna. Like, so badly.

Fine. I suppose I’ll indulge myself in a less philosophical answer.

One of the things people seem to want to really really believe is that any recipe can be sped up. Our western lifestyle of convenience has made cooking a chore, and something on which as little time as possible should be spent. To me, this is sad beyond words. But I digress.

Unfortunately, that idea is antithetical to the idea of low-temperature cooking. In it’s simplest explanation, it means cooking in the range of 60°c (though sometimes lower) to 100°c.

Modern low-temp cooking generally refers to water bath cooking (erroneously referred to as sous-vide, which merely refers to food being under vacuum). This is where scientific equipment is usually required. Immersion circulators are 1/2 water pump, 1/2 highly accurate heating element. They keep liquids at a very precise temperature. Food, bagged in watertight plastic, gets placed in the bath and “cooked” with the ambient water temperature. This allows for very slow cooking at temperatures just high enough to pasteurize the food.

The bad part is that immersion circulators are prohibitively expensive to the home cook, costing thousands of dollars and being rather complex in use. Or are they? [1. That is rapidly changing, as a kickstarter project has produced a USD$300 (to be USD$359 retail) circulator called the Nomiku that’s built for the home cook. No doubt others will follow.]

Older “slow cooking” methods are things like traditional barbecue smoking, rotisserie over open coals/flame, and cooking underground over hot coals. They all produce juicy, tender results, though generally can’t get as low a temperature as more controlled methods.

Lamb over a Rotisserie

More available to the home cook however, is just using lower temperature capabilities of their existing equipment. In my experience, people tend to use only one temperature or method to cook with, but quite honestly two or more temperatures or methods can improve the quality of your food.

A Prime Rib Roast is a great example of a food that can greatly benefit from low-temperature cooking. Typically, it’s cooked at a high temperature—usually around 230°C-250°C (~450°F-475°F) for a few minutes—then dropped to a moderate one of say 160°C (~325°F) for the remainder.

The fact of the matter is though, that any temperature above about 60°C (140°F) will both cook your food and kill microbes. It’ll just do so at much slower rate. It will also maintain better texture and flavour in your food.

Rapid changes in temperature cause cells to literally pop like a balloon as their component water heats up and expands or vaporizes (turns to steam). This is most of what causes a big puddle of juices for instance, when you cook a steak. Low temperature cooking can help prevent this, as it will allow some liquid to escape the cells through slower evaporation or expansion, causing less major structural damage to the cells themselves. This means less drying out, and juicier, softer texture.

In addition, proteins with high amounts of connective tissue greatly benefit, as collagen begins to melt at relatively low temperatures, but can sometimes take substantial amount of time. Think of that collagen as a meltable mortar between cell “bricks”. When it’s solid, it gives firmness and structure to meat. As the collagen melts, it acts like a lubricant between the cells, freeing them from one another, and making meat feel more tender, regardless of doneness. This is the same reason why braised meats, which are technically way overcooked, can be some of the most tender pieces of meat.

So how does this all become a technique?

Knowing that lower temperatures cause less damage and produce better results, it can be used to your advantage. Searing meats and proteins at a very high heat, and then moving to a low oven makes for a much better product, regardless of the meat being cooked.

So in the case of that roast, you’re better off searing the whole surface well in a very hot, heavy bottomed pan to start a nice crust, then placing it in a very low 75°C (~166°F) oven for several hours until it is cooked to the desired temperature. For a medium-rare roast, you will end up with less greying of the meat and more overall pink.

On a related side note: Use a probe thermometer with a temperature alarm, and never assume that minutes-per-pound rules actually work. Water content, fat content, ambient humidity and many other factors can affect the cooking time of your food dramatically. If you’re worried about timing your whole meal together, you’re better with par-cooking any side dishes, then finishing them off or reheating them when your meat comes out of the oven to rest for a few minutes.

In addition, because of the proximity to the ribs, Prime Rib contains a large amount of connective tissue, so a low and slow temperature can melt that collagen without overcooking the meat. The great part about for the home cook is that it’s much harder to overcook meat using lower temperatures. There’s a much greater length of time between “cooked to perfection” and “cooked to drywall”.

Even if it does take more time, it’s well worth the results. And because you’re using a low temperature (far lower than those required to set most things on fire), you can breathe easy and while I don’t recommend this (but won’t confirm nor deny whether I’ve done it myself), you could even leave your home while it’s cooking. Many have no problems leaving their home when they’re cooking with a crockpot, and 75°C (~166°F) is a lower temperature than the low setting on most slow cookers.

Or really, if you’re that worried you can use a slow cooker rather than an oven. The “warming” temperature of a slow cooker is generally around 71°C-74°C (159-165°F). Sear that roast off in a hot pan, then place it the slow cooker, raised up from the direct heat of the bottom using a rack, vegetables or other means, all using the “warming” setting. Just make sure you’ve preheated the cooker before hand, as bacterial growth could be promoted if you’ve started it from cold. I’d also accurately measure the temperatures of your cooker before trying this, as many new ones are known for exceeding the common temperatures associated with slow cookers.

The Five, Day 4 – Wet, Wet Brine.   Permalink

August 13th, 2012

[Day 1 can be found here.]
[Day 2 can be found here.]
[Day 3 can be found here.]

So, this one will be short and sweet, and just under the wire again.

This is a technique that everyone should know and use on just about every piece of meat they can.

Brining is the soaking of food in a salt water solution for a period of time. Sometimes sugar, herbs and spices are added to the brine. This miraculous mixture can save meat from being dry, can improve the texture of firm meats and season food thoroughly and evenly. It’s usually reserved for animal proteins like meats and cheeses, but works equally well with firm fruits and vegetables.

As food soaks in salted water, the natural difference in salinity between the brine and the cells in the food cause salt to equalize between the two. Essentially, the salt naturally tries to balance itself out. Because salt is hygroscopic (meaning it’s prone to holding onto water), it ends up bringing more moisture with it as it enters the cell, leaving it with more water in it than when it started. If that water contains flavouring agents, they’re also carried into the cells.

Brined proteins also denature, whereby the protein strands unravel, coagulate and in the process hold onto more water as they’re cooked.

Sugar is often included in brines for the sake of flavour, preservation, as well as for its own similar hygroscopic abilities.

Due to its residual preservation abilities, brining is also a crucial step in many types of charcuterie and smoking. The higher concentrations of salt contained within their cells can kill microbes both within, and wanting to enter the food.

As brining larger or denser pieces of meat can take a fair amount of time, a similar process can occur with the heavy salting of meat for an hour or so before cooking. Salt generously (it’ll seem excessive) with kosher or another large grained salt and let sit for 1 hour for every inch of thickness. Salt will quickly penetrate into the meat.

Ratios of salt, sugar and water and soaking time vary by food you’re using them on, but there are plenty of guides that can be found all over the internet. Here’s about.com‘s list.

Naturally, it can be hard to have the forethought to brine every piece of meat you buy, but it is worth doing it as much as possible as it makes food juicier, tastier and more tender.

Salt is your friend.

Life can be busy.   Permalink

August 11th, 2012

Due to unforeseen life busy-ness, day 4 and 5 of “the five” have been postponed until Monday, August 13th and Tuesday, August the 14th.

The Five, Day 3 – The Right Pan For The Job   Permalink

August 9th, 2012

[Day 1 can be found here.]
[Day 2 can be found here.]

Busy day and I’m just under the wire with this one, but here goes…

Pans come in a variety of shapes and sizes. But it’s crucial to know which pan to use for what job. Knowing so can speed up your cooking, or make sure you get the most flavour out of your food. Using the wrong pan can lead to burning or slow cooking times.

Material needs.

Cast Iron, Stainless Steel and Non-Stick Anodized Aluminum

Clad or layered stainless steel (stainless with an aluminum or copper slug on the bottom, or sandwiched within the steel) is by far the most common material for pots and pans these days. It’s lighter and heats up faster than cast iron, but is heavier and heats up slower than full aluminum or copper. Being in the middle of the pots and pans thermal conductivity scale means it’s like the All Purpose Flour of cookware; it’s satisfactory for most things, but isn’t ideal for everything.

Best usage for stainless steel: No real “best”, but it does an okay job otherwise.

For searing meats, cast iron does a much better job. Being a poor thermal conductor means that cast iron carries a lot of heat “inertia”. Once it’s heated, it has a tendency to stay heated. So putting a cold or room temperature piece of food on its surface means it’s not going to lose much of it’s surface temperature. Cast iron is great for anything you want to build a nice even crust on, which is why it’s one of the preferred methods for searing a steak on the stovetop. It does have the disadvantage of having zones of different temperatures while it’s heating up. Always make sure it’s been preheated for a great deal of time before use.

Best usage for cast iron: Dutch ovens or skillets.

On the flip side, copper and aluminum pots heat up evenly and quickly, so they’re great for liquids. Their high thermal conductivity means there’s little keeping the heat from your burner reaching your food. Both however, should not be used for acidic or alkaline foods, they can make food taste metallic or even create poisonous compounds. Cast iron is also reactive, but of its cookware is seasoned or ceramic coated, make it a moot point.

Aluminum frying pans are a bad idea. While light and easy to manipulate, they often do a piss poor job when it comes to frying. Stainless is better. Aluminum is common in commercial stock pots. The thermal conductivity allows heat to move faster into your food.

Best usage for aluminum: Stock pots or pasta pots; non-reactive foods.

Copper is a little heavier and a better thermal conductor. So it’s better for things like candy making, and is most commonly preferred due to its ability to apply quick, even heat to sugar. The negative is it’s damn expensive.

Best usage for copper: Sauce pots for candy making; non-reactive foods.

Size does matter.

10L vs. 1L

Choosing the size of your cookware makes a world of difference. Frying a single chicken breast in a 30cm (12 in) pan creates some problems. Because there’s so much surface area not being used, that area just ends up heating air (and dry air is a poor thermal conductor). Large pans are meant to be used for large or multiple items. An 20cm (8 in) fry pan will do a much more efficient job.

A surface area much larger than your food also means there’s more room for cooking oil to spread out, meaning less of it comes in contact with your food. It also means high-viscosity liquids have more area to stick to. If you’re melting 2 tablespoons of butter in a 30cm (12 in) pan vs a 10cm (4 in) pot, you’ll actually end up with less butter when you pour it out, unless you scrape it clean with a spatula.

Use surface area to your advantage.

There’s a reason stock and pasta pots are tall and narrow; there’s less surface area for liquid to evaporate from.

In stock pots, it means more liquid—and volatile flavour compounds—remain in your soup stock as the hours of leaching flavour out of bones and meat roll by.

In the case of pasta, you want to lose as little water as possible. As starches move from the pasta into the water, they make the water “sticky” as it evaporates. The more water you cook in and is left at the end of it all, the less your pasta is likely to stick together. That’s why you should always use the largest pot you have filled as high as possible when you make pasta, regardless of how much pasta you’re actually making.

On the opposite end, a high surface area is great for reducing liquids. Using a large, wide frying pan or skillet for any reduced sauces is one of the best choices you can make. You’ll be able to reduce your liquid much faster. And honestly, reducing a stock to a demi-glace in a marmite (the french term for a stock pot) is a mighty pain in the ass.

Non-stink? Right.

Repeat after me: Not every pan has to be non-stick.

That’s right. You really only need one or two non-stick fry pans. And they don’t need to be used for everything either. They do best in situations where you’re cooking a high-protein, low fat food like fish, chicken breast or eggs (I’m talking about the whites here). Sugars will still stick to non-stick.

What many pot companies won’t tell you is that non-stick coatings are really, really bad thermal conductors. When you cook on non-stick, it’s like trying to cook on silicone. In effect, it actually slows down cooking, and makes it harder to reach higher temperatures required for proper browning of food. So really, it should only be used in situations where the risk of sticking far outweighs the risk of the food not browning.

I won’t go into all the tricks cookware companies like to make consumers believe, but non-stick stock pots, dutch ovens or sauce pans are a waste of money. Any place where you want consistent heat or are cooking liquids, non-stick is pointless.

Another idea that many might have trouble believing; using the same amount of oil in non-stick and regular pans of the same size, your food will pick up more oil from the non-stick pan.

Why?

Because all non-stick repels liquids. Bare metal or ceramic coated pans will hold on to some viscous liquids like cooking oils. This can be tested via a side-by-side test where a drop of oil is placed in both styles of pans, then a paper towel is dropped over top. More of the oil will end up in the towel from the non-stick cookware. If it’s going into the paper towel, it’s going into your food.

The Five, Day 2 – Sweating/Sautéing   Permalink

August 8th, 2012

[Day 1 can be found here.]

This seems remarkably straight forward, but too often I’ve seen food sweat when sauté is called for and vice versa. I’ve even created a word for it; “sweaté”. It’s where a recipe calls for a sauté and the cook ends up sweating the product.

There’s a dramatic difference though. Sweating is done at a relatively low temperature, sautéing is done at a high temperature. If people were clearer on the difference, their food might turn out better.

When a recipe calls for a sweat, put your food in a cold pot or pan with a little oil, turn it on low and walk away. If the temperature is right, little attention is needed, and vegetables will be softened. You can even put a lid on it to hasten the process. You don’t want colour on your product. You just want to soften them up.

Sautéing is a whole different beast. Instead of a cold pan, you start with a very hot pan, add your oil and agitate or toss your vegetables or meats regularly. Some say the term “sauté” (which in French means “jump”) is from the tossing motion of the pan, others say it’s because the pan is so hot, the food jumps around because of it. Either way, the method involves a lot of movement. With such high heats, food can burn easily. Constant motion prevents this from happening. Cooking in a wok is a good example of a sauté, though at a heat much higher than that available to regular stovetops.

Sautéing creates a similar result to a sweat in that it softens food with little colour, however because of the longer cook times with a sweat, you lose more of the violative flavour compounds through steam and the texture is generally more consistently soft throughout. A sautéed product will have a less cooked flavour and texture, and if a high enough heat is used a flavour the chinese call “wok hei”, which can be developed in pans with a surface temperature higher than 200°C (392°F).

A good way to remember the difference is that a sweat is like a sauna; sitting in a warm room, soaking in the heat. On the other side, a sauté is like walking over hot coals; done quickly and with a lot of fast movement.

The Five, Day 1 – Browning Meat.   Permalink

August 7th, 2012

I love Food Republic, but they must be hard up for stories this week, because they put up a story called “Five Crucial Kitchen Techniques and How To Use Them“.

Going through the list, I disagree that—with the exception of shucking oysters— anything they listed can be called a technique.

Five essential techniques I’d say are more important, and seem difficult for many to master?

I’m going to spend the next five days going over five techniques that I feel are far more important to master.

Day 1: Browning meat.

Beauty of a browned steak

Oh sure, everyone knows how to brown meat, right? Actually, in my experience, they don’t. Many seem to confuse “grey” with “brown”, most especially with ground meats.

All animals have a protein called myoglobin in their meat. Myoglobin is the meat analogue to the blood’s haemoglobin, which helps store oxygen in cells. It also gives meat a red colour to varying degrees, based on the animal and the type of muscle that the meat came from. Well used muscles, like leg muscles on a chicken or steer will contain more myoglobin than lesser used muscles like chicken breast or loin. But chickens in general contain less myoglobin than beef, which is why their meat is pink as opposed to red.

This is also what gives meat juices in rare to medium meats a red colour. It’s not blood. I repeat, it’s NOT BLOOD. Sorry, vampires.

Myoglobin changes colour and chemical structure when heated. When it’s heated beyond 60°C (140°F), it’s center iron molecule loses an electron and oxidizes, and in that reaction myoglobin becomes the tan-grey coloured hemichrome. Past 76°C (170°F), there’s very little unoxidized myoglobin left in meat, and this is what gives well-done beef it’s characteristic grey colour.

Unfortunately, this is no where near high enough temperature for browning (maillard and caramelization) reactions to occur. Generally 148°C (300°F) is required for typical maillard reaction browning to even start in meat.

Hence, that “greying” can occur even if you’re boiling meat in a pot of water. When a recipe calls for meat to be browned, it generally involves high heat, a pan quite a bit larger than your meat, and patience.

The large pan/small meat ratio should be at least 2:1. Meaning the surface area of the pan should be at minimum twice the size of the surface area of the meat that will be touching it. High heats will cause moisture to bleed out of your meat. Too much meat in a pan means there’s nowhere for any liquid lost to go and it remains trapped with your food. Essentially, you end up boiling your meat, as the trapped liquid will keep your maximum temperature in your pan around the 100°C (212°F) mark.

The higher heat helps keep internal moisture and promote browning before drying out the inside of the meat, as well as quickly evaporating off any liquid that may leak out.

If you’re cooking ground meats, you may need to use a larger pan-to-meat ratio of 3:1, as there’s significant cell damage and surface area to cause a great amount of liquid loss. Brown in batches, and recombine all cooked batches together near the end. Trust me, next time you make those ground beef tacos, your taste buds will thank you.

Terms of Service   Permalink

August 6th, 2012

The New York Times’ great post on terms used during service at some of the major restaurants in New York City.

Recipes, substitutions and the woes of an analytical cook.   Permalink

July 31st, 2012

I’ll let you in on a secret. I’m a bit of an etymology geek.

Did you know the word “receipt” is a synonym for recipe? You find the word a lot in older cookbooks. In fact, the word receipt actually started out in a pharmacological and culinary context first, before coming to mean an itemized list of purchase.

A pic of peppers for no good reason.

For juvenile chuckles, you may even find the word “apricocks” in old cook books.

I take issue with many negative comments and ratings of online recipes. Often, I’ll find a bad or mediocre rating that will say, “I didn’t have any X, so I substituted it with Y”.

Don’t make substitutions and expect the recipe to be good. Ever.

So it is with all of my heart that I tell you; follow the recipe to the letter.

At least the first time around.

Experimentation should come after experience. In the restaurant kitchen, we’re taught to follow orders strictly for most of our careers. This keeps consistency and predictability steady. If you deviate from a recipe, even slightly, it can mean disaster.

Broccoli and Asparagus are similar vegetables. They’re both part of the brassica family and can be substituted in many recipes. Substituting equally by weight, a cheddar broccoli soup makes for a pretty good cheddar asparagus soup. However, I dare you to make a substitution of asparagus for broccoli in a recipe containing wine. Odds are, it’ll taste metallic and less than appetizing.

If you follow directions long enough, you’ll learn what works and what doesn’t; what ingredients are truly interchangeable and what aren’t. Research supplements this to some degree, but hard earned experience is how most cooks become chefs (where you are allowed to create, not just follow orders).

So I beg and plead—especially if you plan on rating a recipe—follow it to the letter the first time. If your recipe comes from a known, tested source, all the better.

Consider it building up a repertoire of knowledge, not stifling creativity.

And keep your receipts.

Beautiful food.   Permalink

July 26th, 2012

The folks over at Gilt Taste have a series called “The Art of Plating”, demonstrating how specific chefs plate certain dishes. I’m one of those cooks who’s fascinated with presentation, even though I’m nowhere close to mastering it. Modern plating techniques are—simply put—organized chaos, and I love looking at food that’s been plated in this style. Having been a graphic designer prior to a cook, I can recognize the amount of work and thought that goes into these well-designed plates. Combining organic and geometric shapes into something that looks unnatural and natural at the same time is a tough feat.

Stained heirloom baby beets, frisee, chervil, carrot, stilton, celery leaves, citrus dressing

Throughout culinary school, I was often annoyed by the lack of demonstration of actual plating. We were told how important it was, and how you eat with your eyes first, but other than a few mentions in different classes, there was no time at which it was a focus. I suppose they felt that if we could master the techniques in the cooking aspect, we could probably figure the presentation out on our own.

It wasn’t until I was out in the industry that I was really given to understanding the intricacies of a well-designed plate. Even then, I’m someone who likes strict description and instruction. Chefs, despite such sharply creative minds can be blunt with their tongues. Directions like “make it less symmetric” are more than a little vague. So I ultimately learned by watching and taking a *lot* of pictures. I would take photos of dishes that weren’t even my own responsibility, all in an effort to understand better the art of plating. And every time I see something truly incredible, I’m humbled and try to learn as much as I can from it.

Heirloom beet salad, rye crostini, goat cheese & herb mousse, hazelnut 'soil', frisee, tarragon, celery leaves, beet gel, sherry shallot dressing

What especially piqued my interest with the Gilt Taste story are the demonstrations by Michael Laiskonis, former Pastry Chef at Le Bernadin and now Creative Director at ICE (the Institute of Culinary Education). His work is especially beautiful, and though I’ve never tasted it with my mouth, I have by all means tasted much of his work with my eyes.

I won’t post any pictures of his stuff here, but instead I highly encourage you to visit the three (Well, four) plating demonstrations he did and see for yourself. Complexity and simplicity, organic and inorganic. It’s awe inspiring to me, and hopefully you get as much out of it as I do.

Part One: Greek yogurt panna cotta

Part Two: Pistachio financier

Part Three: Black sesame “gianduja” mousse / “The Egg” Milk chocolate custard

Veganism, reimagined.   Permalink

July 25th, 2012

Imagine I started a club, based on appreciation of women.

I said, women are beautiful, wonderful beings. You should never, ever treat a woman badly, or harm her in any way.

It’s a beautiful thought isn’t it?

Then I said, “you must be adamant in avoiding women whenever possible.

Okay, it’s starting to get a little weird, right?

Then I said, “…and you can never use a product that has been made by women. Women shouldn’t work in factories, or be executives or housewives or work at all. And they should never interact with men, except viewing in their natural habitat, far from males.”

Huh?

Then, “Even though we’ll have to create machines to create and gestate new babies, it’s still more natural.”

?!

Then as the kicker I told you, “This should be the way everybody on the planet should live. We only tell you this because it’s better for your cholesterol.”

W.T.F.

Period.