Recipe: Banoffee Pie   Permalink

July 19th, 2012

Chefs love to caramelize bananas. If a fine dining dessert contains them, there’s a good chance that the garnish will be a slice of banana, dipped in sugar and then browned under a blowtorch or broiler. Their flavours works so well together; the crunch of caramelized sugar and the soft sweet fruit make for an excellent textural yin-yang.

And of course, there’s the classic dessert; Bananas Foster. The fruit is cooked in a caramel sauce containing alcohol, served with vanilla ice cream and set aflame for a spectacular table side show.

How much more proof do you need to know that caramelized sugar and bananas are meant for one another?

Banoffee Pie (as I know it) is near perfection in its flavour and texture. From the bottom up, it’s a digestive cookie crust, thick dulce de leche, sliced bananas and whipped cream to top it all off. It’s soft, firm, sweet, sticky, crunchy and crumbly all at once. This British pie can tend to be quite sugary, but doesn’t need to be cloyingly so if done right.

I know there are purists out there who adhere to the original Banoffee Pie recipe, but I consider that a different pie with the same name. Rather than a digestive cookie base, it uses a sweet pie dough (AKA: Sweet Paste) and includes instant coffee in the whipped cream layer. It doesn’t bother me that it’s called “Banoffee”, even though it should be “Banoffeeoffee”. But like Apple Pie vs. Tarte Tatin, it’s a whole different thing.

It’s just different.

I said it’s different, didn’t I?

Alright, now that you understand that this is going to be about the more modern bananas-and-toffee-in-a-cookie-crust-pie, we can get on with it.

Banoffee Pie
Serves 12-16, or one medium-sized bear.

For the base:

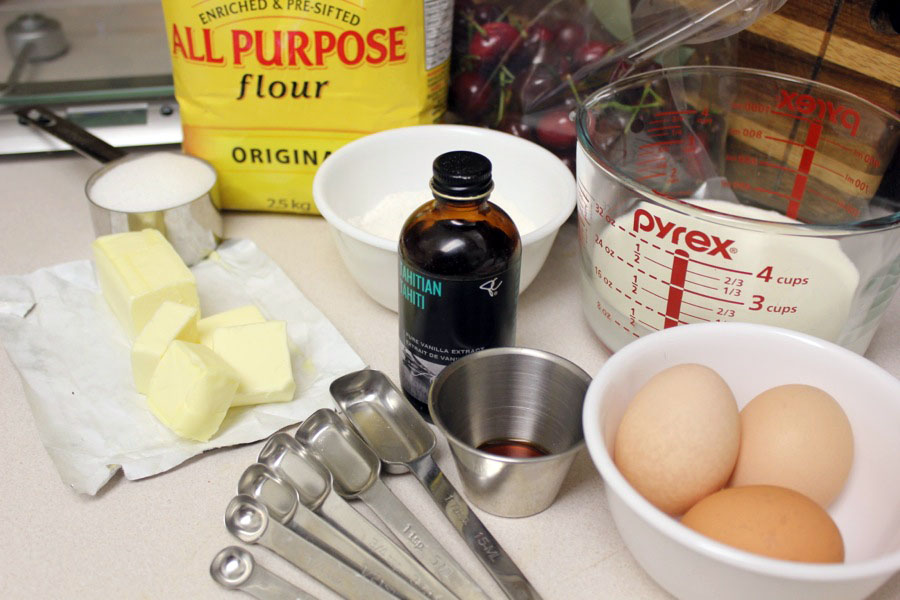
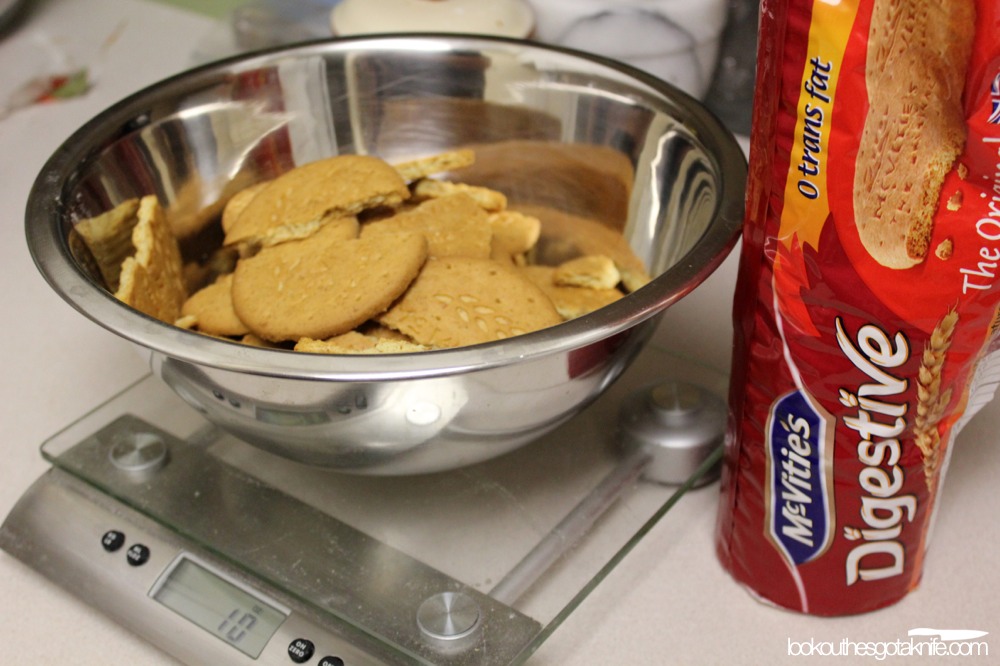
280g (10oz) english-style digestive cookies (no arrowroot digestives!), lightly broken up
114g (½ cup) unsalted butter
13g (1 tbsp) sugar (or isomalt; notes in the directions)

For the inner gooey goodness:

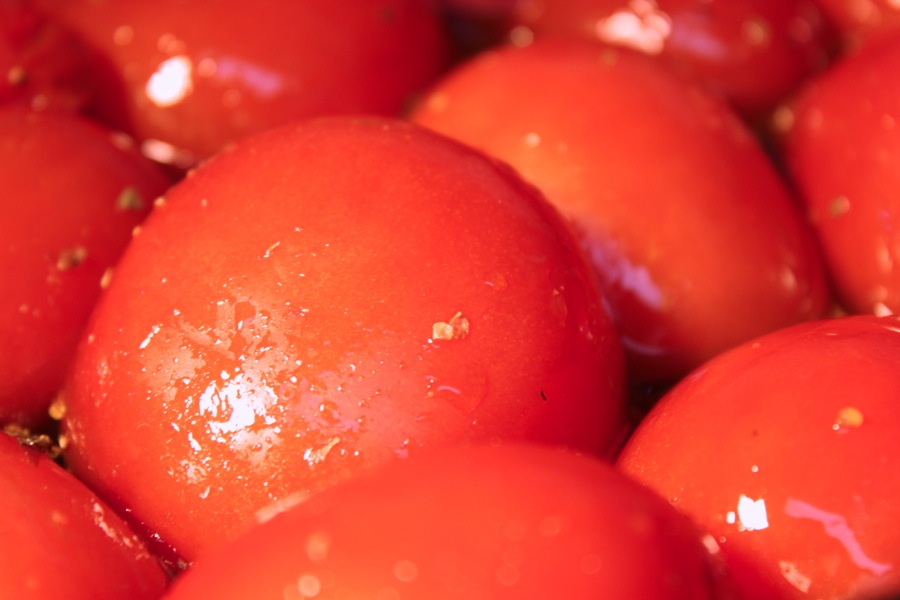
4 slightly underripe bananas (edible, but not to maximum sweetness)
30mL (2 tbsp) of lemon juice or 1 tsp of ascorbic acid powder (vitamin C powder)
600mL (20oz) sweetened condensed milk or 600mL (20oz) of pre-prepared dulce de leche.
a healthy pinch of salt

For the whipped cream topping:

500mL (2 cups) 35% or higher cream
13g (1 tbsp) sugar
1mL (¼ tsp) vanilla extract
1g (1 tsp) powdered gelatin
30mL (2 tbsp) water

Garnish (optional):

Dark chocolate for grating

Equipment:

A stand mixer, hand mixer or hand-blender with whisk attachment
A food processor or hand blender
A 10-inch removable bottom tart pan
A small sauce pan or two
A microplane or a fine grater (optional)
Piping bag and #7 star tip (optional)
Spoons, forks and the like

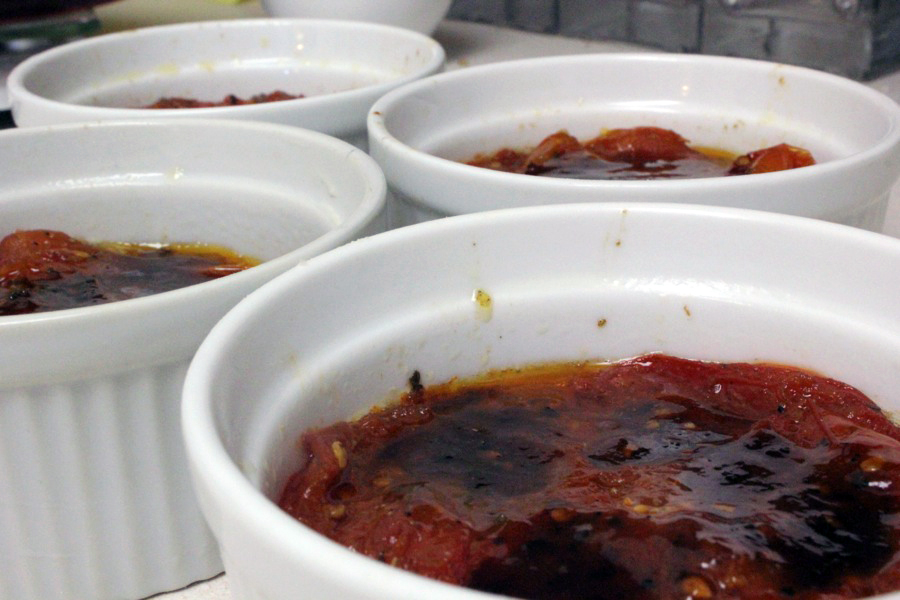
If making your own dulce de leche:

A deep baking dish
A smaller dish that will fit in the baking dish with lots of room to spare
Aluminum foil

Directions

Ignore directions 1-4 if you’re using pre-made dulce de leche.

1) Preheat an oven to 375°F.
2) Fill the baking dish with hot water and the sweetened condensed milk into a much smaller dish.
3) Cover the smaller dish with tin foil and place in the water-filled baking dish. Place the whole thing in the oven and cook for 1 ¾ hours, or until the milk takes on a dark mahogany colour.
4) While still hot, add salt and then whisk or blend the dulce de leche until silky smooth. A hand blender might work best.

You can stop ignoring now.

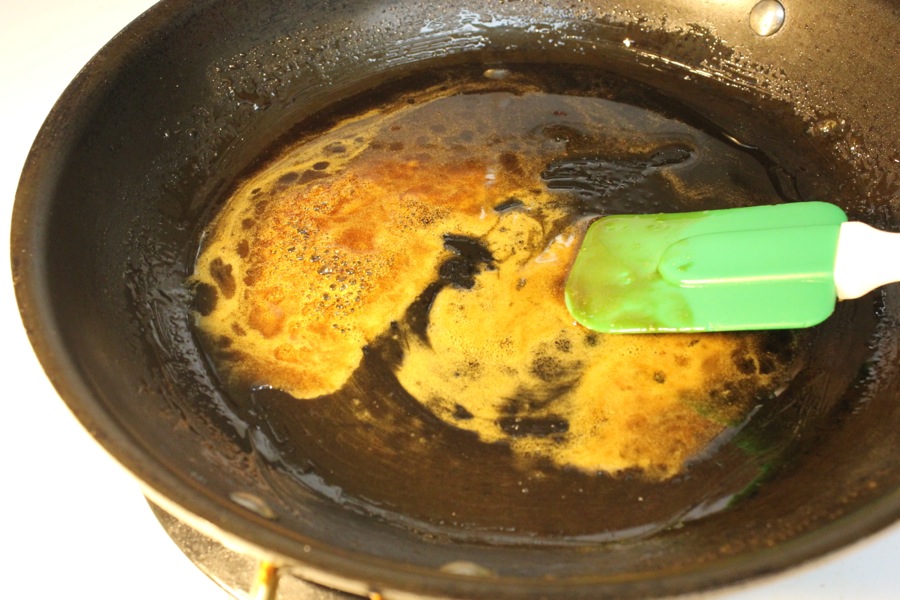
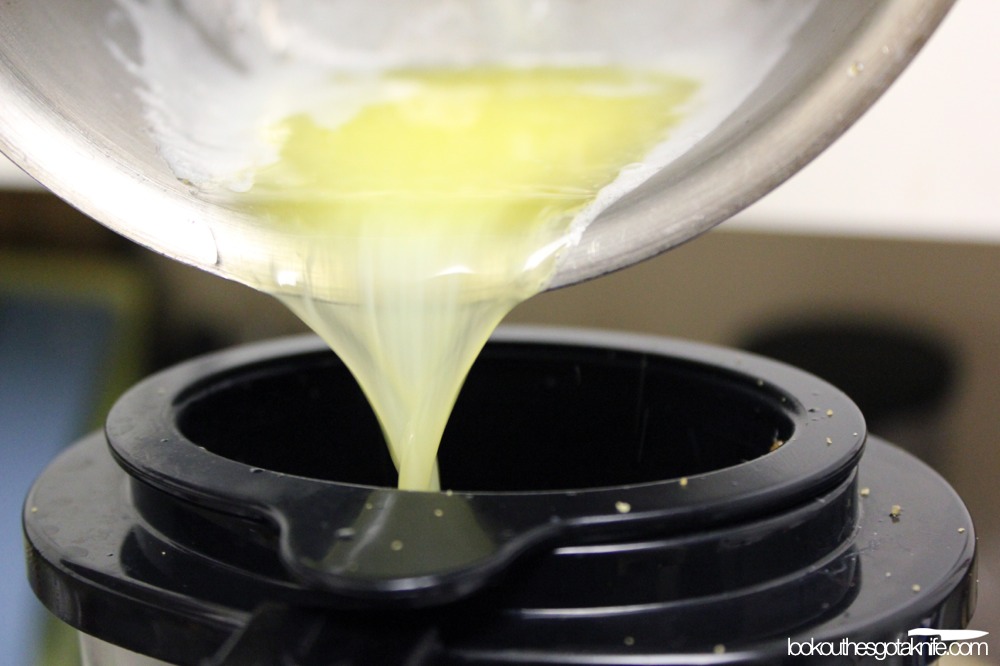
5) Reduce or preheat your oven to 325°F. Place the unsalted butter and sugar or isomalt in a small sauce pan over medium-low heat.

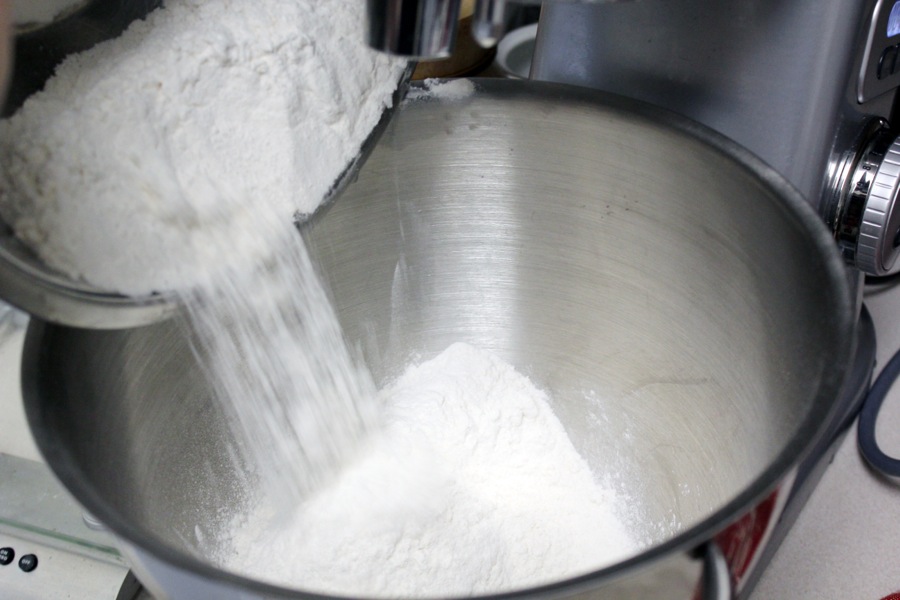
6) While butter is melting, use a hand blender, food processor, a rolling pin or your bare hands (you vicious monster!) to finely break up the digestive cookies.

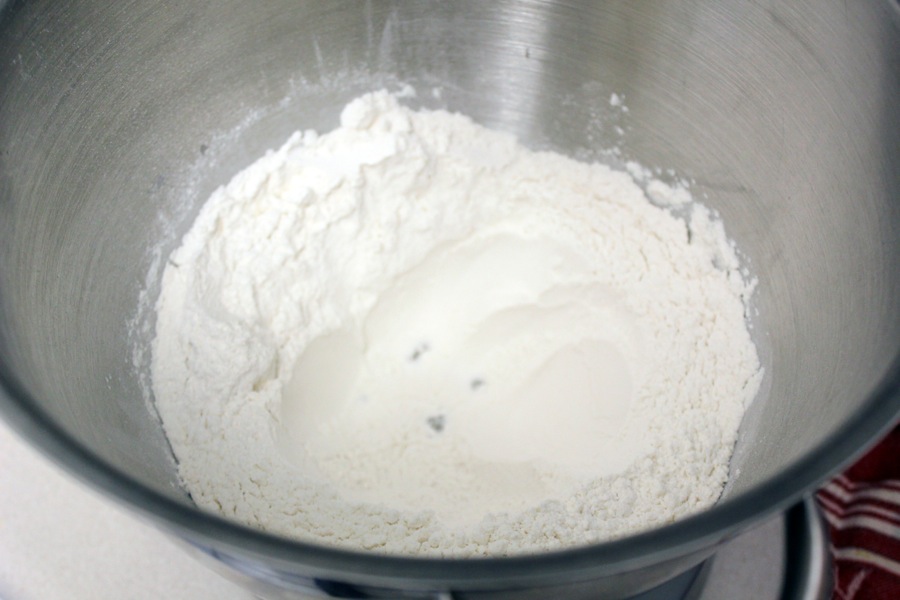
7) Whisk the sugar/butter mixture until the sugar crystals are no longer easily seen. Pour into the bowl (or food processor) containing cookie crumbs. Pulse or mix them until thoroughly incorporated, scraping down sides if needed.

Regarding Isomalt: Isomalt is a natural sugar alcohol that acts a lot like regular granulated sugar, but doesn’t caramelize as easily and is nowhere near as sweet. This makes it extremely good at mimicking sugar at things like being sticky or hardening if cooked to certain temperatures. For this purpose, isomalt would help glue the cookie crumbs together without affecting the sweetness much. Isomalt is not hard to find. Most bakery supply and bulk food stores should have it. Of course, it’s also available online.

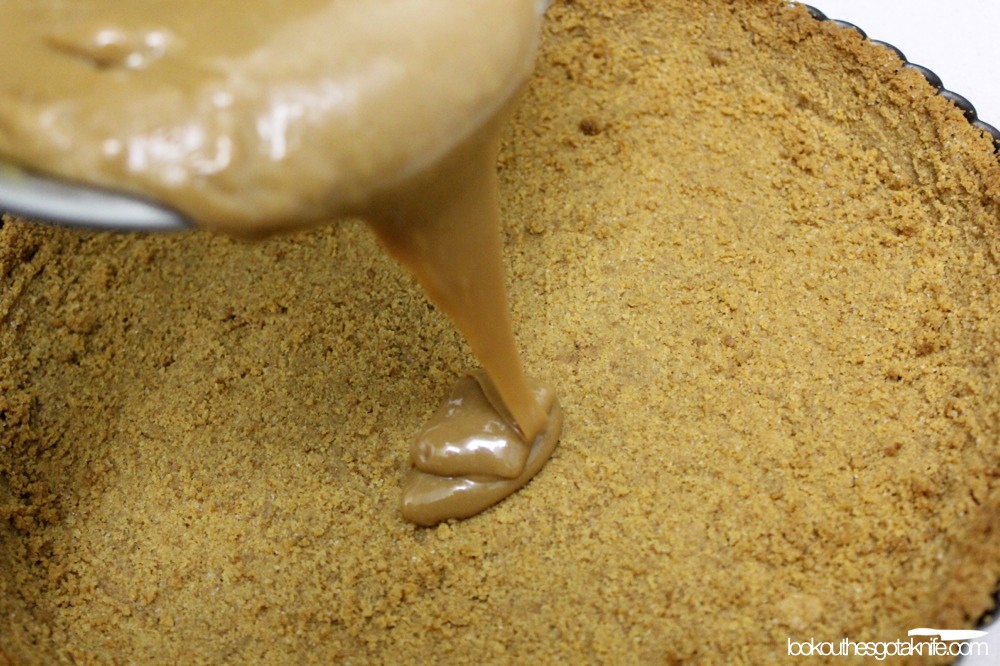
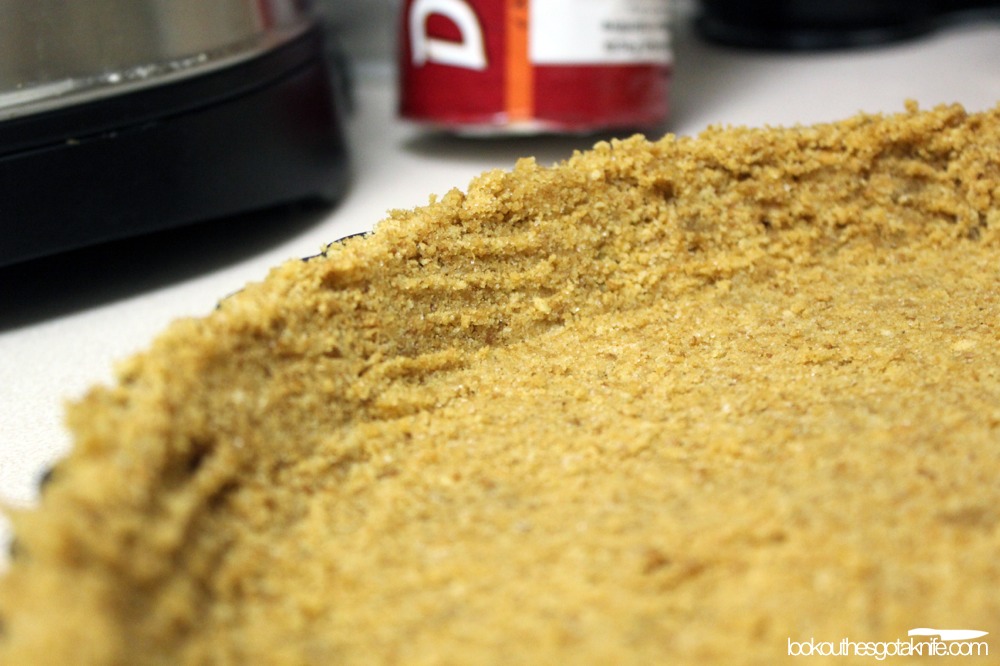
8) Spread the crumb mixture evenly into the 10″ tart pan, pressing it down with a fork until it’s compact. Don’t forget to press the mixture up the sides of the pan as well.

9) Bake the crust in the oven until just starting to brown. Be careful not to disturb it too much, as the crumb can easily fall apart. Allow to cool.

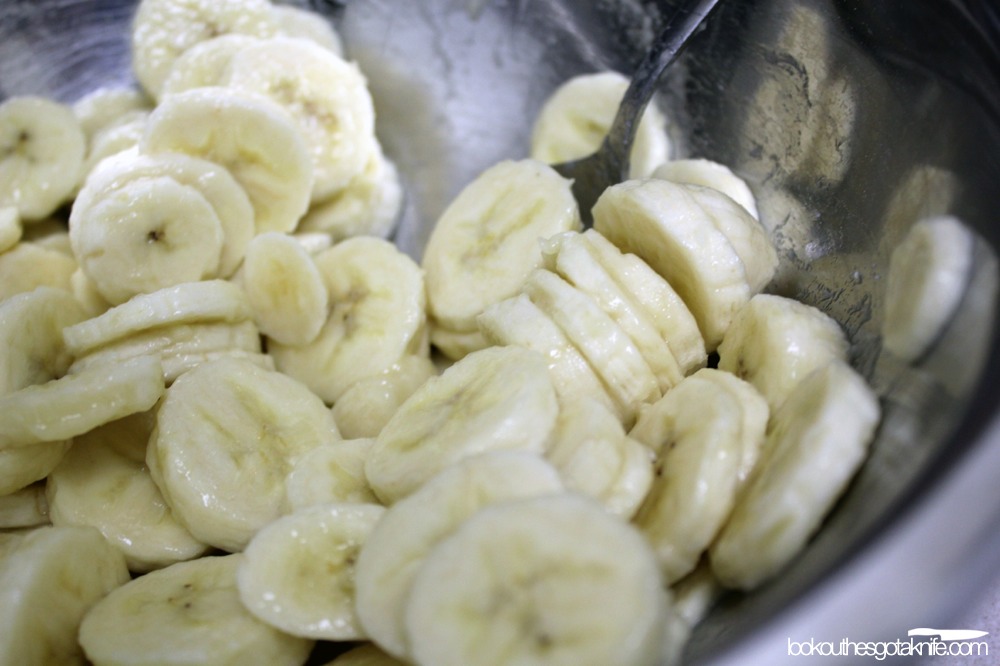
10) Slice your bananas into discs ¼” thick. Toss with lemon juice or ascorbic acid (vitamin c) powder. The acid in both will help keep the bananas from turning brown too quickly. Ascorbic acid is preferred, as it doesn’t add any additional liquid and is more potent. It’s available at most bulk and health food stores, is fairly inexpensive and is indispensable in the fight against oxidization of fruits and vegetables.

So why slightly underripe bananas?

Bananas contain high amounts of malic acid, as well as smaller amounts of citric, glutamic and other acids. When a banana has fully ripened and its skin a deep canary yellow, the high sugar content counteracts and overpowers all of these acids, making for a very sweet tasting fruit. Other fruit like Apples aren’t sweet enough to counter these acids, and lead to their characteristic tartness, even when cooked and in a pie.

The flavour characteristics of bananas are quite present for a long time before ripening, and the high malic acid to sugar ratio gives the mouth-drying feeling produced by severely under ripe banana. It’s just a matter of the plant converting the complex carbohydrate chains into sugar, making the fruit softer and sweeter and overpowering the malic acid. This results in the creamy texture of the ripe fruit.

In this recipe however, we have plenty of soft texture and sugar in the dulce de leche, and additional softness in the whipped cream. The addition of soft, creamy banana would be lost amongst the other soft textures, and lead to pie that feels like a stiff crust filled with pudding. The firmer, less-ripe banana adds an additional texture aspect, and the acids help the pie as a whole from seeming cloyingly sweet, bringing some balance to the pie. It’ll still be sweet though, don’t worry. Make sure your bananas have just barely turned yellow, with perhaps a little green still on the ends.

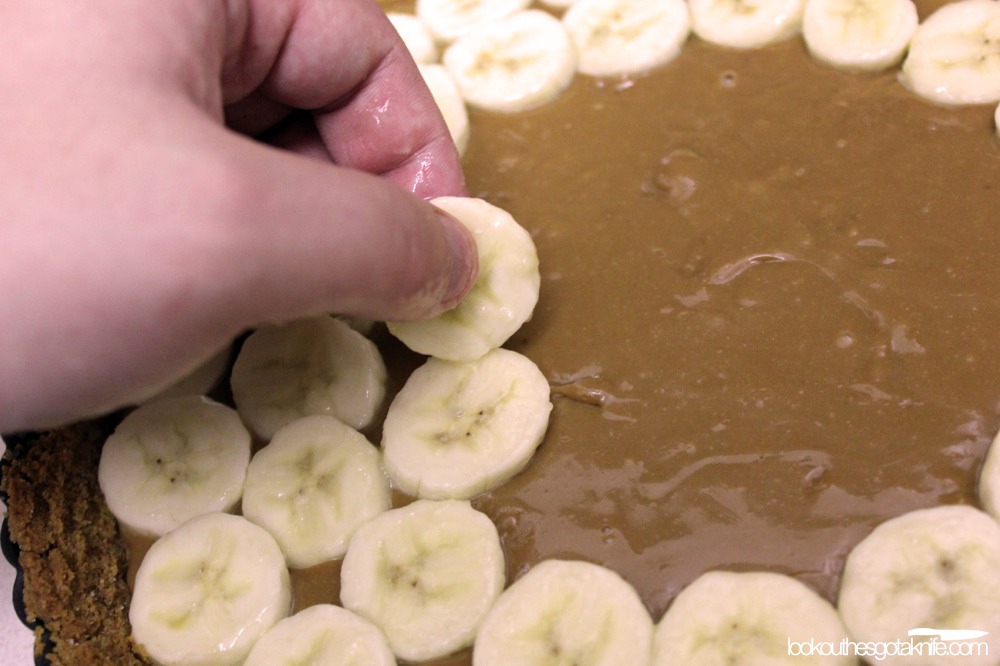
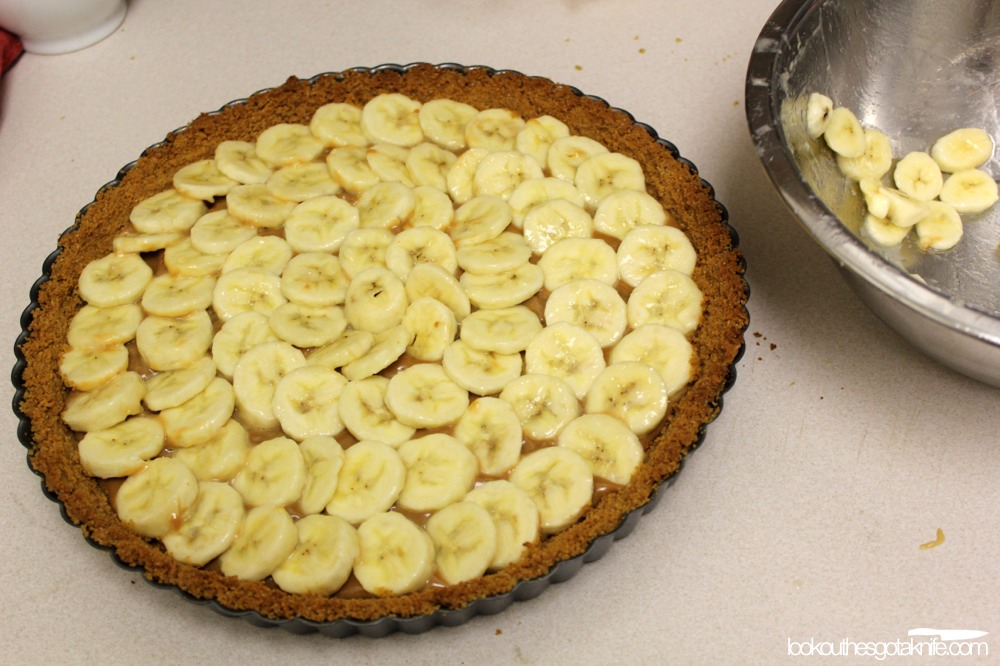
11) While the dulce de leche is still warm (if it isn’t, make it warm!) use half of it to spread a thin layer on the crust base. Layer the bananas on top in as flat a layer as possible, then pour the rest of the dulce de leche on top of that. This layering method isn’t so pretty, but keeps oxygen away from the bananas, keeping them from browning. If you know the pie is going to be finished within a day, you can simply pour all the dulce de leche into the base and layer the bananas in a decorative fashion (see photos) on top.

Allow the pie to come down to room temperature if it hasn’t already.

12) In a small sauce pan over medium heat, melt the powdered gelatin with the water, making sure the gelatin is fully dissolved. Set aside, but it should be kept lukewarm.

13) Add the sugar to your cold cream, using your mixer or hand blender with whisk attachment, whisk until it’s starting to turn fluffy. While still whipping, slowly drizzle the gelatin mixture into the cream. Then add to the vanilla. Continue whipping until stiff peaks appear.

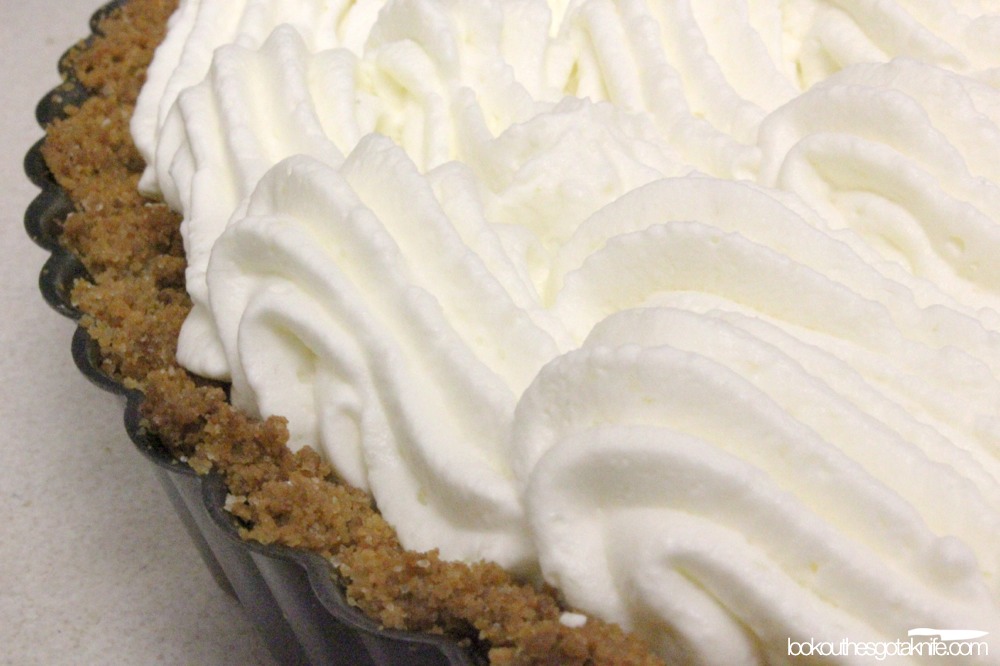
14) Decoratively pipe or spread the whipped cream over the filling. If garnishing, grate dark chocolate over the pie. Chill for at least an hour. Store in the refrigerator.

$12m to rethink crop fertilizers   Permalink

July 19th, 2012

A joint UK/US collaboration is offering $12 million dollars to scientists who can come up with an alternative to current nitrogen-heavy fertilizers.

We desperately need this. As world populations grow at a greater rate every year, and farming grows in an attempt to match it, agriculture becomes a greater threat to the environment. Fertilizers, pesticides and other products grow in concentration and ultimately make their way to the consumer.

Without an alternative, we stand to make our food poisonous to the planet, and eventually us.

Busting A Myth: Bring meat to room temperature before cooking.   Permalink

July 13th, 2012

The common wisdom has been to bring meat up to room temperature before cooking it. The argument is that this initial warmup creates more even cooking. And this is great, for any meats that are generally cooked to a baseline temperature of well done. That list includes poultry, and…?

Mostly just poultry.

Don’t think I forgot about pork. Nope, because Trichinosis rates have been reduced to almost nothing worldwide. You have twenty times higher odds of getting struck by lightning than contracting the parasite that we’re trying to eradicate by overcooking our pork. Note to self: investigate lightning-fried pork.

To be honest, the “room temperature rule” hinders the final quality of a great number of meats because so many are cooked best without even temperature throughout. With a great steak, you want a dark outer crust and (generally, the preferred) medium rare interior. Some meats, like venison, duck breast or bison, suffer from toughness and dryness if cooked even a small amount above medium rare.

We know that flavour is developed through the browning process; as sugars and proteins reach certain temperatures, their chemical makeup changes. Different sugars break down at temperatures ranging from 110°C to 180°C (230°F to 355°F) and change into other sugars, invert, turn brown and release volatile compounds (ie; aromas and flavours). This is caramelization.

Proteins react in a different way. Above 150°C (300°F) they break down into their base amino acids, combine with sugars and turn brown. This too creates hundreds of flavour compounds. This is the Maillard Reaction

While caramelization is less likely to occur in meats, the Maillard Reaction is a greatly desired result. Getting this to occur without over cooking the interior meat is the goal.

Room temperature meat starts off about 17°C (30°F) closer to being overcooked. This means by the time the outer surface of room temperature meat reaches temperatures capable of causing the Maillard Reaction, the interior may be approaching or at temperatures considered overcooked.

When not to bring your meat to room temperature:

  • Cooking whole animals (birds, poultry, lamb, suckling pig), especially larger ones. Bringing them up to room temperature means that by the time the internal temperature is there, the external temperature has been in the bacteria-promoting danger zone (4°C-60°C/40°F-140°F) for a while. Cooking straight from the fridge negates this. Additionally, you want to render as much fat out of the skin as possible so that it crisps up; starting from cold also helps. Tenting poultry breasts with foil or spatchcocking can help prevent overcooking of breast meat.
  • Cooking anything with different internal/external temperatures. This means beef steak cuts, duck breast, pork chops/loin/tenderloin, venison loin, wild boar chops and other steak-like or roasting cuts of game meat.

When it doesn’t matter to bring your meat to room temperature or not:

  • Braising. Even though you generally brown meat before braising it, overcooking the interior doesn’t matter much. By the time your braise is finished, the meat is technically overcooked anyway. The only reason it seems tender is because the collagen has been melted, lubricating and moisturizing the muscle strands.
  • Browning meat for stock. The reasons are similar to the ones listed for braising. Overcooking the meat can bring a great flavour to your stock, in fact, as long as it’s not burnt. Just remember that the flavour comes most from the surface of the meat you’re using. Use smaller pieces and cook them until they’re well browned.
  • Quick-fry steaks or strips. These meats are almost entirely surface area, meaning they cook incredibly fast. It also means there’s little internal meat to worry about. The difference between medium rare and well done can literally be seconds.

When you should bring your meat to room temperature:

  • Portioned poultry. In short, to avoid salmonella. Salmonella (unlike E.Coli and many other bacteria) exists within muscle tissue, rather than on the surface. If the interior is undercooked, the bacteria may still be there.
  • Portioned meats with a good amount of unexposed bone (like duck thighs, etc.). Bone can hold bacteria in trace amounts of blood. If the bone isn’t cooked through, any bacteria present could survive cooking.

A Great Steak

Restaurants are able to achieve quick, well-crusted, rare (or even blue) steaks by using incredibly high heats. Salamanders (commercial broilers) are regularly used, and they can achieve upwards of 815°C (1500°F), other methods include indoor gas charbroilers(400°C/750°F) and high BTU convection ovens capable of 260°C (500°F). I’ve even cooked steaks on a commercial flat-top capable of heats that can make its iron surface glow. These temperatures can be incredibly difficult to achieve at home with anything but outdoor grills, which are notorious for uneven cooking this high.

Few restaurants have the advance notice or space to bring meats to room temperature before cooking. Most just pull a steak straight from the fridge, season it and toss it on the heat.

A high enough heat more than guarantees lots of Maillard Reaction. But the truth is you only need to be able to get the surface of meat to a sustainable 150°C (300°F) to get it. Lower home oven and stovetop temperatures mean longer, more even cooking, so you still want some temperature insurance. This is most important for thinner-cut steaks. That’s where starting straight from the fridge comes in.

Home directions for A Great Steak

Requirements:

A well-marbled NY strip steak (the thicker the better)
A cast-iron or heavy bottom pan over high heat
A thermometer
A baking sheet
A small amount of oil
Salt

Directions:

1) Pull your steak from the fridge, pat the surface dry, season well with salt only (pepper will burn).

2) Add a small amount of oil to the pan.

3) Sear immediately in the hot pan from cold. Turn the meat every 10 seconds. Aim for lots of brown and little grey on the surface of the meat. Constant turning will keep the interior from overcooking.

4) Once sufficient browning has occurred, transfer immediately to the baking pan and place in a 190°C(375°F) oven. Cook until it the temperature reaches about 3°C-4°C (7°F-8°F) below desired internal doneness. Psst, medium rare is around 60°C (140°F).

5) Allow the steak to rest for 5- up to 10 minutes. The temperature will continue to rise, and it will peak right around your desired temperature.

6) Now you can add pepper.

Food that never visibly rots scares people.   Permalink

July 12th, 2012

Who knew?

Why So Much Work?   Permalink

July 9th, 2012

Why TV chefs feel the need to demonstrate the assembly and kneading of fresh pasta dough using only their hands is beyond me. It looks rustic and homey, and I have done it many times and understand how cathartic and therapeutic hand-kneading can be. The problem is that it’s so easy to make, but the idea of hand-kneading makes it less approachable for the average joe. It’s certainly not how it’s done in the majority of restaurants making their own. So why should a home cook have to?

Fresh pasta is quite easy to make, and a very simple recipe. It’s a ratio of 100g (3.5oz) of flour to one large egg. Two ingredients! Times that by three and you’ll get a 450g (4g shy of 1 lb) recipe. It’s just a matter of the time and effort; most of which can be achieved with a stand mixer and a dough hook.

Hand kneading offers zero gain; except for the fabulously large arms you can develop doing it on a regular basis. My opinion is, if it offers nothing to the final taste and texture over the faster method, then use the faster method. Carpenters don’t need to cut wood with hand saws any more because band-, jig- and circular saws exist. The same pasta dough with the same taste and texture can be made using the same technique using a home stand mixer. All with less mess and in about half the time.


Place your flour in a mixer.

Create a well in the center.

Place your eggs in the well.

Start your mixer off slow…

…and when the egg is fully mixed in, turn it to medium and knead for half the recommended time for hand-kneading.

If the dough won’t come together, add a teaspoon of water and continue mixing for 1 minute. If it still doesn’t come together, repeat until it does.

The dough should be stretchy with a smooth surface when it’s done.

Cover and rest in the fridge for at least an hour.

See? Same technique, but without getting your hands messy. Your arms will thank you.

Global salmon farming standards have been created.   Permalink

July 6th, 2012

This is a good thing. The more worldwide consistently standards for food production exist, the more it elevates the quality of food.

Recipe: Clafoutis   Permalink

July 5th, 2012

Because we in Eastern North America will be paying premium prices for cherries this year, it’s best we use them in applications that truly show them off, like a clafoutis.

Clafoutis is a classic country dessert from the Limousin region in central France. As with a lot of French country food, it’s simple, focuses on ingredients and is served family style. It’s not overly refined or finicky, or needing a lot of skill. The cherries themselves are distinct and whole, and become sweet/tart pop-in-your-mouth juice bombs. It can pretty much be described as a big casserole made with (traditionally) cherries and sweetened crepe batter. Yep, that’s pretty much it. And it’s even easier to make. Just about any fruit that can hold its shape well under heat can be used in place of cherries.

Clafoutis

750g (roughly 1.5lbs) sweet cherries like Bing, Chelan or Ranier.

For the batter:

325mL milk (2% or higher)
55g (¼ cup) unsalted butter
3 large eggs
70g (½ cup) all-purpose flour
125g (½ cup) granulated sugar
1 TSP vanilla extract
¼ teaspoon salt

For dusting:

30mL (2 TBSP sugar)

For greasing:

5mL (1 TSP) butter

Equipment:

A Blender or stick blender.
A medium bowl.
A small sauce pan or microwave safe dish.
A shallow casserole dish, capable of holding 2L (8 cups) of liquid, with room for expansion.
(optional) a cherry pitter.

Directions:

Preheat your oven to 190°C (375°F)

1) (optional) Pit the cherries. Traditionally, they aren’t pitted and it’s said the pits impart extra flavour. Like bitter almonds perhaps? Stone fruit pits contain amydgalin, which metabolizes in the body as hydrogen cyanide. Best to err on the non-toxic side.

Not to mention you’ll need to issue advance warning, or risk broken teeth of your guests. And we like our friends, don’t we?

2) In a bowl in a microwave or on the stovetop in a small pan, heat the 55g of unsalted butter until almost completely melted. Carry over heat will continue to melt the rest.

3) In a separate mixing bowl, combine the flour, sugar and salt.

4) Place the eggs in a blender and blitz until frothy. Add the flour mixture and pulse until combined, occasionally stopping to scrape down the side of the blender jug.

5) With the speed on medium-high, in a steady stream pour in the butter and then the milk. Allow the blender to keep going until no visible lumps are seen. Add the vanilla and pulse once or twice to incorporate.

NOTE: At this point, you can store the batter and cherries in the refrigerator until needed, for up to 48 hours.

6) Using the 1 TSP of butter, grease the inside of a shallow casserole dish, then add the cherries. Any cherries that don’t fit must be eaten or taken prisoner for later sado-masticistic reasons. Pour the batter over the top, but keep the liquid a good 1cm (½ inch) from the lip of the dish. Clafoutis batter will slightly soufflé and may spill over the edge.

7) Bake for 30 minutes, pull from the oven, sprinkle the additional sugar over the top and return to the oven (turned 180° for equal cooking) and cook for an additional 30 minutes, or until the top shows signs of light browning and caramelization.

Serve warm. Try not to devour it all in one sitting.

It’s Cherry Season… Maybe?   Permalink

July 5th, 2012

Cherries are one of my favourite fruit. This year hasn’t been good to the cherry crops in Eastern Canada and U.S. Northeast. A tepid winter combined with a few very cold weeks in spring meant that cherry trees blossomed early and later frosts froze the flowers on the branch. This ended up staunching the future growth of the fruit later on. As such, sweet cherry crop expectations have been reduced. Tart cherries—the ones most often made into pies—were bitten by frost only shortly after the buds opened, and have suffered even more dramatically.

Meagen Finnerty reporting for the Erie Times-News:

The frosts destroyed 70 to 100 percent of cherry crops for local farms, Andy Muza, fruit crop agent with the Erie County Cooperative Extension, said.

“The 70 percent might even be generous,” he said.

In other words, Cherries are gonna be mighty ‘spensive this year.

I love this.   Permalink

July 4th, 2012

As someone who was a daily part of making staff meal, it makes me smile.

Noma: Staff Meal on Nowness.com.

Low-carb, high protein diets linked to cardiovascular disease   Permalink

July 2nd, 2012

A fad diet that removes good, history-proven sources of carbohydrates is bad for your health. Surprise!

Spiral-cut hot dogs   Permalink

July 1st, 2012

Can’t say I don’t agree with the science; faster, more even cooking, more surface area for caramelization, etc. But it’s still a hotdog. Better to start with a good quality frankfurter, rather than cheap quality weiners.

Two Minute Recipe: Tomato Sauce Like Nonna Used to Make.   Permalink

June 29th, 2012

Another example why food monocultures suck   Permalink

June 29th, 2012

Gina Kolata for the New York Times on Tomatoes:

Yes, they are often picked green and shipped long distances. Often they are refrigerated, which destroys their flavor and texture. But now researchers have discovered a genetic reason that diminishes a tomato’s flavor even if the fruit is picked ripe and coddled.

Recipe: Tomato Tarte Tatin   Permalink

June 25th, 2012

Tarte Tatin, like many classic French desserts is simple, yet tastes complex; and it’s made during the height of fall, when apples are at their peak. A large cast iron pan is placed over medium heat. Sugar and butter are cooked to a caramel and then apple slices are tightly packed into the skillet. A pastry is placed on top and the whole shebang is baked until golden brown and flaky. When cooked, the entire pan is inverted over a plate or platter, revealing a slightly crisp bottom crust and translucent apples coated in the most delicious dark caramel. More modern interpretations use puff pastry, but other than the method for making the pastry, it hasn’t changed.

And it’s easier than apple pie. No, really.

There’s no thickening agent, no additional spices. No crimping or latticing of crusts, nothing. It is, at it’s simplest, five whole ingredients (including the pastry): Apples, Sugar, Butter, Flour and Water. Maybe a pinch of salt somewhere in the pastry, if you’re feeling un-French.

Why should it be that this glorious cooking method be left to only Apples? Or greater yet, only sweet items? It’s not, and shouldn’t be.

I had the idea to make a Tomato Tarte Tatin earlier this year and went hunting. I was able to find a recipe, but felt it needed some tweaking. I think my changes elevate the recipe and enhance the flavours, bringing out an intense tomato flavour.

Tomato Tarte Tatin

1kg (2.2lbs) fresh, ripe roma (plum) or san-marzano Tomatoes
Puff pastry (regular unsweetened pie pastry does fine in a pinch)
46.7g (3 tbsp) granulated sugar
15mL (1 tbsp) aged balsamic vinegar
45mL (3 tbsp) white wine vinegar
30mL (2 tbsp) light olive oil
2 cloves fresh garlic, finely chopped or grated (no jar stuff!)
0.3g (1/4 tsp) dried oregano
0.6g (1/2 tsp) dried basil
3.7g (3/4 tsp) salt
1.7g (1/4 tsp) fresh ground black pepper
fresh basil for garnish (optional)
butter for greasing

Non-Food items needed:
4 6-8oz ramekins
1 knife
1 cutting board
1 large bowl
1 rolling pin
plastic wrap (optional, see note below)
1 baking sheet, big enough to hold four ramekins.
1 large, oven-proof skillet
1 pair kitchen tongs
1 spoon (wooden or otherwise)

1. If you’re making your own puff pastry, you should have done that hours ago before you started into this recipe. Alright, go do that now. I’ll wait. Otherwise, go to the store and get some. For what it’s worth, making your own isn’t hard, just time consuming. Oh, and preheat an oven to 135°C(275°F).

2. Wash, dry and cut tomatoes in half lengthwise. Using a paring knife, cut out the white core of the tomatoes. Taking out the cores isn’t absolutely necessary, but it produces a better product.

3. Using a small spoon, remove seeds from tomato halves. Any other blunt-tipped instrument—like a lobster pick or a small finger (preferably your own)—should do just fine.

4. In a bowl, toss the tomatoes with salt, pepper, oil, garlic and herbs and then set them aside.

5. Into a large oven-proof skillet over medium heat, add sugar and shake the pan several times to spread it out. Without any stirring or additional shaking, let the sugar melt and eventually it will begin to turn golden.

6. When the sugar is the colour of dark honey, remove pan from heat and add vinegars. It will likely steam and sputter, but this won’t last long. Place back on heat and with constant stirring, the sugar will eventually dissolve.

7. When the sugar is dissolved, remove the pan again from the heat. Pack in the tomatoes cut side down. If they won’t fit, make them fit, dammit. Put them in the oven until the tomato skins begin to wrinkle (about an hour).

8. While the tomatoes are baking, roll out the pastry dough to roughly 1/4″ thick. Using a round cookie cutter with a press and twist motion, cut out discs of pastry and set them aside in a cool place.

9. Butter the ramekins and pack them with cooked tomatoes, placing them skin side down and tight together. Try to get as little liquid in the ramekins as possible. If the tarts are to be cooked immediately, raise the oven temperature to 220°C(425°F).

10. Once all tomatoes have been packed into ramekins, place the pan over medium high heat and reduce the liquid to a thick syrup consistency, almost like molasses. Spoon the syrup over the tomatoes, diving equally between the ramekins.

Note: at this point, you can wrap up the pastry discs (with layers of cling film, wax or parchment paper between them) and the ramekins, put them in the fridge and hold off baking them for up to 48 hours.

11. Gently place the pastry discs on top of tomatoes. Avoid pressing down on them. Put the ramekins into the 220°C(425°F) oven for 20 minutes or until the top of the puff pastry has a nice light mahogany colour. Allow to cool for several minutes before proceeding.

12. Run a knife along the inside edge of the ramekins, loosening any pastry or tomatoes that may be stuck to the sides. While holding the pastry down with one finger, tip the ramekins lightly and check for liquid. If it seems excessive (i.e., will leave a huge freaking puddle on the plate) tip off any excess. Using all your speed and dexterity, flip the ramekins over onto individual plates. Allow them to sit upside down for a few seconds before unmolding.

Serve warm with parmesan cream spooned over top and some nice dressed summer greens or vegetables. Now would be a good time to garnish with some fresh basil, whole or chopped.

Some might balk at the use of dried herbs, but in a situation where long cooking times are concerned, many of the bright flavours that fresh herbs offer are volatile and lost upon application of sustained heat anyhow.

Parmesan Cream

250mL 35% cream
45g (about 1/2 cup) finely grated parmiggiano reggiano or grana padano
salt to taste

1. Pour the cream into a small sauce pan and place over medium heat. Reduce it to 1/2 the original volume. Remove from heat.

2. While still hot, sprinkle in grated cheese. Stir until it’s fully incorporated.

3. Season to taste with salt and keep warm until it’s time to use it.

If you’ve followed directions, you should have something that looks like this:

Why volatile flavour aromatics are so funny.   Permalink

June 23rd, 2012

On first sip this morning, a cup of Starbucks Pike Place coffee tasted for an instant like a well-smoked traditional frankfurter.