Posts Tagged ‘recipe’

Recipe: Corn Chowder   Permalink

Saturday, August 18th, 2012

It’s mid-August, and that means that we’re hitting the peak of corn season in this part of North America.

Go shuck yourself.

But why would I want to talk about corn? Corn’s bad. Well, at least it’s been portrayed that way in the last decade or so. And there’s good reason for thinking unkindly of this absurdly mutated grain. There’s corn’s over use as cheap filler, high fructose corn syrup, etc. Most of corn’s problems can be attributed to the massive subsidy given to corn farmers in North America. If corn weren’t subsidized, it wouldn’t be cheap (the full cost of growing it would be reflected in the price), and thus there’d be less incentive to try and turn it into anything and everything. Sadly, when a food is cheap, this is a pretty common occurrence in the food industry.[1. Dragon fruit (AKA Pitaya) is expensive to produce and ship, and are often $7-$8 per one piece of fruit. Thus, dragon fruit appears as pretty much only dragon fruit.

Apples and pears are cheap to produce, thus apple and pears are used as a filler in everything from Fruit Roll-Ups to jams. Their mild taste lends particularly well to being covered up with artificial strawberry flavour and other fake stuff.]

Despite corn’s abuses in fakery, we can’t forget that it started out as a pretty humble food. Like rice was to Asian cultures, and bread was to Europeans, corn was an important staple for American indigenous cultures. It was so important that when the Spanish showed up, they left the Americas with holds full of corn. The unfortunate part is they forgot to take the process of nixtamalization with them, and killed themselves with pellagra.

Silly conquistadores, nixtamalization is for Aztecs!

Worry not, today’s sweet corn varieties don’t need to be specially treated before eating; though cooking is highly recommended as it can be rather bulky in the digestive system. Cooking will break down some of the starches and make it a little easier to digest. ‘Cause we all know that, uh, forensically speaking, it’s already pretty easy to tell that outer bran doesn’t get digested all that well in the gastrointestinal pathway.

Don’t give it more reasons by eating it raw.

Corn doesn’t have to be relegated to canned side dishes, tex-mex and something you serve on the cob at barbecues. The fact that it works well equally in sweet or savoury dishes means it can be quite a versatile ingredient that can be used in a wide range of applications. Even as the main star.

I love corn chowder, and I’m of the belief that this dish started out because someone misheard the word “clam” for “corn”. They’re pretty much the same dish. Bacon? Check. Cream or milk? Check. Potatoes? Check. Onion? Check. Clams/Corn/Clorn? Check.

Despite being so associated with New England, chowder is undeniably French in origin, ingredients and flavour. The soup itself has existed in Europe for a long time, and the word is generally thought to come from “chaudière”, which is the French word for a large cooking pot. The first time the word was used for a soup is apparently by Breton fishermen in Newfoundland.

That’s right. Fuck you New England. Booya!

Sorry. Canadians aren’t allowed to be patriotic. I’ll go hide in the corner for the remainder of this recipe.

Corn Chowder

INGREDIENTS:

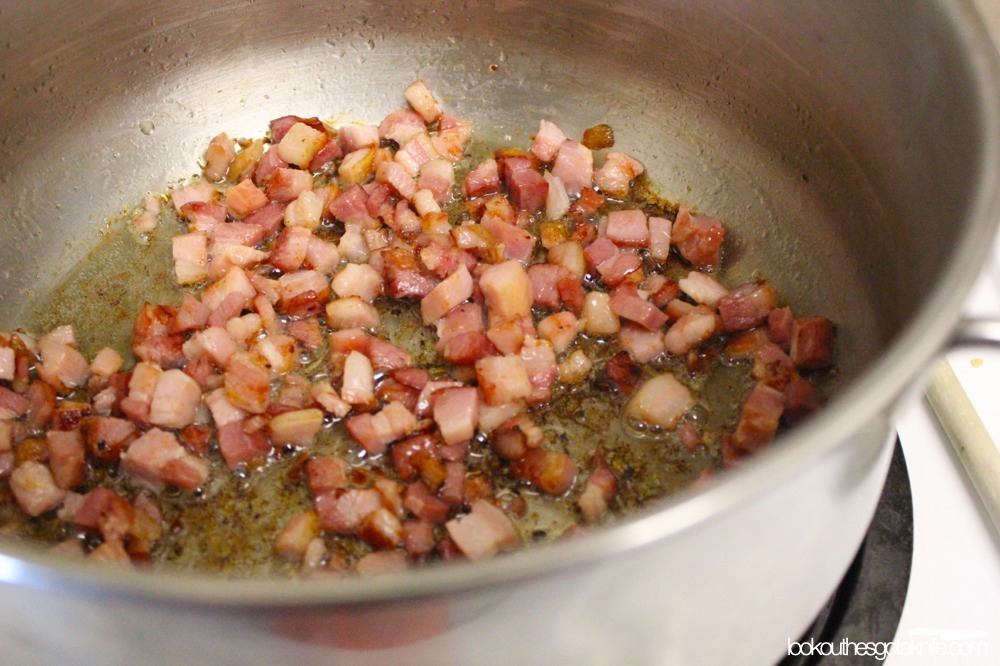
100g (3.5 oz) pancetta, salt pork or unsmoked bacon, cut into small cubes.
150g (5.3 oz) onion, finely chopped
325g (11.5 oz) corn kernels (use whole cobs; 3 should do it)
1 clove garlic
10mL (2 tbsp) parsley, roughly chopped (should yield about 5mL/1 tbsp)
3 parsley stems
1 bay leaf
6 peppercorns
500mL (2 cups) chicken or vegetable stock
335g (11.8 oz) waxy potatoes, peeled and diced to 1 cm (a small ½ in)
250mL (1 cup) 35% cream
5mL (1 tbsp) flour
salt to taste
green onion, thinly sliced, for garnish

EQUIPMENT:

1 heavy bottom dutch oven
1 large sauce pan with lid
1 spoon (wooden is best)
1 roasting pan or sheet pan, preferably lined with parchment
1 sharp knife
1 large cutting board
8cm (3 inch) square of cheesecloth
kitchen string

DIRECTIONS:

1. Preheat an oven to 400°F. Put the parsley stems, bay leaf and peppercorns into the center of square of cheese cloth. Bring up the corners and tie with a piece of the string to make a sachet. Set aside.

2. Shuck the corn and cut the stem ends flat. On a large cutting board, stand the cobs up on end and slice off the kernels. Set them aside for now and keep the cobs.

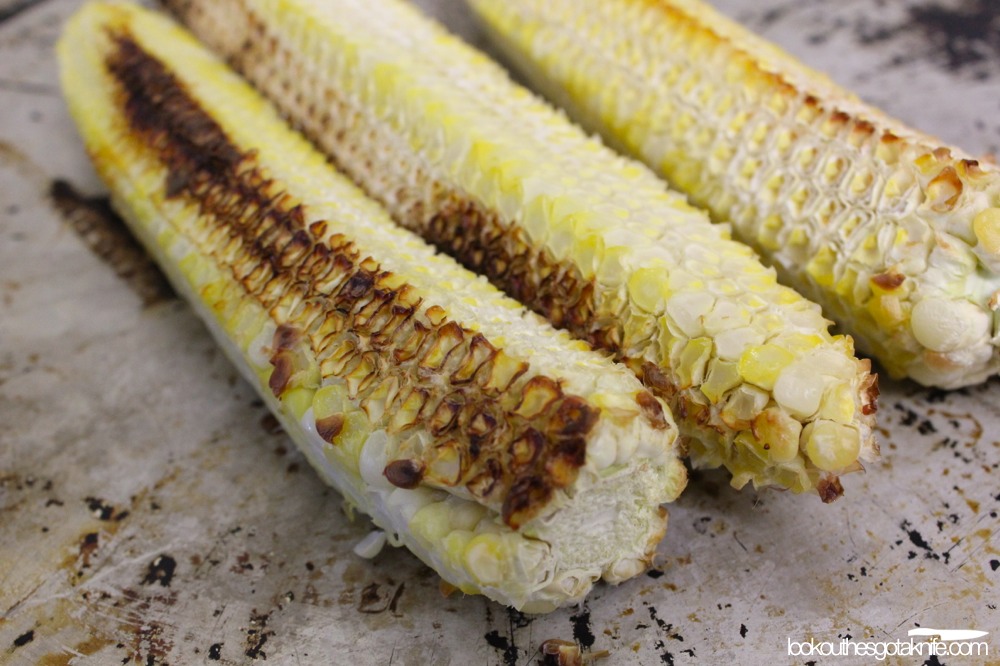
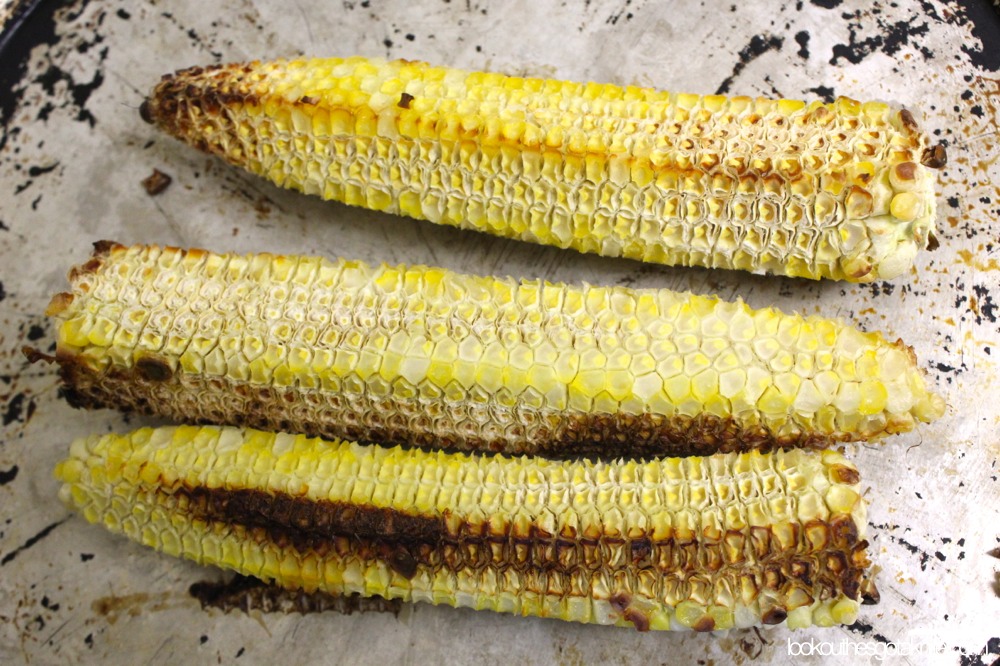
3. Place the now kernel-less cobs on the pan and roast them in the oven until they’re turning nicely brown (about 20mins or so, but keep an eye on them them as the high sugar content means they can burn quickly).

4. When the cobs are nicely roasted, combine them with the stock and sachet in a sauce pot and place over medium-high heat. If the cobs are too big to fit, cut them in half. Put a lid on the sauce pot; we don’t want to lose any of that liquid or flavour. If it boils, turn it down to a simmer. Doing this to the cobs will help give the soup a subtle toasted corn flavour.

5. In a dutch oven over medium-low heat, render the pancetta until it’s dark mahogany and crispy. Pull the pan from heat, drain but reserve 5mL (1 tsp) of the rendered fat. Set the pancetta aside. DO NOT clean the pan of any of the lovely darkness left on the bottom of the pan. Unless of course it’s burnt to a black colour. Only then should you clean your pan.

6. Add the onions to pan with reserved fat and return them to the burner. Set the heat on medium low and sweat the onions down until they’re soft.

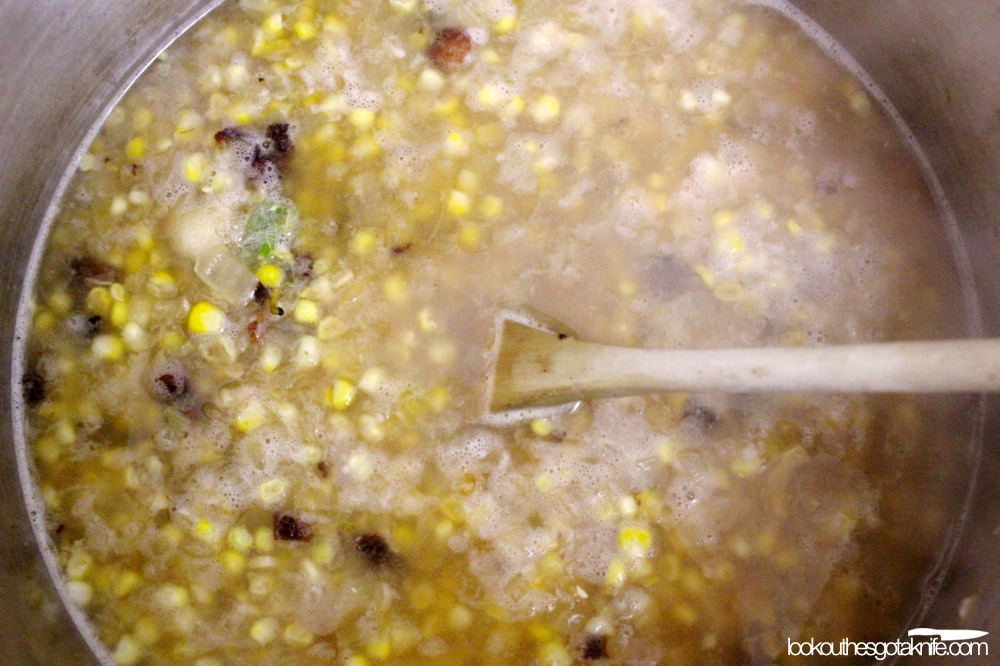
7. Stuff the corn into the stock pot and cook for about 5 minutes stirring occasionally. Add the garlic and stir constantly for about 1 minute, then sprinkle in the flour and continue stirring for about another minute.

8. Remove the cobs and sachet from stock, and pour it into the dutch oven along with the potatoes. Check the salt level and season accordingly. Bring it up to a simmer, stirring occasionally. After about 10-15 minutes, add the cream and let it continue to simmer.

9. Take the dutch oven from the heat when the potatoes have softened and have reached a stage of being edible. Add the fresh parsley leaves. Check the seasoning and re-season if necessary.

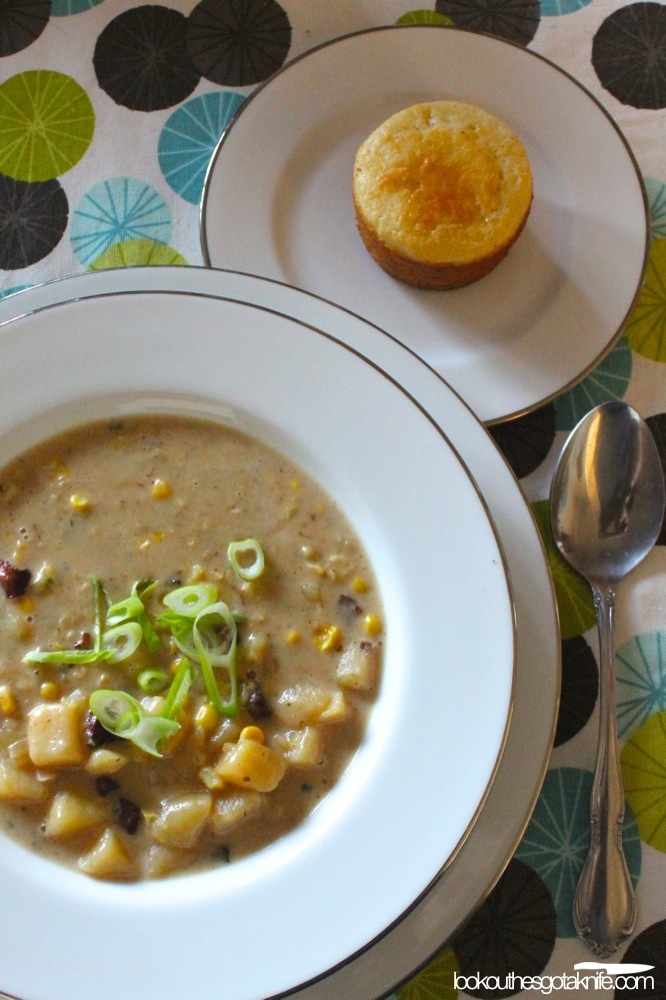
Serve hot, garnished with green onion. With bread on the side. Corn bread is nice.

Makes a scant 1L (1 qt).

Recipe: Banoffee Pie   Permalink

Thursday, July 19th, 2012

Chefs love to caramelize bananas. If a fine dining dessert contains them, there’s a good chance that the garnish will be a slice of banana, dipped in sugar and then browned under a blowtorch or broiler. Their flavours works so well together; the crunch of caramelized sugar and the soft sweet fruit make for an excellent textural yin-yang.

And of course, there’s the classic dessert; Bananas Foster. The fruit is cooked in a caramel sauce containing alcohol, served with vanilla ice cream and set aflame for a spectacular table side show.

How much more proof do you need to know that caramelized sugar and bananas are meant for one another?

Banoffee Pie (as I know it) is near perfection in its flavour and texture. From the bottom up, it’s a digestive cookie crust, thick dulce de leche, sliced bananas and whipped cream to top it all off. It’s soft, firm, sweet, sticky, crunchy and crumbly all at once. This British pie can tend to be quite sugary, but doesn’t need to be cloyingly so if done right.

I know there are purists out there who adhere to the original Banoffee Pie recipe, but I consider that a different pie with the same name. Rather than a digestive cookie base, it uses a sweet pie dough (AKA: Sweet Paste) and includes instant coffee in the whipped cream layer. It doesn’t bother me that it’s called “Banoffee”, even though it should be “Banoffeeoffee”. But like Apple Pie vs. Tarte Tatin, it’s a whole different thing.

It’s just different.

I said it’s different, didn’t I?

Alright, now that you understand that this is going to be about the more modern bananas-and-toffee-in-a-cookie-crust-pie, we can get on with it.

Banoffee Pie
Serves 12-16, or one medium-sized bear.

For the base:

280g (10oz) english-style digestive cookies (no arrowroot digestives!), lightly broken up
114g (½ cup) unsalted butter
13g (1 tbsp) sugar (or isomalt; notes in the directions)

For the inner gooey goodness:

4 slightly underripe bananas (edible, but not to maximum sweetness)
30mL (2 tbsp) of lemon juice or 1 tsp of ascorbic acid powder (vitamin C powder)
600mL (20oz) sweetened condensed milk or 600mL (20oz) of pre-prepared dulce de leche.
a healthy pinch of salt

For the whipped cream topping:

500mL (2 cups) 35% or higher cream
13g (1 tbsp) sugar
1mL (¼ tsp) vanilla extract
1g (1 tsp) powdered gelatin
30mL (2 tbsp) water

Garnish (optional):

Dark chocolate for grating

Equipment:

A stand mixer, hand mixer or hand-blender with whisk attachment
A food processor or hand blender
A 10-inch removable bottom tart pan
A small sauce pan or two
A microplane or a fine grater (optional)
Piping bag and #7 star tip (optional)
Spoons, forks and the like

If making your own dulce de leche:

A deep baking dish
A smaller dish that will fit in the baking dish with lots of room to spare
Aluminum foil

Directions

Ignore directions 1-4 if you’re using pre-made dulce de leche.

1) Preheat an oven to 375°F.
2) Fill the baking dish with hot water and the sweetened condensed milk into a much smaller dish.
3) Cover the smaller dish with tin foil and place in the water-filled baking dish. Place the whole thing in the oven and cook for 1 ¾ hours, or until the milk takes on a dark mahogany colour.
4) While still hot, add salt and then whisk or blend the dulce de leche until silky smooth. A hand blender might work best.

You can stop ignoring now.

5) Reduce or preheat your oven to 325°F. Place the unsalted butter and sugar or isomalt in a small sauce pan over medium-low heat.

6) While butter is melting, use a hand blender, food processor, a rolling pin or your bare hands (you vicious monster!) to finely break up the digestive cookies.

7) Whisk the sugar/butter mixture until the sugar crystals are no longer easily seen. Pour into the bowl (or food processor) containing cookie crumbs. Pulse or mix them until thoroughly incorporated, scraping down sides if needed.

Regarding Isomalt: Isomalt is a natural sugar alcohol that acts a lot like regular granulated sugar, but doesn’t caramelize as easily and is nowhere near as sweet. This makes it extremely good at mimicking sugar at things like being sticky or hardening if cooked to certain temperatures. For this purpose, isomalt would help glue the cookie crumbs together without affecting the sweetness much. Isomalt is not hard to find. Most bakery supply and bulk food stores should have it. Of course, it’s also available online.

8) Spread the crumb mixture evenly into the 10″ tart pan, pressing it down with a fork until it’s compact. Don’t forget to press the mixture up the sides of the pan as well.

9) Bake the crust in the oven until just starting to brown. Be careful not to disturb it too much, as the crumb can easily fall apart. Allow to cool.

10) Slice your bananas into discs ¼” thick. Toss with lemon juice or ascorbic acid (vitamin c) powder. The acid in both will help keep the bananas from turning brown too quickly. Ascorbic acid is preferred, as it doesn’t add any additional liquid and is more potent. It’s available at most bulk and health food stores, is fairly inexpensive and is indispensable in the fight against oxidization of fruits and vegetables.

So why slightly underripe bananas?

Bananas contain high amounts of malic acid, as well as smaller amounts of citric, glutamic and other acids. When a banana has fully ripened and its skin a deep canary yellow, the high sugar content counteracts and overpowers all of these acids, making for a very sweet tasting fruit. Other fruit like Apples aren’t sweet enough to counter these acids, and lead to their characteristic tartness, even when cooked and in a pie.

The flavour characteristics of bananas are quite present for a long time before ripening, and the high malic acid to sugar ratio gives the mouth-drying feeling produced by severely under ripe banana. It’s just a matter of the plant converting the complex carbohydrate chains into sugar, making the fruit softer and sweeter and overpowering the malic acid. This results in the creamy texture of the ripe fruit.

In this recipe however, we have plenty of soft texture and sugar in the dulce de leche, and additional softness in the whipped cream. The addition of soft, creamy banana would be lost amongst the other soft textures, and lead to pie that feels like a stiff crust filled with pudding. The firmer, less-ripe banana adds an additional texture aspect, and the acids help the pie as a whole from seeming cloyingly sweet, bringing some balance to the pie. It’ll still be sweet though, don’t worry. Make sure your bananas have just barely turned yellow, with perhaps a little green still on the ends.

11) While the dulce de leche is still warm (if it isn’t, make it warm!) use half of it to spread a thin layer on the crust base. Layer the bananas on top in as flat a layer as possible, then pour the rest of the dulce de leche on top of that. This layering method isn’t so pretty, but keeps oxygen away from the bananas, keeping them from browning. If you know the pie is going to be finished within a day, you can simply pour all the dulce de leche into the base and layer the bananas in a decorative fashion (see photos) on top.

Allow the pie to come down to room temperature if it hasn’t already.

12) In a small sauce pan over medium heat, melt the powdered gelatin with the water, making sure the gelatin is fully dissolved. Set aside, but it should be kept lukewarm.

13) Add the sugar to your cold cream, using your mixer or hand blender with whisk attachment, whisk until it’s starting to turn fluffy. While still whipping, slowly drizzle the gelatin mixture into the cream. Then add to the vanilla. Continue whipping until stiff peaks appear.

14) Decoratively pipe or spread the whipped cream over the filling. If garnishing, grate dark chocolate over the pie. Chill for at least an hour. Store in the refrigerator.

Why So Much Work?   Permalink

Monday, July 9th, 2012

Why TV chefs feel the need to demonstrate the assembly and kneading of fresh pasta dough using only their hands is beyond me. It looks rustic and homey, and I have done it many times and understand how cathartic and therapeutic hand-kneading can be. The problem is that it’s so easy to make, but the idea of hand-kneading makes it less approachable for the average joe. It’s certainly not how it’s done in the majority of restaurants making their own. So why should a home cook have to?

Fresh pasta is quite easy to make, and a very simple recipe. It’s a ratio of 100g (3.5oz) of flour to one large egg. Two ingredients! Times that by three and you’ll get a 450g (4g shy of 1 lb) recipe. It’s just a matter of the time and effort; most of which can be achieved with a stand mixer and a dough hook.

Hand kneading offers zero gain; except for the fabulously large arms you can develop doing it on a regular basis. My opinion is, if it offers nothing to the final taste and texture over the faster method, then use the faster method. Carpenters don’t need to cut wood with hand saws any more because band-, jig- and circular saws exist. The same pasta dough with the same taste and texture can be made using the same technique using a home stand mixer. All with less mess and in about half the time.


Place your flour in a mixer.

Create a well in the center.

Place your eggs in the well.

Start your mixer off slow…

…and when the egg is fully mixed in, turn it to medium and knead for half the recommended time for hand-kneading.

If the dough won’t come together, add a teaspoon of water and continue mixing for 1 minute. If it still doesn’t come together, repeat until it does.

The dough should be stretchy with a smooth surface when it’s done.

Cover and rest in the fridge for at least an hour.

See? Same technique, but without getting your hands messy. Your arms will thank you.

Recipe: Clafoutis   Permalink

Thursday, July 5th, 2012

Because we in Eastern North America will be paying premium prices for cherries this year, it’s best we use them in applications that truly show them off, like a clafoutis.

Clafoutis is a classic country dessert from the Limousin region in central France. As with a lot of French country food, it’s simple, focuses on ingredients and is served family style. It’s not overly refined or finicky, or needing a lot of skill. The cherries themselves are distinct and whole, and become sweet/tart pop-in-your-mouth juice bombs. It can pretty much be described as a big casserole made with (traditionally) cherries and sweetened crepe batter. Yep, that’s pretty much it. And it’s even easier to make. Just about any fruit that can hold its shape well under heat can be used in place of cherries.

Clafoutis

750g (roughly 1.5lbs) sweet cherries like Bing, Chelan or Ranier.

For the batter:

325mL milk (2% or higher)
55g (¼ cup) unsalted butter
3 large eggs
70g (½ cup) all-purpose flour
125g (½ cup) granulated sugar
1 TSP vanilla extract
¼ teaspoon salt

For dusting:

30mL (2 TBSP sugar)

For greasing:

5mL (1 TSP) butter

Equipment:

A Blender or stick blender.
A medium bowl.
A small sauce pan or microwave safe dish.
A shallow casserole dish, capable of holding 2L (8 cups) of liquid, with room for expansion.
(optional) a cherry pitter.

Directions:

Preheat your oven to 190°C (375°F)

1) (optional) Pit the cherries. Traditionally, they aren’t pitted and it’s said the pits impart extra flavour. Like bitter almonds perhaps? Stone fruit pits contain amydgalin, which metabolizes in the body as hydrogen cyanide. Best to err on the non-toxic side.

Not to mention you’ll need to issue advance warning, or risk broken teeth of your guests. And we like our friends, don’t we?

2) In a bowl in a microwave or on the stovetop in a small pan, heat the 55g of unsalted butter until almost completely melted. Carry over heat will continue to melt the rest.

3) In a separate mixing bowl, combine the flour, sugar and salt.

4) Place the eggs in a blender and blitz until frothy. Add the flour mixture and pulse until combined, occasionally stopping to scrape down the side of the blender jug.

5) With the speed on medium-high, in a steady stream pour in the butter and then the milk. Allow the blender to keep going until no visible lumps are seen. Add the vanilla and pulse once or twice to incorporate.

NOTE: At this point, you can store the batter and cherries in the refrigerator until needed, for up to 48 hours.

6) Using the 1 TSP of butter, grease the inside of a shallow casserole dish, then add the cherries. Any cherries that don’t fit must be eaten or taken prisoner for later sado-masticistic reasons. Pour the batter over the top, but keep the liquid a good 1cm (½ inch) from the lip of the dish. Clafoutis batter will slightly soufflé and may spill over the edge.

7) Bake for 30 minutes, pull from the oven, sprinkle the additional sugar over the top and return to the oven (turned 180° for equal cooking) and cook for an additional 30 minutes, or until the top shows signs of light browning and caramelization.

Serve warm. Try not to devour it all in one sitting.

Two Minute Recipe: Tomato Sauce Like Nonna Used to Make.   Permalink

Friday, June 29th, 2012

Recipe: Tomato Tarte Tatin   Permalink

Monday, June 25th, 2012

Tarte Tatin, like many classic French desserts is simple, yet tastes complex; and it’s made during the height of fall, when apples are at their peak. A large cast iron pan is placed over medium heat. Sugar and butter are cooked to a caramel and then apple slices are tightly packed into the skillet. A pastry is placed on top and the whole shebang is baked until golden brown and flaky. When cooked, the entire pan is inverted over a plate or platter, revealing a slightly crisp bottom crust and translucent apples coated in the most delicious dark caramel. More modern interpretations use puff pastry, but other than the method for making the pastry, it hasn’t changed.

And it’s easier than apple pie. No, really.

There’s no thickening agent, no additional spices. No crimping or latticing of crusts, nothing. It is, at it’s simplest, five whole ingredients (including the pastry): Apples, Sugar, Butter, Flour and Water. Maybe a pinch of salt somewhere in the pastry, if you’re feeling un-French.

Why should it be that this glorious cooking method be left to only Apples? Or greater yet, only sweet items? It’s not, and shouldn’t be.

I had the idea to make a Tomato Tarte Tatin earlier this year and went hunting. I was able to find a recipe, but felt it needed some tweaking. I think my changes elevate the recipe and enhance the flavours, bringing out an intense tomato flavour.

Tomato Tarte Tatin

1kg (2.2lbs) fresh, ripe roma (plum) or san-marzano Tomatoes
Puff pastry (regular unsweetened pie pastry does fine in a pinch)
46.7g (3 tbsp) granulated sugar
15mL (1 tbsp) aged balsamic vinegar
45mL (3 tbsp) white wine vinegar
30mL (2 tbsp) light olive oil
2 cloves fresh garlic, finely chopped or grated (no jar stuff!)
0.3g (1/4 tsp) dried oregano
0.6g (1/2 tsp) dried basil
3.7g (3/4 tsp) salt
1.7g (1/4 tsp) fresh ground black pepper
fresh basil for garnish (optional)
butter for greasing

Non-Food items needed:
4 6-8oz ramekins
1 knife
1 cutting board
1 large bowl
1 rolling pin
plastic wrap (optional, see note below)
1 baking sheet, big enough to hold four ramekins.
1 large, oven-proof skillet
1 pair kitchen tongs
1 spoon (wooden or otherwise)

1. If you’re making your own puff pastry, you should have done that hours ago before you started into this recipe. Alright, go do that now. I’ll wait. Otherwise, go to the store and get some. For what it’s worth, making your own isn’t hard, just time consuming. Oh, and preheat an oven to 135°C(275°F).

2. Wash, dry and cut tomatoes in half lengthwise. Using a paring knife, cut out the white core of the tomatoes. Taking out the cores isn’t absolutely necessary, but it produces a better product.

3. Using a small spoon, remove seeds from tomato halves. Any other blunt-tipped instrument—like a lobster pick or a small finger (preferably your own)—should do just fine.

4. In a bowl, toss the tomatoes with salt, pepper, oil, garlic and herbs and then set them aside.

5. Into a large oven-proof skillet over medium heat, add sugar and shake the pan several times to spread it out. Without any stirring or additional shaking, let the sugar melt and eventually it will begin to turn golden.

6. When the sugar is the colour of dark honey, remove pan from heat and add vinegars. It will likely steam and sputter, but this won’t last long. Place back on heat and with constant stirring, the sugar will eventually dissolve.

7. When the sugar is dissolved, remove the pan again from the heat. Pack in the tomatoes cut side down. If they won’t fit, make them fit, dammit. Put them in the oven until the tomato skins begin to wrinkle (about an hour).

8. While the tomatoes are baking, roll out the pastry dough to roughly 1/4″ thick. Using a round cookie cutter with a press and twist motion, cut out discs of pastry and set them aside in a cool place.

9. Butter the ramekins and pack them with cooked tomatoes, placing them skin side down and tight together. Try to get as little liquid in the ramekins as possible. If the tarts are to be cooked immediately, raise the oven temperature to 220°C(425°F).

10. Once all tomatoes have been packed into ramekins, place the pan over medium high heat and reduce the liquid to a thick syrup consistency, almost like molasses. Spoon the syrup over the tomatoes, diving equally between the ramekins.

Note: at this point, you can wrap up the pastry discs (with layers of cling film, wax or parchment paper between them) and the ramekins, put them in the fridge and hold off baking them for up to 48 hours.

11. Gently place the pastry discs on top of tomatoes. Avoid pressing down on them. Put the ramekins into the 220°C(425°F) oven for 20 minutes or until the top of the puff pastry has a nice light mahogany colour. Allow to cool for several minutes before proceeding.

12. Run a knife along the inside edge of the ramekins, loosening any pastry or tomatoes that may be stuck to the sides. While holding the pastry down with one finger, tip the ramekins lightly and check for liquid. If it seems excessive (i.e., will leave a huge freaking puddle on the plate) tip off any excess. Using all your speed and dexterity, flip the ramekins over onto individual plates. Allow them to sit upside down for a few seconds before unmolding.

Serve warm with parmesan cream spooned over top and some nice dressed summer greens or vegetables. Now would be a good time to garnish with some fresh basil, whole or chopped.

Some might balk at the use of dried herbs, but in a situation where long cooking times are concerned, many of the bright flavours that fresh herbs offer are volatile and lost upon application of sustained heat anyhow.

Parmesan Cream

250mL 35% cream
45g (about 1/2 cup) finely grated parmiggiano reggiano or grana padano
salt to taste

1. Pour the cream into a small sauce pan and place over medium heat. Reduce it to 1/2 the original volume. Remove from heat.

2. While still hot, sprinkle in grated cheese. Stir until it’s fully incorporated.

3. Season to taste with salt and keep warm until it’s time to use it.

If you’ve followed directions, you should have something that looks like this: