Recipe: Banoffee Pie 
Thursday, July 19th, 2012
Chefs love to caramelize bananas. If a fine dining dessert contains them, there’s a good chance that the garnish will be a slice of banana, dipped in sugar and then browned under a blowtorch or broiler. Their flavours works so well together; the crunch of caramelized sugar and the soft sweet fruit make for an excellent textural yin-yang.
And of course, there’s the classic dessert; Bananas Foster. The fruit is cooked in a caramel sauce containing alcohol, served with vanilla ice cream and set aflame for a spectacular table side show.
How much more proof do you need to know that caramelized sugar and bananas are meant for one another?
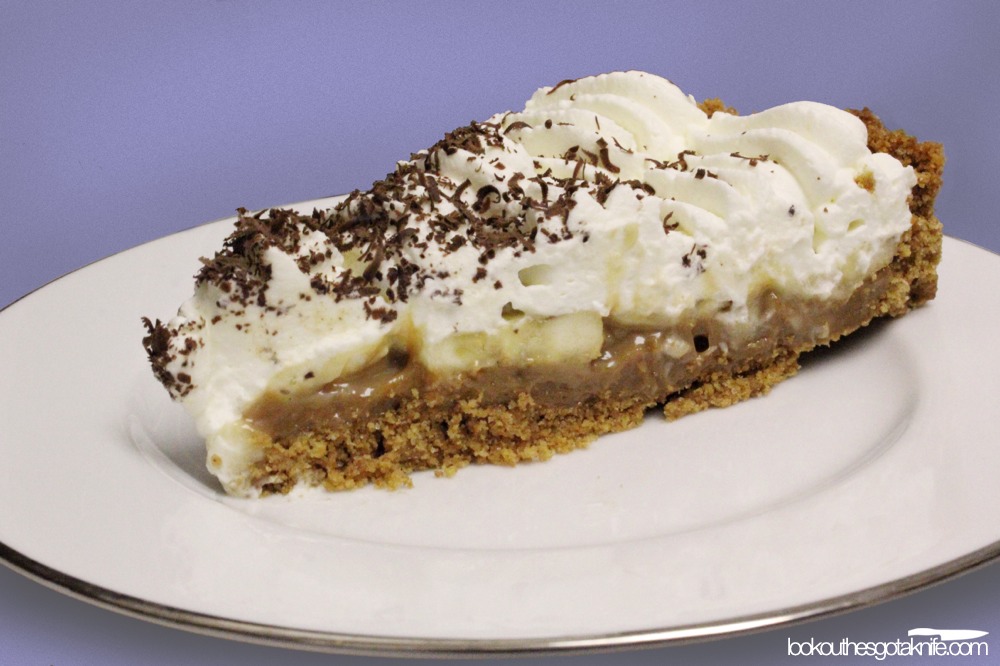
Banoffee Pie (as I know it) is near perfection in its flavour and texture. From the bottom up, it’s a digestive cookie crust, thick dulce de leche, sliced bananas and whipped cream to top it all off. It’s soft, firm, sweet, sticky, crunchy and crumbly all at once. This British pie can tend to be quite sugary, but doesn’t need to be cloyingly so if done right.
I know there are purists out there who adhere to the original Banoffee Pie recipe, but I consider that a different pie with the same name. Rather than a digestive cookie base, it uses a sweet pie dough (AKA: Sweet Paste) and includes instant coffee in the whipped cream layer. It doesn’t bother me that it’s called “Banoffee”, even though it should be “Banoffeeoffee”. But like Apple Pie vs. Tarte Tatin, it’s a whole different thing.
It’s just different.
I said it’s different, didn’t I?
Alright, now that you understand that this is going to be about the more modern bananas-and-toffee-in-a-cookie-crust-pie, we can get on with it.
Banoffee Pie
Serves 12-16, or one medium-sized bear.
For the base:
280g (10oz) english-style digestive cookies (no arrowroot digestives!), lightly broken up
114g (½ cup) unsalted butter
13g (1 tbsp) sugar (or isomalt; notes in the directions)
For the inner gooey goodness:
4 slightly underripe bananas (edible, but not to maximum sweetness)
30mL (2 tbsp) of lemon juice or 1 tsp of ascorbic acid powder (vitamin C powder)
600mL (20oz) sweetened condensed milk or 600mL (20oz) of pre-prepared dulce de leche.
a healthy pinch of salt
For the whipped cream topping:
500mL (2 cups) 35% or higher cream
13g (1 tbsp) sugar
1mL (¼ tsp) vanilla extract
1g (1 tsp) powdered gelatin
30mL (2 tbsp) water
Garnish (optional):
Dark chocolate for grating
Equipment:
A stand mixer, hand mixer or hand-blender with whisk attachment
A food processor or hand blender
A 10-inch removable bottom tart pan
A small sauce pan or two
A microplane or a fine grater (optional)
Piping bag and #7 star tip (optional)
Spoons, forks and the like
If making your own dulce de leche:
A deep baking dish
A smaller dish that will fit in the baking dish with lots of room to spare
Aluminum foil
Directions
Ignore directions 1-4 if you’re using pre-made dulce de leche.
1) Preheat an oven to 375°F.
2) Fill the baking dish with hot water and the sweetened condensed milk into a much smaller dish.
3) Cover the smaller dish with tin foil and place in the water-filled baking dish. Place the whole thing in the oven and cook for 1 ¾ hours, or until the milk takes on a dark mahogany colour.
4) While still hot, add salt and then whisk or blend the dulce de leche until silky smooth. A hand blender might work best.
You can stop ignoring now.
5) Reduce or preheat your oven to 325°F. Place the unsalted butter and sugar or isomalt in a small sauce pan over medium-low heat.
6) While butter is melting, use a hand blender, food processor, a rolling pin or your bare hands (you vicious monster!) to finely break up the digestive cookies.
7) Whisk the sugar/butter mixture until the sugar crystals are no longer easily seen. Pour into the bowl (or food processor) containing cookie crumbs. Pulse or mix them until thoroughly incorporated, scraping down sides if needed.
Regarding Isomalt: Isomalt is a natural sugar alcohol that acts a lot like regular granulated sugar, but doesn’t caramelize as easily and is nowhere near as sweet. This makes it extremely good at mimicking sugar at things like being sticky or hardening if cooked to certain temperatures. For this purpose, isomalt would help glue the cookie crumbs together without affecting the sweetness much. Isomalt is not hard to find. Most bakery supply and bulk food stores should have it. Of course, it’s also available online.
8) Spread the crumb mixture evenly into the 10″ tart pan, pressing it down with a fork until it’s compact. Don’t forget to press the mixture up the sides of the pan as well.
9) Bake the crust in the oven until just starting to brown. Be careful not to disturb it too much, as the crumb can easily fall apart. Allow to cool.
10) Slice your bananas into discs ¼” thick. Toss with lemon juice or ascorbic acid (vitamin c) powder. The acid in both will help keep the bananas from turning brown too quickly. Ascorbic acid is preferred, as it doesn’t add any additional liquid and is more potent. It’s available at most bulk and health food stores, is fairly inexpensive and is indispensable in the fight against oxidization of fruits and vegetables.
So why slightly underripe bananas?
Bananas contain high amounts of malic acid, as well as smaller amounts of citric, glutamic and other acids. When a banana has fully ripened and its skin a deep canary yellow, the high sugar content counteracts and overpowers all of these acids, making for a very sweet tasting fruit. Other fruit like Apples aren’t sweet enough to counter these acids, and lead to their characteristic tartness, even when cooked and in a pie.
The flavour characteristics of bananas are quite present for a long time before ripening, and the high malic acid to sugar ratio gives the mouth-drying feeling produced by severely under ripe banana. It’s just a matter of the plant converting the complex carbohydrate chains into sugar, making the fruit softer and sweeter and overpowering the malic acid. This results in the creamy texture of the ripe fruit.
In this recipe however, we have plenty of soft texture and sugar in the dulce de leche, and additional softness in the whipped cream. The addition of soft, creamy banana would be lost amongst the other soft textures, and lead to pie that feels like a stiff crust filled with pudding. The firmer, less-ripe banana adds an additional texture aspect, and the acids help the pie as a whole from seeming cloyingly sweet, bringing some balance to the pie. It’ll still be sweet though, don’t worry. Make sure your bananas have just barely turned yellow, with perhaps a little green still on the ends.
11) While the dulce de leche is still warm (if it isn’t, make it warm!) use half of it to spread a thin layer on the crust base. Layer the bananas on top in as flat a layer as possible, then pour the rest of the dulce de leche on top of that. This layering method isn’t so pretty, but keeps oxygen away from the bananas, keeping them from browning. If you know the pie is going to be finished within a day, you can simply pour all the dulce de leche into the base and layer the bananas in a decorative fashion (see photos) on top.
Allow the pie to come down to room temperature if it hasn’t already.
12) In a small sauce pan over medium heat, melt the powdered gelatin with the water, making sure the gelatin is fully dissolved. Set aside, but it should be kept lukewarm.
13) Add the sugar to your cold cream, using your mixer or hand blender with whisk attachment, whisk until it’s starting to turn fluffy. While still whipping, slowly drizzle the gelatin mixture into the cream. Then add to the vanilla. Continue whipping until stiff peaks appear.
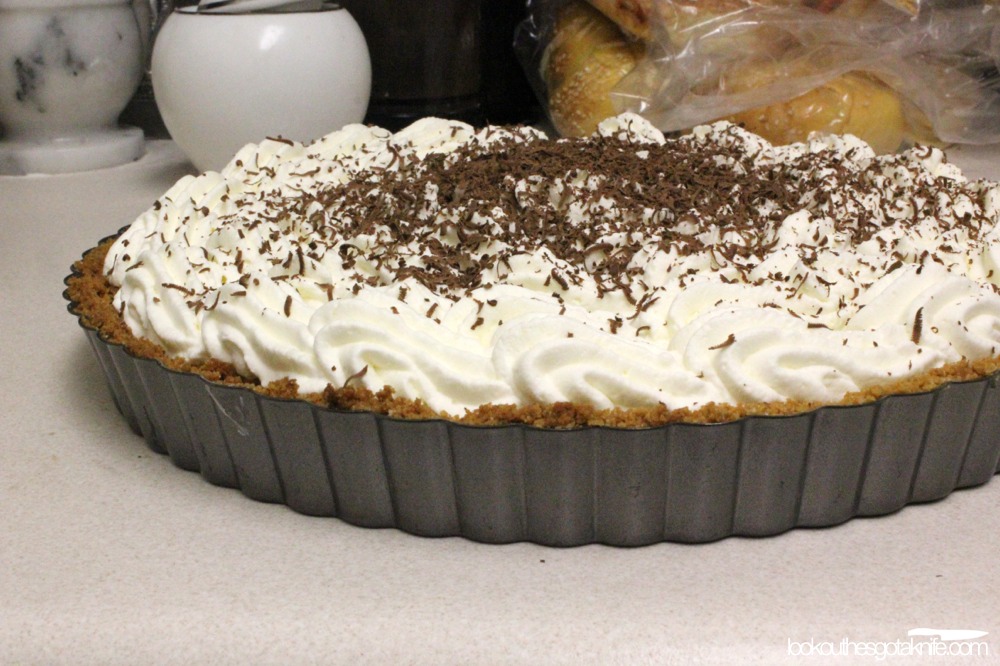
14) Decoratively pipe or spread the whipped cream over the filling. If garnishing, grate dark chocolate over the pie. Chill for at least an hour. Store in the refrigerator.

