Archive for the ‘Main’ Category

You’re Not Going to Like This.   Permalink

Saturday, May 20th, 2017

Dear people looking to fire up the grill this holiday weekend (or this coming holiday weekend in the U.S.):

If you’re buying lean or low-fat hamburgers, hotdogs or sausages, I implore you not to.

I’m going to tell you something you’re not going to like hearing.

*you* are ruining hamburgers, hotdogs and sausages for everyone else.

Yes, you.

“But I can’t be ruining it all by myself!”, you say. Well, for people who will directly eat those products you prepare, yes, you are. But also by making that consumer choice, you and anyone else who makes that choice tells food manufacturers, “we don’t want fat in our products”. This induces fat reduction in all products they make. And here’s why it’s wrong.

Okay, modern ambiguity about fat’s “badness” aside, hamburgers, hotdogs and sausages are made of ground meat. Almost always, the meat comes from highly flavourful cuts that aren’t very tender on their own; cuts that are high in connective tissue like chuck in beef and shoulder (butt) in pork.

In order to make those meats tender, they are ground and fat is added. Grinding the meat takes away the normal disadvantages of tougher cuts. So whether you grind lean or fatty meat, the end result is a somewhat even playing field in terms of the meat tissue itself. But that only does so much. Adding additional fat helps immensely in perceived tenderness and mouthfeel. It also adds a lot of flavour, as some of the really nice “meaty” notes come from fat soluble compounds.

This is what sausages look like

If you’ve ever had a really nice sausage or burger at a decent restaurant and wondered why what you’ve made at home has never been as good, know this: restaurants aren’t as afraid of fat. I’m willing to bet what they served you was between 20-35% fat. A lot of that will melt off, but the stuff that doesn’t gets sandwiched in between the little bits of meat, allowing them to move around more easily in the mouth and protecting against proteins coagulating the patty/sausage into one homogenous mass. For a home cook, there’s the added bonus of being able to get away with overcooking.

Yes, you can overcook your meat. A good, fatty burger or sausage can be cooked to the recommended “well done” and still come out feeling tender. If that lean burger or sausage gets overcooked however, it’s going to be dry and hard.

When as a consumer you ask for lean products, you’re ultimately also asking for more salt, sugar and added flavours. Leaner cuts of meat don’t often have as much flavour. Think of a beef tenderloin (filet) steak and a beef rib eye. Which is more flavourful? Tenderloin is wonderful and can be melt-in-your mouth tender. But it can also dry out quickly, and if it’s done to anything past medium is a complete stringy waste of money. And there’s also a reason restaurants serve tenderloin wrapped in bacon, or with a compound butter or other sauce: because it’s just not got that much flavour. Thrillest once took a poll of seventeen chefs, asking what meat is overrated. Nine of them mentioned beef tenderloin/filet mignon on the grounds of lack of flavour, due to lack of fat. So what do manufacturers do to make up for fat in ground meat products? They add *other* flavour enhancers, like salt, sugar, MSG and hydrolyzed soy or vegetable protein (“natural” sources of glutamate similar to MSG). I don’t have anything wrong with MSG myself, but I don’t like it being used simply to make up for something that’s lacking.

Now, I know people want less fat in their diets. And that’s commendable; less fat in the western diet is probably a good thing. However, Victoria Day (or Memorial Day) are one day a year. Eating a fatty meal once in a while isn’t so bad for you. It’s all about moderation. There’s this weird psychological phenomenon where we humans also tend to over-indulge if we know something’s been calorie- or fat-reduced. This pretty much negates the point of low-fat meats. Split a fatty sausage with your partner and fill up on the salad. Or eat one fatty burger instead of two lean ones. At least that way you also get less of the accoutrements (bun, condiments, cheese) in addition.

If you want to make your own burger patties, use medium ground beef. Though medium (the once-standard) is hard to find in stores these days, it’s likely there’s a butcher near you who can make you some if you ask nicely. But that’s only between 17-23% fat (here in Canada). If you want to go luxurious find a butcher who’ll grind you a 30% mix.

Likewise with sausages, buy them from a decent butcher, and ask the fat percentages (nicely, not accusatorially). For those who care for the craft of sausage-making, they’ll probably be happy you want something fattier, because it means you want a better product. This will make them reconsider just a little about appeasing the low-fat market.

Now, the reason I decided to rant on this is because I bought sausages yesterday. Italian-style pork sausages, made in-house by the local grocery store’s butcher (“Eric”; his name was even on the package). I took the meat out of one of them and cooked it like one would cook ground beef in a pan. The problem was, I needed to add oil to that pan. Which told me that sausage—which was not labeled “low-fat” in any way—was simply made with very little fat. It was nearly fat-free.

So, thank you for ruining my sausage, low-fat seekers.

Don’t do it again.

‘Twas the Season   Permalink

Wednesday, May 22nd, 2013

I’m going to say something that many an inexperienced home cook will dread:

Salt measurements in savoury recipes should be largely ignored. Or at the very least, taken with some deep skepticism.

You think I’m kidding, right? Lemme lay down some info smackdown on you.

Almost all raw food ingredients contain salt (well, sodiums), even in minute amounts. That salt varies dramatically based on the location the food was grown, what the conditions are like, the species and what time of year it is. A plant grown near a body of salt water like an ocean or sea will contain naturally higher amounts of salt, even without direct contact with seawater. Likewise, a pig raised during a hot summer is likely to be lower in salt than a temperate one, due to added sweating. For possibly genetic reasons, milk from Jersey cows naturally contains lower concentrations of sodium and chloride than other breeds like Holstein.

Humans also vary in salt tolerance. As we age, our ability to taste declines, and thus we rely more on salt to focus the flavours we taste. Something salty to a teen might be pleasurable to someone in their eighties. And to add more to the salt-inconsistency, some people just have saltier palates than others, some are super tasters (having significantly more tastebuds), and some just like salt more.

Qualities in ingredients like acidity, sweetness, fattiness, bitterness and others can also affect how we taste salt. Each quality can counter any of the others. This is part of what creates “balance” in food, but that’s for another article.

I won’t go into the rampant lack of testing in published recipes, but I will mention that I’ve cooked from some in the most precise of ways and still found them needing dramatically more or less salt—for my tastes anyway.

All this is why you should follow these rules:

1) If a recipe calls for salt and it’s baking and pastry (i.e.; culinary chemistry), then follow it to the letter and ignore all other advice I’ve just given you. Especially if its ingredients are presented in weight, rather than volumetric (cups, tablespoons, etc.) amounts. I know, I just told you to ignore salt amounts in recipes, but with baked goods there’s are reasons to stick to the recipe. One, salt inhibits yeast, so its presence in a yeast-containing recipe isn’t just for the flavour; it also keeps yeast from rising too quickly. Second, leaveners like baking powder and baking soda consist of salts (sodium bicarbonate) themselves, and the perceivable taste of salt could increase dramatically by a change in the recipe.

Seriously though if it’s not seasoned enough the first time, re-adjust the recipe for next time.

2) If a recipe calls for salt and it’s not pastry, season along the way.

3) If a recipe requires infusion of salt or other flavours (like rice or pasta) or long cooking times (like braised meats or a roast), then by all means add some salt to the beginning, and adjust as you go along. Never start immediately with the amount that the recipe recommends. It’s easy to add more salt, but impossible to take it away.

4) If you don’t trust your ability to season after the fact, and a recipe includes ingredients that are considered “unsafe” when eaten raw (eggs, ground beef, etc); then add some salt to the uncooked assembled recipe, take a small spoonful of it and cook it in a hot pan until safe, then taste it. It’s not a perfect method, but it’ll get you much closer and with experience you’ll be able to create better “starting guesses” on how much salt to add. I might point out that I once saw a chef instructor eat a pingpong ball sized lump of raw chicken sausage filling in order to test seasoning. Yeah, it was stupid, but he’s still alive and kicking. Last I heard, anyway.

5) Potatoes don’t draw out salt from food; that’s just a myth. That said, potatoes are high in potassium which has counteractive effects on salt in the body. Higher levels of potassium in the body will balance out sodium from salty food. [1. http://www.hsph.harvard.edu/nutritionsource/sodium-potassium-balance/]

6) Learn to develop and trust your sense of taste. Gradually add more salt until the flavour level increases to where you want it to be.

7) If adding salt to something only makes it taste saltier, rather than more flavourful, you’ve either added too much salt or there’s too small a flavour base to start with. Always use each step in cooking to maximize flavour. That means don’t focus on the final flavour, but the flavour at each step. If you’re halfway through a recipe and it doesn’t taste like much, question why that is.

8) The smaller a recipe is, the easier it is to over or under season it. When you’re making 60L of soup in a commercial kitchen, it’s pretty easy to get the salt levels correct, because you have to add large amounts of salt to get a noticeable change. In a soup recipe that makes 1L, an extra half teaspoon of salt can make something go from “almost there” to “salty”.

9) Pepper isn’t a seasoning. It has a distinct flavour and heat; it adds something new to a dish rather than enhancing what’s already there as salt does. That’s not to say it doesn’t have a place in food, but not every dish requires it and others like Steak au Poivre or Cacio e Pepe use it as a main flavour. I remember watching a documentary or TV show about El Bulli, and Ferran Adrià was asked why there was salt, but no pepper on his tables. His response was “You don’t see cumin on the table either, do you?” Pepper is a spice, use it wisely.

In short, the use of salt is probably the most important skill you can have in a kitchen. It’s worth investing the time to develop it, rather than rely on the wisdom (or lack thereof) of others. Spend some time honing it and your food will benefit.

A(n) [Insert Superlative Here] Grilled Cheese   Permalink

Friday, February 22nd, 2013

The internet is rife with recipes for a “better” grilled cheese sandwich.

They swap the bread for a whole wheat or sourdough. Or they change the cheese to a gruyere or brie. They add things like spinach or apple or drizzle with balsamic reduction. Worse yet, some make completely ridiculous and unfounded claims like adding mayonnaise to the butter prevents your sandwich from burning.

But what none of them seem to do is give a method for creating a proper, diner-style classic grilled cheese sandwich.

“Different” is not “better”, it’s just different.

What they’re making are cheese sandwiches alright, but they don’t teach a technique for actually making a better 3-ingredient (white bread, processed cheese, butter) grilled cheese sandw——Oh hell, why the formality? Sammich.

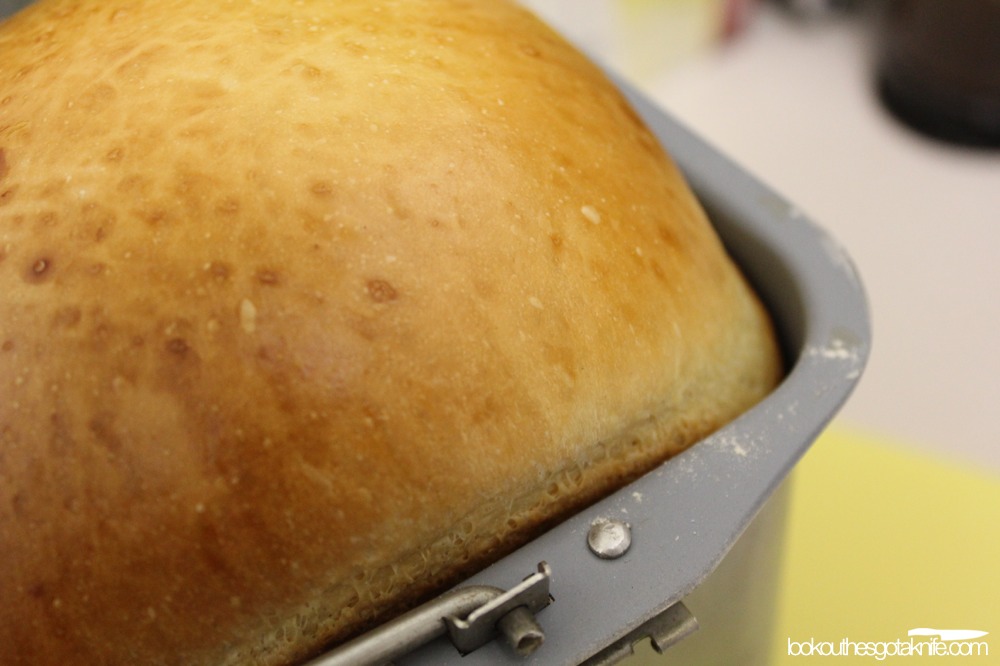
For the sake of this post, I used a home made, bread-machine white loaf. It’s not really different from your standard store-bought white bread, except that it’s fresh and not chock full of preservatives and stabilizers. I also like the consistent square shape, unavailable in white bread unless you buy some brands’ texas toast loaves or similar. I just prefer the homemade stuff, but it’s by no means necessary.

I understand why other recipes recommend different breads though. Supermarket white bread can be flavourless, get hard easily when in long dry heat, and can get soggy when near moist heat. And the latter two make for a narrow window in which a really great grilled cheese sandwich can be made. Just make sure it’s fresh. The fresher the bread, the better your flavour, texture and consistency.

It’s (not) in the name

A grill is a grate over dry heat. What many improperly call a barbecue is really a grill. It doesn’t need to be outdoors, and doesn’t require gas, but it is not what a “grilled cheese” is cooked on.

A better term would be “griddled cheese” or “fried cheese sandwich”. In diners and restaurants, a griddle (or plancha) is used. It’s a flat cast iron or stainless steel slab that sits over a heat source. In the home, a frying pan or skillet works just as well, as long as it has a smooth surface. For this purpose, I prefer a good, smooth-bottomed non-stick frying pan. An open electric griddle also works and many allow you to set the surface temperature.

Why non-stick?

One of the unique advantages of non-stick pans is their ability to repel liquids. It means food won’t stick easily, but it also means that water and oil can move more easily into your food. This is just due to the fact that bare metal or ceramic has a higher relative coefficient of friction than non-stick coatings. In simpler terms, liquids in a non-stick pan will have a tendency to stick to other things in the pan more than the pan itself. Frying in the same amount of oil in a non-stick vs. “sticky” pan means that more of it is likely to end up in your food with the teflon.[1. People believe that less oil is required with non-stick pans. If proper pre-heating of non-non-stick is performed and the right cooking oil is used, you can get away with the same amount of oil in either pan.

Aim for higher heats and use oils with higher smoke points like canola, sunflower, safflower, peanut or if you can afford it, avocado oil is king. Never fry using extra virgin olive oil; save it for dressing, drizzling or oil poaching. A great list of the smoke points of various oils is here.]

Where cooked butter is used as a flavour, we want that butter to stick to the food and not the pan, so smooth non-stick is the way to go.

Note: this means none of those weird textured non-stick pans. They have a rough (on a macro scale) surface, usually with claims that it helps release the food from the pan, or prevents abrasion from utensils. This may be true, but your food is never allowed to make 100% contact with the surface of the pan, and ability to cook food efficiently should be a criteria for buying cookware. Plus, if your non-stick coating requires a pattern on it to allow for better release of food, exactly how good is that coating? Your frying pan is smooth and flat, and you only ever use wood, silicone or plastic utensils with it, right? Good. No worries then.

So what defines a “really great” grilled cheese sandwich?

Of course, there’s a lot of personal interpretation in that question. So let’s narrow it down what defines a grilled cheese sandwich in general.

Melted cheese; it just so happens that processed is best
Frankly, you’re applying heat to a cheese sandwich. Processed cheese tastes kind of lousy and rubbery when it’s cold and develops bad, acrid odours when it’s browned. However, one of the areas in which it excels over most other real cheeses is meltability. The “classic” grilled cheese sandwich has processed cheese for a reason.

Note: This is only one of two times that I will ever recommend processed cheese in a dish; the other is american-style cheeseburgers, and it’s for the same reasons (consistency, mouthfeel and meltability).

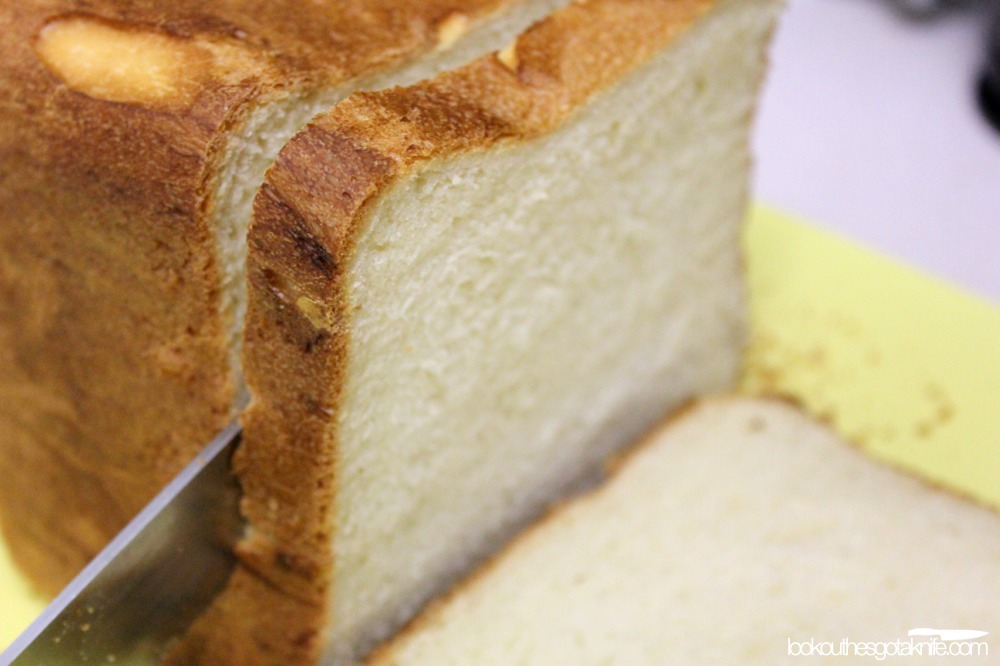
Sliced bread with as consistent an interior as possible (i.e.; few holes)
Baguette would make a really awesome grilled cheese, if it weren’t for the cheese melting right out of the sandwich. Grocery store white bread is notorious for never having holes in it (any more; back in the day it was different). It has been processed into a homogenous mass of little tiny bubbles, never big ones. Homemade or a true bakery white will still contain the occasional bubble, but be homogenous enough to contain the vast majority of the cheese when it’s melted.

Browning
Part of what defines a grilled cheese is the browning/caramelization of the bread.

Frankly, mass produced white bread can be lacking in flavour. It’s bland. Any browning or maillard reactions can only serve to benefit.

Butter flavour
Scientifically, un-clarified butter is a pretty inefficient cooking medium. At its best (and you’re extremely lucky to find it), it’s 86% milk fat. At it’s worst, it’s only 80% fat. This means there’s a fair amount of water (whey) in it. That water is counter-productive to the frying process, as it keeps the overall temperature of the butter low until it’s all boiled or evaporated off. Being a saturated fat, butter fat can also lead to a greasy mouthfeel, especially as it starts to cool. Other oils like canola, peanut and even saturated fats like lard and clarified butter make for a better fat to cook a GCS in, technically speaking.

As well, within the additional 20-14% of butter that isn’t fat, reside milk solids. These milk solids contain a lot of flavour, but can also get bitter when over cooked, and have a tendency to burn easily and quickly.

But despite all this, we still use butter. So it must be about the flavour. Higher quality butter will have both more milk fat and better flavour. Use the good stuff if you can find it.

How you can make it “better”.

The ingredients themselves are fine. There are however, things that can be improved.

Textural differences
We humans crave textural differences in our food, and tend to organically pair or make foods with contrasting textures and flavours. Chips and dip, french-fried onions on green bean casserole, or sprinkles on ice cream. We love crisp/crunchy textures paired with soft ones. One thing the “Better Grilled Cheese” recipes often share is a crispy, crunchy bread, but a nice crunch is usually missing from the bog-standard white-bread home grilled cheese.

Maximize flavour
Use every tool in the shed. That means you take every opportunity as a way to enhance or increase flavour. It’s a 3-ingredient dish, but there are still steps that can be taken to get the most out of it, like making sure we get as efficient a browning as possible.

As close to foolproof as you can get
C’mon, no one wants to screw up their lunch, right? You want to make the best dish you can without error, so it’s gotta be easy.

The problems with other methods

Pre-buttered bread
Butter being an emulsion of fat and water means that as it heats up it will start to split. The water (or whey in this case) will start to leak out into whatever is nearby unless it cooks off first. This means that once you place your pre-buttered grilled cheese onto a griddle or frying pan, the butter will heat up and some water will wick its way out into other parts of the sandwich. This slows down cooking time and adds unwanted moisture into the bread.

Straight into the pan
So, the pre-buttered method isn’t optimal. How about tossing the butter straight into the pan first, then the raw bread? This introduces the issue of potentially burning the milk solids in the butter before truly developing the browning of the bread itself. This might be cured by going low and slow, but…

Low and slow
Lower temperature/longer time would be a better technique if you were using clarified butter, but we want to use whole butter for the additional flavour. Unfortunately, low and slow promotes the uptake of moisture and fat into the bread and also means a very long time to brown. The result is a greasy feeling heavy sandwich, sometimes oozing butterfat when bitten into.

Clamshell griddles
You may be tempted to use a double-sided grill to cook both sides at once. This isn’t good either. You need to pre-butter the topside, and once that butter is melted, it tends to soak downwards into the bread. Soggy or greasy bread is the result. Damn gravity. If it didn’t need the butter, a closed clamshell would be good for toasting as long as it didn’t squish the bread.

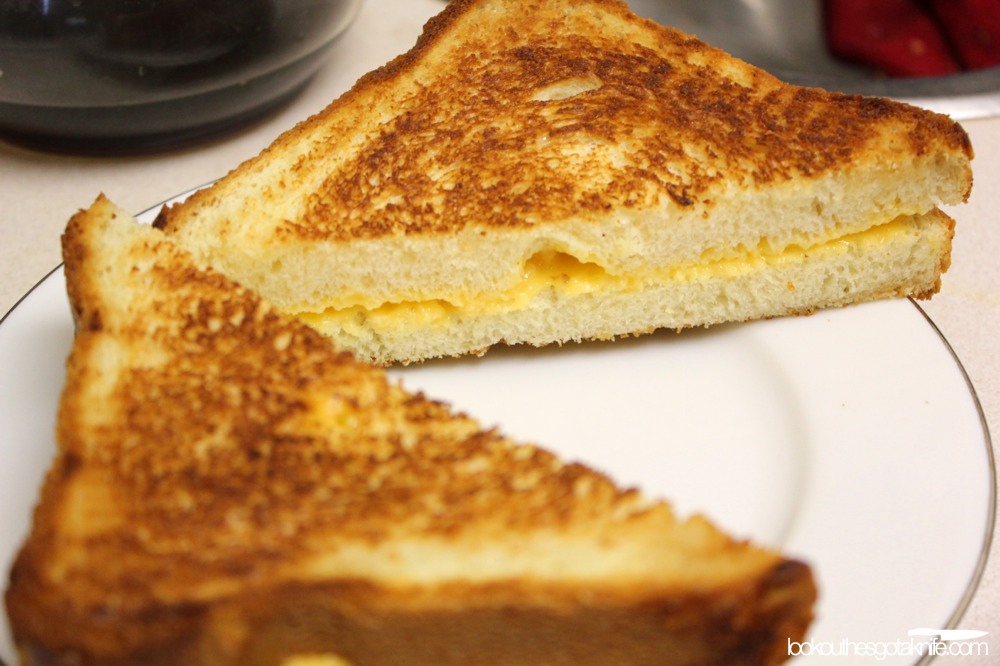
So with all this in mind, I’ve developed this technique. It creates a more predictable grilled cheese sandwich with lots of butter flavour, browned flavours, crisp crust, melted cheese and an easy two-step method.

Getting Ready

Preheat your non-stick pan. Place it on medium-high heat with no oil or butter in it for five or six minutes. Yes, this is safe. If your non-stick is teflon-based (not ceramic-based), avoid pre-heating any longer than ten minutes. We’re looking for a surface temperature of about 350°F. What? You don’t have an infrared thermometer, which are absolutely indispensable for determining accurate surface temperatures?! Well, you really should get one. They’re super-handy and can be bought inexpensively. It’s not necessary though. If you place your palm on the pan surface, we can use this scale:

0 – Warm like a baby’s bath.
1 – Uncomfortable but tolerable.
2 – Okay, this is starting to get hot.
3 – It’s like touching the hood of a car sitting in the sun on a summer’s day.
4 – Yikes, that might blister.
5 – Yep, that’ll definitely blister.
6 – Ssssssssssssssss.
7 – No way I’m putting my hand near that.
8 – You’re kidding, right?
9 – Right?!
10 – Motherfu––

You’re aiming for 6.

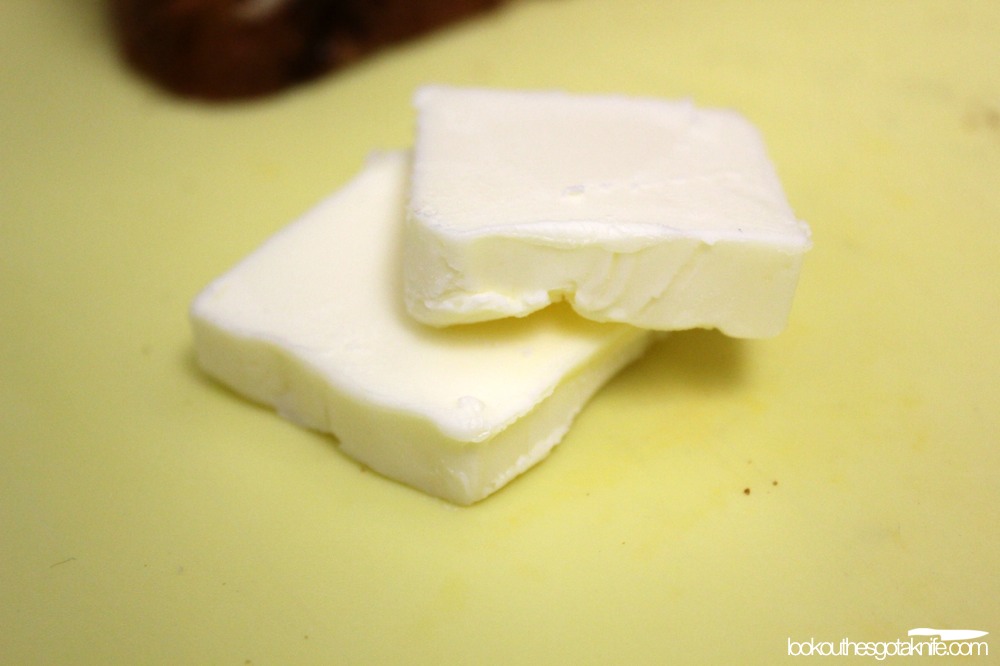
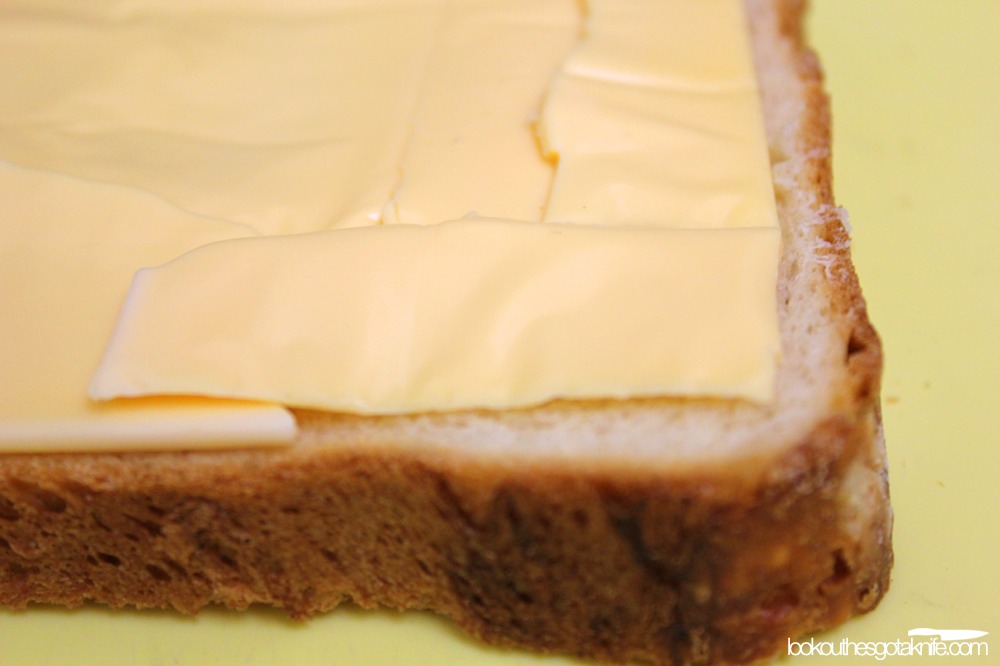
Put your cheese on your bread. Use multiple slices if necessary and try to cover as much of the bread as possible without extending past the border of crust. Cut slices up to fit and play processed cheese Tetris. Try and leave a few millimetres (1/8th inch) from the edge. Avoid too much overlap as this can create uneven melting. If you like lots of cheese, add more slices. Just make sure that the cheese is relatively the same thickness throughout. Top with another slice of bread.

The dry step

Brush off any crumbs on the bread and place it dry into the pan. Allow the bread to toast to a light brown. Flip the sandwich over and repeat. Set the sandwich aside, wipe off any crumbs.

Why dry?

Well, the dry heat kickstarts the maillard reaction in the bread. The maillard reaction is a chemical reaction between amino acids and sugars that essentially causes them to break down and release additional, complex flavour compounds. It generally takes a higher heat to get maillard reactions going, but they can be continued and maintained at lower temperatures.[2. It’s like “breaking the seal” if you will. That’s why its recommended that you start a roasted turkey in a very hot oven (235°C/450°F) for several minutes before turning the oven down quite low for the remainder of the cook; it kickstarts the process and improves final colour and flavour overall.] This mean we’re going to get easier browning and better flavour the more we can take advantage of it in our sandwich. Straight butter will stay closer to 100°F (212°F) until all the water is cooked off. This is too low a temperature to get those reactions started in the time needed.

The smooth-bottomed pan also acts on the bread like an iron. The weight of the sandwich itself will help create a smoother surface for further cooking and allows more even distribution when the butter comes into play. Pre-toasting in a oven/toaster oven won’t achieve get the same surface-smoothing result, but it does a great job of toasting if y’know, you’re lazy or something.

Pre-toasting also dries out the very surface of the bread. When the butter gets added, its water content will only serve to re-moisturize the drying caused by the heat, rather than adding extra moisture beyond what the bread has when it’s fresh.

The cheese also begins to melt. We want this.

The wet step

Before anything, put the doubly-toasted sandwich to the side and wipe the pan clean of crumbs. These will only burn in the long run, and can act like mini ball-bearings, keeping the bread from full contact with the pan.

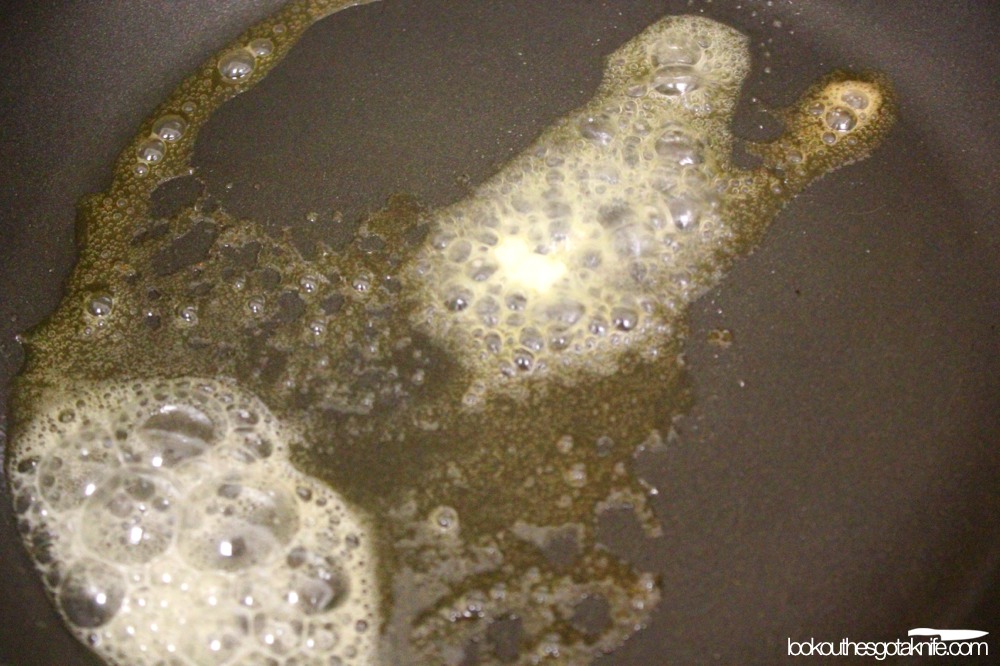
Add your butter to the pan; about 15 mL (1 tbsp) per side is just fine. It shouldn’t melt near-instantly. If it does, turn down the temperature by one number on the element’s dial. The butter will melt and start to foam and sizzle. Once the butter is just about to be completely melted, place your pre-toasted sandwich in the centre of the puddle (or as close as you can get). Using a light finger or other cooking implement, push the bread around in a circular motion to “soak up” the butter as best as possible. If your oven is level, this is almost completely unnecessary. Cook for a half-minute or to the desired browning. It won’t take long though. Repeat with the other side.

Why?

This way, we get some light browning of the butter (but not enough to burn the milk solids), so we get some of those nice caramel flavours. The sizzling of the butter also marks the quick evaporation of water, which we want.

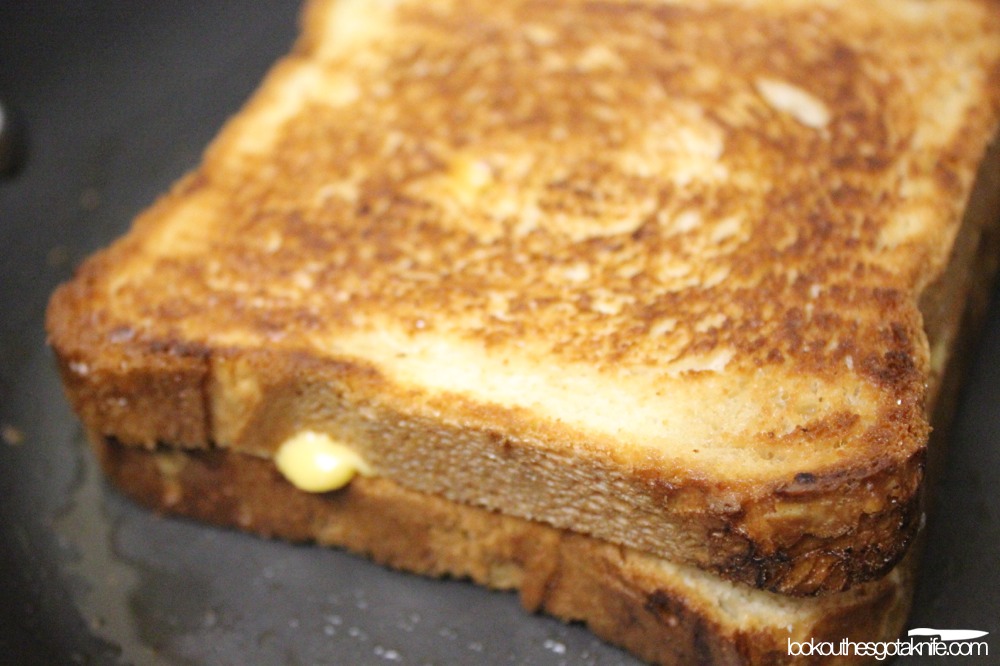
Due to the dry cooking step and how little the bread sits in the butter, it doesn’t travel far into the bread and stays mostly at the surface. This keeps it where its needed for cooking and increases the chance of a crisp, crunchy crust while keeping the rest of the bread soft (but not wet).

The bread is allowed to start to brown before the milk solids do. This means also get to continue the maillard and browning reactions started by the dry pan. This means more overall toasty/brown flavour.

As the cheese is already melted from the dry step, we only need to worry about the browning of the bread during the wet step. This means a simpler, more controllable final product.

Note: Eat it quickly. Crispness is like a high-entropy state in food, meaning it doesn’t last long before the moisture in the atmosphere finds a way to equalize itself. The longer you wait after cooking, the less crisp your sandwich will be. When you can put it into your mouth without scorching the buhjeezus out of your tongue, it’s ready.

That doesn’t mean if you’re making multiple sandwiches that you have to serve them à la minute. You can put the sandwiches onto an open rack (or cooling rack over a baking sheet) in a 60°C (140°F) oven. It’s important to have it over a rack though, as dry heat on all sides will keep the bread from condensing moisture at any one surface.

The problems to avoid

Squishing the sandwich
Some people recommend giving the sandwich a squish to help it cook. This increases the chance of the cheese melting faster, as you’re shortening the distance between the cheese and the heat and reducing some of the insulating power of the bread. Unfortunately, this also removes some of the volume of the sandwich, making it feel less substantial in the mouth, but denser and heavier in the stomach. If you’re going to be eating cheese on fried bread, you’re best not to make it into a complete gut bomb.

Mayo instead of butter
This seems to be a relatively recent idea; that if you replace the butter with mayo you gain additional cooking time and less burning. What they seem to miss is that you get extra moisture. Generally, store-bought mayo is usually a 1:3 (75% fat) water-based-liquid-to-oil ratio and low-fat mayonnaise can come surprisingly close to a 1:1 ratio (50% fat). That means the water content in mayo is higher than that of butter and we already know the surface temperature of the bread won’t achieve good browning temperatures until that water is removed. If that moisture isn’t evaporated quickly enough, it goes into your bread. Not ideal. As well, last I checked, egg solids in oil can burn just as well as milk solids in milk fat.

The truth

Quite honestly, this technique can be applied to any combination of bread or cheese. Why I picked the classic white bread, processed cheese sandwich is that techniques are more important than recipes. Any good recipe can be ruined by poor technique, and poor recipes can be improved with good technique.

Still, take what you will from this long-form, in-depth examination of a humble little sammich. At the very least, I hope it’s taught you that better isn’t just adding more cruft to a recipe.

It’s Not Your Mama’s Pasta Sauce.   Permalink

Wednesday, January 23rd, 2013

Northern Italy is the source of most of the food that English-speakers consider “Italian”. Sure, the Southern dishes evoke “Italianess”, but a plate of summer squash, bell peppers and olive oil with grilled fish could just as easily be identified as Greek, French or Spanish.

No, the hearty, pasta and tomatoes image is generally the first thing that pops into our heads. Not that there’s anything wrong with that. I mean, China gets slapped with General Tso’s chicken, Mexico gets thought of as Tacos and Italy gets pasta-with-a-red-sauce. There’s some basis in the stereotypes, truth be told. But if you dig a little deeper, you’ll find that even the stereotyped dishes don’t compare to the originals.

Bolognaise Sauce

As a kid, this was the name that I believed belonged to tomato sauce with ground beef in it, generally eaten on spaghetti; sometimes used in lasagne.

For my mother, this meant browning some ground beef, perhaps with a little extra onion, and then adding it to a can of Hunt’s Thick and Rich (Zesty!). Et voila! Bolognaise Sauce!

In the UK, this tomato-sauce-and-beef-with-spaghetti idea is so ubiquitous, its name has been truncated to simply “Spag Bol”.

But quite honestly, the idea of “Spaghetti Bolognaise” in Italy is likely to be met with a nice big WTF?!-face. During the 1970’s Italian food had a bit of a fine-dining boom around the English speaking world, and Bolognaise was part of that. It was such a problem that in 1982 the Culinary Academy of Italy released an “official” recipe for Ragù alla Bolognese. The Academy claims it spent 38 years consulting with the region of Bologna to define it, but its timing of release is suspect. I wholeheartedly believe they saw what was happening to Italian food in the Anglo world and felt deeply insulted, causing the need for an “official” recipe.

As with many Italian dishes, a recipe is only a basis; there are micro-regional differences that also define a standard. But what they defined bears far more resemblance to a stew than any tomato sauce I’ve ever seen. It’s not a tomato sauce with meat. It’s a meat sauce with a bit of tomato. In fact, ingredient-wise, it’s remarkably close to classic stew dishes like Coq-au-Vin and Beouf Bourguignon, differing by only a few ingredients.

In fact, let’s make a comparison, shall we? For the sake of ease, I’ve compiled the common ingredients found in a bunch of Bolognese recipes. I’ll table it up with Boeuf Bourguignon and I’ll include the official recipe too:

Boeuf Bourguignon Ragù Bolognese “Official” Bolognese Recipe
Beef
Veal No Sometimes No
Cured Pork Belly Lardons Pancetta Pancetta
Giblets No Sometimes No
Stock/Broth
Carrots
Onions
Celery (part of a bouquet garni)
Wine Red (Burgundy) White or Red White or Red
Mushrooms Never Never
Tomato Paste
Garlic Sometimes Sometimes No
Milk Never
Cream Never Rarely Optional, only if served
without pasta.
Herbs/Spices Rarely Never

Pretty close, no?

Some more coincidences? Both are considered stews. Even though other pasta sauces like Arrabiata, Puttanesca, Pomodoro, etc. are called “salsa” (Italian for “sauce”) or “sugo” (essentially, “gravy”), Bolognese is called a Ragù (“stew”). Both have origins as peasant food. The Burgundy region is close to France’s east border with Northern Italy. Both are also traditionally served with broad egg pastas.

To get into facetious-and-totally-irrelevant-but-look-coincidental-facts-territory, both are named after regions (or by proxy of a region’s wine), and both names have silent Gs in them. Oh, and the french word for stew? Ragoût (pronounced “ragoo”).

Some regional recipes include the use of poultry giblets (kidney, liver, etc.) to help thicken and flavour the dish. That practice has fallen mainly out of practice, and in my opinion would muddle the flavour with too much “gaminess”.

I have no doubt that there’s more than just similarity going on between Boeuf Bourguignon and Ragù alla Bolognese. At the very least, there’s likely some old Roman dish acting as an influential predecessor, like Coq-au-Vin.

The point of my tangent was to demonstrate that this is not a sauce, but a thick hearty stew. With many italian sauces, the pasta is the star and the sauce is just there to accent it. But with Ragù alla Bolognese, it is the star.

And like regional differences in recipes, I take my own little spin on the dish. I don’t use the veal or giblets (not uncommon), but I do use a good stewing meat instead of ground beef and I cut it myself.

Why no veal?

The subtleties of veal are kind of lost on this dish. It’s a stew based on intensification of flavours, and veal is mostly a less intense version of beef. Back in the days when cattle was slaughtered much later in their life and thus much “gamier”, younger beef might’ve been a better choice, but I don’t think veal adds any flavour to the party now. In a much “softer”, more delicate cream-based stew like Blanquette du Veau I say, “Oh hell yes”. But not this one.

In addition, part of the reason we prize veal is for its tenderness, but in a dish where hours of cooking in actuality puts the meat beyond well-done territory, tenderness is a moot point.

Why not ground beef?

There are several reasons. One, it’s easier to know what you’re getting. “Ground beef” has become a bit of a grocery store catch-all for beef trimmings and whatever’s left over. The meat can be flavourless or too lean, depending on where it comes from on the animal.

It’s also likely that prior to grocery stores and widespread commercial meat grinding, meat was cut by hand into small pieces (but not minced). It’s probably closer to traditional with stew beef.

Cutting your own also means you can take advantage of what’s on sale. The official recipe recommends ground skirt steak, but brisket, short rib, cheek, chuck, shank, oxtail; All make great cuts for this purpose. Brisket tends to go on sale after the winter holidays, so it’s what I used for these photos.

Stewing meat generally comes from cuts with a lot of connective tissue, and thus a lot of collagen. When that collagen cooks for long periods of time, it irreversibly turns into gelatin, which has the advantage of being a bit of a natural thickener and adds to an incredible mouthfeel. Once that is rendered out into the sauce, you end up with a glossy, fulfilling and thick-but-not-too-thick liquid for your stew.

NOTE: A trick restaurants often use with sauces or stews is putting a little additional powdered or sheet gelatin into the mix to give a better mouth feel. But don’t let them know I told you.

When the collagen breaks down and melts, the strands of meat it holds together begin to separate, creating space for sauce to “hide” between them; This is exactly what happens with pulled pork. With ground meats, this textural aspect is lost. Stewing beef ends up making the dish seem heartier, without losing moisture.

If you pick a good, flavourful cut, just try and trim most of the fat and any silverskin before using.

This ragù is traditionally created by layering flavours. Meats are browned separately, tomato paste, milk and wine are reduced or browned in successive order. There isn’t any quick way or trick to get around these steps. This makes for a time consuming, but ultimately flavourful stew.

NOTE: Ragù alla Bolognese is the basis for meat lasagnes in Northern Italy. In Southern Italy, lasagne is generally graced with a pure tomato sauce. If anyone tries to convince you that meat-in-a-tomato-sauce is traditional in a lasagne, they’re lying to you and should be slapped ‘cross the face. Multiple times.

NEVER SPAGHETTI

Bolognese is almost always served over a fresh egg-based tagliatelle, but with the added heartiness of the non-ground-meat variation, an extra-wide pappardelle works fabulously. I make a batch of pasta dough, roll it into sheets, then I hand-cut 2.5cm (1-inch) wide noodles. You don’t have to hand-roll your own pasta though. Buying pre-made fresh lasagne sheets and cutting them into noodles works just as well. Ragù alla Bolognese is never served over spaghetti, as it can’t hold a dense sauce like this. Spaghetti’s better suited to lighter sauces like (surprise!) tomato sauces. And hey, if you need a good recipe for a tomato sauce, clicky-clicky.

Ragu alla Bolognese

300g pancetta (bacon makes a good substitute in times of need), diced small
1kg stewing-friendly beef, cubed; smaller cubes will cook faster, aim for 1.5cm (2/3 inch) or smaller.
150g onion, diced small
150g celery, diced small
150g carrot, diced small
3 cloves garlic, minced or grated
600mL 2% (or higher) milk
1 bay leaf
35g tomato paste (preferrably a double or triple concentration variety)
500mL red or white wine
1L beef stock
1 pinch nutmeg

NOTE: You will notice almost no cooking times. There’s a reason for this; there’s too much variability in this dish. You can’t just say 5-7 minutes and expect to be accurate. But the great thing is, this stew holds really well at low temperature if you’re not yet ready to serve it. Just expect at least 3 hours from start to finish. More if you want to get the absolute most out of it.

1. In a medium sauce pan over medium heat, render the pancetta until crispy. Drain, set aside and reserve fat in a separate glass or metal bowl. Put the pan back on and turn the burner to high.

2. In small batches covering no more than 50% of the surface area of the bottom of the pan, sear the stew meat in some of the rendered pork fat, turning the cubes as necessary. You don’t have to worry too much about over-browning the meat, as long as it’s not black or getting close to black, it’s great. Remove the cubes into a separate bowl and deglaze the pan with a little water after every batch. Add that liquid to the bowl with the meat.

3. After all the meat is browned, reduce the heat to medium-low and sweat off the onions, carrots and celery in additional rendered pork fat, or some butter or light olive oil, if necessary. You want them to be soft and the onions translucent. When softened, add garlic and stir for about a minute.

The flavour-layering process begins.

4. Add the tomato paste to softened vegetables. Cook it over medium heat until the tomato paste begins to brown. This helps sweeten the tomato and creates more umami through Maillard reactions. This excellently compliments the beef, adds some bright acid, fresh flavour an adds to the overall umami.

5. Toss in the wine, and reduce this to “au sec” as well. The wine will help bring out the alcohol-soluble flavour components of the tomato paste, and reducing to au sec will cause most of the alcohol to evaporate off. The wine adds additional acid to balance out richness, and helps round out the flavours.

6. Add the milk, stirring constantly and reduce the milk down to “au sec” (dry). Essentially, reduce it down until there’s very little liquid left in the pan. This cooks and lightly browns the milk, creating additional Maillard-reaction flavours. This milk will add caramel and butter notes.

If steps 4-6 were ignored and the milk, wine and tomato paste were just tossed into the broth, the resulting liquid would have no way of getting those additional maillard notes or and would have a poor release of the alcohol-soluble compounds. Now, that’s not to say that a reasonable facsimile of a Bolognese wouldn’t be made, but that it wouldn’t have the same depth of flavour.

7. When the milk has been taken to au sec, add the broth, meats, nutmeg, bay leaf and simmer until the meat begins to fall apart (at least 2 hours, more is preferable). Generally, to break apart the meat, I aid the process with a potato masher or a pair of forks. Add water or additional stock as needed.

8. Depending on how thick you want the stew, continue reducing the liquid until the desired consistency. In my case, I like it thick and hearty.

9. Check the seasoning and adjust, remove the bay leaf and serve hot over broad egg pasta. Top with shaved Parmiggiana Reggiano or Grana Padano. Though I’ve recently taken to preferring Pecorino Crotonese (a hard, slightly gamey sheeps-milk cheese) as my go-to pasta topper. I’m sure there are some Italians who’d have my head for suggesting a southern cheese be paired with a northern dish, but I will say that it works nicely, and offers a change of pace from the ubiquitous “parmesan”.

Serves 6-8, or 4 plus extra for the freezer.

Obviously, this isn’t a dish you can make every night. But it does make a great sunday dinner. In addition, it freezes really well, so larger batches can be made and portioned off for freezing.

It’d be nice if there were some kind of trick that could be applied to speed the process up, but generally the things that take the longest have the best rewards, and if you’ve only ever had meat-in-a-tomato-sauce, Ragù alla Bolognese will blow your mind. Maybe just enough to recognize the value of taking the time to make it right.

Okay, so here’s where I usually end a post, but I just can’t do it.

I lied. There is a trick.

A pressure cooker would dramatically cut short the cooking time of the final stew, down to probably about ⅓ of the simmering time of the regular version. You’ll need a good quality pressure cooker though. Nothing cheap, or made of aluminum (stainless steel, FTW!) and one capable of 15 psi of pressure. You’ll need to triple the amount of onion, as food scientist extraordinaire/International Culinary Center instructor Dave Arnold‘s experiments have shown that onion flavour is muted by pressure cooking, and I trust his geekery over mine any day. You’ll also need to reduce the amount of stock to at least half (reduction is almost non-existent in a pressure cooker). The additional pressure might increase the chances of the milk and tomato paste caramelizing and going through the same chemical changes, but the amount of total liquid is likely to negate that, so you’ll still probably need to go through all the steps up to 7 before putting the cap on the cooker.

Using a pressure cooker as a shortcut will definitely cut some time off the final tally, but in all honestly the only portion that gets cut short is the portion that can be almost entirely unattended. That’s time you’re likely to be doing other stuff anyhow. Start the ragù earlier, and take the time to make your own pasta while it’s simmering, or just watch TV. It’s up to you, but sometimes you just need to take the time.

Ferulic Acid   Permalink

Wednesday, January 16th, 2013

NPR goes into the science behind why we like white bread over whole wheat, and it gets all scientific-answery about it.

Of acids and Maillard…

Never Buy Mayonnaise Again   Permalink

Friday, January 11th, 2013

It takes more time to find the condiment aisle and go to the checkout on a visit to the grocery store than it does to make mayonnaise.

Come Dine With Me (UK) drinking game   Permalink

Tuesday, December 4th, 2012

“Dark horse” – drink
Meringue/pavlova – drink
Cheesecake – drink
Rice formed using a bowl – drink
“I hate fish/goat’s cheese” – drink
Every 7 rating – drink

A Classic Sitcom Joke   Permalink

Friday, November 16th, 2012

[NOTE: Having a baby has taken away a lot of the time I was previously able to dedicate to this site. I have over a dozen half-written posts, a hundred recipe photos and many, many ideas for other posts. My distinct, super-heroic ability to ramble on and turn what should be 200 word posts into 3,000 word dissertations means that I end up focusing a lot of time on the actual writing. This likely will not change, so I just need to find more of that elusive, unicorn-esque thing they call time. Don’t give up yet though——I do intend to post more often as life allows.]

In the world of television, soufflés would seem to be the most difficult and fussy food ever created; they appear to require master skills and they will deflate if you so much as look at them funny. Fortunately, sitcoms aren’t exactly the paragon of truthiness and TV shows very rarely gets the life of a cook right (except maybe these ones).

Soufflés are rich, yet light and airy. Eggs, flavour ingredients and technique are the basics. And if you make them, despite the fears the odds are they’ll turn out just fine.

Speaking of fears, the common ones are that soufflés deflate easily, and that “fat deflates a foam”.

Both are loads of crap. Yes, crap.

Firstly: A properly made soufflé (which is not hard), seldom just deflates with anything but time; and time stops no soufflé from deflating. The whole reason they inflate is because the protein structure of the egg white allows it to hold onto bubbles easily. Heat “sets” the bubbles in place, and then they expand when they’re heated up, quite like a balloon. Expanding hot air stretches the bubbles and give soufflés the impressive lift that they’re known for. But as that hot air in those bubbles cools down, they shrink back down to their original size. This is the whole reason soufflés must be served straight out of the oven for best results. If a soufflé is deflated by the time it hits the table, odds are it took too long to get there. Here’s a little (though very limited) trick: Soufflés will expand again when reheated. That said, they’ll never expand as much as the first time, and too much reheating can turn the structure tough and eggy, so be careful.

Secondly: Fat does not deflate all foams. Consider this; if fat deflates a foam, soufflés wouldn’t work at all. Once egg whites touched egg yolk (and other fatty ingredients), it would start to deflate. Whipped cream, which contains a large amount of fat, also foams quite nicely. Both egg yolks and milk/cream have natural emulsifiers in them. This keeps the fat from interfering much with the water-based portions. Without emulsifiers, fats would of course, modify the surface tension of the liquid you’re whipping and interfere with the creation of bubbles (which is why it’s added to things like apple juice to keep it from foaming). But we don’t have to worry about that. If you get a little yolk into your whites, it’s not the end of the world. Once whipped in, all will be fine. Just don’t over whip your whites, yolk or not. Because that is evil, and makes for a lousy product.

Chive & Gruyere Soufflé

Ingredients:

55g (~1/4 cup) unsalted butter, plus a little extra for greasing
50g (~6 tbsp) all purpose flour
310mL (~1 1/3 cup) 2% milk, cold
60mL (~1/4 cup) dry sherry
12g (~1/4 cup) chives, chopped
6 egg yolks
8 egg whites
2g (1 tsp) kosher salt
0.5g (1/4 tsp) ground white pepper
120g (~1 cup) finely grated gruyere
30g (~1/4 cup) finely grated parmigiano reggiano or grana padano, plus extra for dusting
pinch cayenne pepper

Equipment Required:

4 8-9oz ramekins (taller styles will give better lift).
a sheet pan.
a whisk.
a hand-mixer or stand mixer with whisk attachments (or one hell of a beefy arm holding a whisk).
a medium, heavy bottom sauce pot.
a stainless steel, glass or copper mixing bowl, capable of holding at least 3L or more.
a fine grater for grating fine cheeses (a microplane is best).
a cutting board and knife, for chopping chives finely.

Re: White pepper; its use in this recipe is purely aesthetic. It’s just so there aren’t little black specks throughout your soufflé. If you don’t have it, use a slightly smaller amount of black pepper as it’s slightly hotter.

Re: Sherry. Use cheap stuff for this. Honestly, the XO Pedro Ximénez stuff is too good for anything but drinking on its own, and its subtleties would be lost through the cooking process. If you don’t have sherry, you can always just use some dry white wine instead.

Directions

1. Preheat an oven to 220°C/425°F. In a medium sauce pot over medium heat, add the medium butter in a medium fashion. When fully melted, stir in flour to make a roux. Allow to cook for a few minutes, stirring regularly. Avoid putting colour on it.

2. Add the cold milk and sherry, whisking until roux is fully incorporated. Raise the heat and bring just to simmer, stirring and scraping the sides regularly, until thick and smooth. This should take just a few minutes. The béchamel should be silky and not floury. If it is, keep cooking it dammit.

3. Remove from heat and allow to cool slightly. While this is happening, you can separate your eggs from their yolks if you haven’t already. Except that the recipe already called for them separately, and we do read recipes, don’t we? That means you should’ve done it by now, you slacker. Add the grated cheeses to the béchamel, stir lightly and allow it to sit and melt.

4. After that small wait, stir the cheese in completely until incorporated. Adding the cheese should have cooled down the sauce to lukewarm. If it is still hot and steaming, let it sit a bit longer. When cooled, whisk in your egg yolks, chives, salt, white pepper and cayenne pepper.

NOTE: At this point, you can set the yolk/bechamel mixture and egg whites into the fridge in separate containers for no more than two days. Allow them to come back to room temperature before continuing.

5. Using the extra greasing butter, grease the interior of four 8-9oz ramekins. Add finely grated parmiggiano reggiano or grana padano and coat the butter as completely as possible.

6. With a hand-mixer or stand mixer (or if you’re a masochist, with your arm and a whisk), beat the egg whites until stiff and fluffy (stiff peaks stage). Fold the whites into the yolk mixture in thirds, making sure it’s all incorporated before adding the next third.

7. Pour the egg batter into the greased and cheesed ramekins, right to the top. This is a thinner soufflé batter, so top-hat tricks won’t easily work on it. Don’t worry anyway, this recipe is a grower, not a shower. Place filled ramekins on a sheet pan and into the oven. Immediately turn the temperature down to 190°C/375°F and bake for 22-25 minutes, until well risen and still slightly wobbly.

8. Serve immediately. Like, don’t even think about it. Launch it molten hot into your mouth. Chase it with a dainty salad, like the one in the pictures.

Three really awesome random cooking tips.   Permalink

Sunday, October 21st, 2012

1. Whisk a cold pat of butter into a sauce.

No, I’m not Paula Deen and I don’t put a pat of butter on everything. In fact, I rarely use it on its own for anything but bread (which I don’t eat often) or pastry items. However, butter makes sauces better.

Say you’re making a duck breast with a reduced wine/stock/dried cherry sauce (A recipe I plan on putting on the site someday). You create this luscious, flavourful sauce that is both sweet and tart, but has a slightly thin mouthfeel. It’d be great as is, but while the sauce is hot, drop about two teaspoons of cold, unsalted butter into it. Swirl the pan and watch as magic takes place. That sauce will look a little messy as the butter melts, but the natural lecithin in the butter and the swirling motion will start to emulsify it. The sauce will begin to take on a nice glossy sheen, and thicken ever so slightly. It will behave better on a plate and spread less easily. Most of all, it will take on a silky, richer texture and flavour that wasn’t there to begin with. And that’s what it’s all about, right? Flavour?

2. Pre-cook the flour in a roux for consistency and accuracy.

A roux is two parts; a starch thickening agent and a fat buffering agent (usually butter, but oils and animal fats are sometimes used). The thickening power comes from the flour. When flour hits water, the starches begin to uncoil and swell, turning into a gel. The concentration of this gel in the parent liquid primarily determines the thickness of the final liquid.

The butter on the other hand helps the flour spread out before gelatinizing, and offers some minor heat protection, as well as flavour.

This is where I note that if you’re using a hot liquid, your roux should be cold or room temperature. If your liquid is cold, use a hot roux. The temperature difference allows the fat to spread out first. Otherwise — as one of my culinary instructors often liked to say — adding a hot roux to a hot liquid makes for great dumplings.

Unless you’re making what’s called a white roux, the roux is almost always cooked for a period of time before using. This allows it to take on a bit of colour; from a blonde roux for a velouté, all the way to a black or “brick” roux for gumbo. A longer cooking time means it’ll have more of a toasted flavour, but less thickening power.

Knowing however that main reason for the fat being there is to spread out the starch molecules before they swell, one must ask why the fat needs to be there in the cooking process? Cooking butter for the length of time needed for dark roux means that the milk solids burn. Any flavour that butter would’ve added there is now bitter and burnt one. This is why dark roux is generally made with oil or clarified, rather than whole butter. The whole point of using butter in light roux is flavour, so why do dark roux have to miss out?

The solution? Cook your flour first.

In a hot oven or in a thin layer in a large skillet or fry pan, toast the flour to a desired colour, stirring or shaking the pan regularly. This toasted flour can be quickly whisked into freshly melted butter. It will have the same flavour and texture, but there’s less likelihood of burning or unevenness, and it also means that whole butter can be used for black roux. The best part; toasted flour can be made in larger batches and kept in an airtight container in the freezer for months. There’s also no waste of butter or oil if burning should happen.

I should also note that roux made regularly freezes well in plastic-wrap-lined ice cube trays for separate portioning.

There’s also beurre-manie, the sister to the roux. It too is butter and flour, but the flour is mixed with room temperature butter, creating a paste that can be whisked into sauces. Because it’s un-cooked prior to entering a liquid, beurre-manie has a limited usage and your final liquid must be cooked for a long time to remove that cereal, dry mouthfeel and taste. Sauces with beurre-manie will also never have the same toasty flavour that a cooked roux will have.

That is, unless you pre-toast the flour first.

3. Blanching vegetables doesn’t just help keep colour, it helps keep them crisp.

Many know that to keep broccoli, asparagus, green beans, etc. green, that you should blanch them in hot, boiling water for a few seconds, prior to cooking them via another method. There is however, a better reason to blanch.

Think of (most) fruits and vegetables as trojan horses for seeds. A flower becomes pollenated and makes a fruit. The fruit or vegetable then acts as a vehicle for a seed to leave the plant. They’re then disseminated across the land. Sometimes by mere wind or gravity, many times by other animals. They taste good to us so that we spread their seeds. We are constantly manipulated by nature, but that’s another story.

Anyhow, back on topic here; In order to expose the seed, the “meat” of the fruit or vegetable usually needs to go away. It can’t always rely on animals’ digestive tracts for this process, so there’s an enzymatic action backup. This is what happens when fruit rots (along with some bacterial action). Cell walls are dissolved, colour changes and the fruit or vegetable turns soft, allowing bacteria, mold and other nasties to take over. This initial enzymatic action also happens to be sped up in warm temperatures.

When these foods are cooked in a way that doesn’t have a constant, surrounding, ultra-hot temperature, that enzyme will begin to act on surface areas that are merely warm, and you end up with greyish beans instead of green beans.

Somewhere along the way, us humans realized that the enzymatic action that caused massive colour change could be shut off with a dunk in boiling hot water. Being completely enveloped in instant heat means the surface enzymes will be deactivated. It’s a full-out assault from all sides. Once those enzymes have been stymied, a dunk in cold, cold water stops any further cooking.

Once the fruit or vegetable is cooled down, it can be reheated and cooked again losing far less of it’s colour and texture than it would have had it been cooked without blanching. This is why blanching is so commonly used in restaurants and why it’s a recommended step in the cooking of most vegetables. It’s also why you should use it whenever possible.

Chock full of E.coli goodness.   Permalink

Friday, October 5th, 2012

This is more than a little scary…

Butcher says his shop’s boss continues to knowingly sell tainted beef.

Bovine Intervention   Permalink

Monday, October 1st, 2012

Right now in Canada, we’re dealing with an outbreak of E.coli in beef products. It’s a recall that encompasses thousands of products, from most of this country’s major grocery stores and dozens of food manufacturers, all across the country. It appears to be of a scope not seen before.

If there ever were a reason to hate factory farming and large-scale food handling, this is it.

Forget the fact that large feed lots where cattle are constantly surrounded by their own filth makes them sicker.

And forget the fact that said cattle end up becoming staging grounds for antibiotic resistant strains of bacteria.

The problem that should scare people is that all of these grocery stores and food manufacturers, spreading from coast to coast, got their beef from one sole supplier, XL Foods, Inc in Alberta; a company that processes about 35% of all beef in Canada.

If E.coli had been found in the products of one small manufacturer, the outbreak would be much smaller and more easily contained.

This problem exists at the scale it does because huge meat companies are allowed to keep hundreds of thousands head of cattle in confined contact with one another. These same companies slaughter hundreds of thousands of animals in-house or in a quickly diminishing number of slaughterhouses.

It’s just a matter of numbers. The fewer the number of slaughterhouses, the greater the chance of cross-contamination between animal carcasses. The greater the number of cattle in contact with one another, the greater the chance of a disease spreading.

It’s for this very reason that we should discourage food suppliers on the scale that they currently are. Perhaps it could be immense fines on companies that ship out contaminated product. If companies were fined in large enough amounts, it would make it more economically sound for them to be prudent in proper sanitation and quality. Unfortunately, this does little to save lives after the fact.

Companies could also be forced to pay for government inspection on a curved scale encouraging that larger companies have more inspection of their product than actually required, in an attempt to keep a close eye on companies who stand to profit most from lack of diligence.

But quite honestly, I think we should decentralize food production. Despite my socialist values, I’m a strong believer in lots of true, honest competition. Collusion, mergers and oligopolies only serve to limit not only choice, but safety. Over the years, the market has amalgamated into just a handful of major food suppliers. In turn, these massive companies centralize their production into one or two major facilities.

As a childhood survivor of E.coli, I’m well aware how dangerous a problem this is, and how much faster and easier it should be dealt with. As it is now, and as the way it has been going, it can only get worse.

Food and Parenting   Permalink

Tuesday, September 25th, 2012

My wife gave birth to our daughter, Penelope, so please excuse my lack of updates over the past couple of weeks. Newborns need a lot of attention.

I can be an opinionated bastard at times. I get outraged with stupidity, ignorance, and lousy parenting. I don’t think friendship with your child should take precedence over teaching them good habits, respect for others and selflessness. In other words, I see (what I think is) a lot of crappy parenting out there.

As with most new parents, we have certain plans on how we want to raise our child. We’ve read a few books on French parenting methods, and I quite like the emphasis on healthy eating and structure. But most of all, I like the focus on the idea that a child is an adult-in-training. 

That’s not to say that kids can’t be kids, but that the ultimate goal is to turn them into well-rounded, emotionally and physically stable adults. 

This, I feel, is why it’s so important to teaching kids how to eat properly.

I have my own issues with food. I’ve been overweight for the greater part of my life. Much of that is my own doing, and I know I can’t blame it all on upbringing. For the most part, I eat relatively healthy; I eat fast food maybe a few times a month, and very little processed food in general. I do really love food. It’s a big pleasure thing for me. Everyone has their vices. For some, it’s drugs. For others, it’s exercise or fame. For me, like many, it’s food. As far as vices go, good food is a pretty socially acceptable one to have.

And as with many in North America, my love of food is carbohydrate- and fat-heavy. Lots of dairy, lots of breads and pasta. 

Kids have pretty acute senses of smell and taste. They can sniff out a mother’s breast and take comfort in the arms of those with familiar scents. Their sense of taste is just as impressive. The evolutionary wisdom says that the over-sensitivity is for protection’s sake. The super-nose allows them to know their caretakers from others before sight is developed. Their sense of taste is aimed heavily towards fat and sugar, two of the major components of breast milk; and they won’t eat bitter or sour foods (likely to keep them from ingesting rotting food and poisonous substances).

So ultimately, at least on a subconscious level, as adults we seek those attributes from food. They are a link to our childhood and a source of comfort.

The problem is, kids aren’t given enough opportunity to like foods that aren’t sugary, fatty or full of carbohydrates.

I know kids who — throughout most of their lives — haven’t had vegetables on their dinner plates. Their parents too eat few vegetables. Food to them is served with little structure, at varying times and with no celebration of what it’s made of. It makes me sad because this is the pattern these kids will carry into adulthood. Sorry, but chicken nuggets and hamburgers five times a week aren’t healthy.

In my youth, vegetables were pretty limited, too. There are numerous (common) foods I’d never eaten until I hit my 20s and started cooking for myself, including lentils, avocado, eggplant and asparagus. Our dinners were generally a plate of meat (chicken, beef or pork), starch and a vegetable (peas, carrots, corn or sometimes broccoli or cauliflower). This made me apprehensive for a very long time about trying new foods. I’m more adventurous these days, but still tend to lean towards the stuff that was familiar to me in my childhood.

Still, my experimentation gives me hope that the “lost” kids can learn to change their ways.

Search your memories for early childhood information about food. We learn the food pyramid, but it’s taught to us in a sterile, joyless way. We grow up believing that the bitter foods we may not like as much (like vegetables) are more like medicine than food to be enjoyed.

The French have it right because a lot of childhood education focuses on food. Lunches in French public schools are posh by North American standards. Kids are sung nursery rhymes about food, taught proper meal structure (3 meals plus 1 snack, always at the same times every day) and coaxed into savouring their food and asked questions about its texture or flavour. They learn first and foremost that food is a pleasure with a time and place. It’s not just fuel; It’s life. It’s tradition. It’s social.

By removing the focus on “healthfulness” and making it something kids want to do and look forward to, they ironically end up eating a greater (and healthier) variety of foods.

When my daughter gets to eating solid foods, She will know what celeriac or fiddleheads taste like. She doesn’t have to like everything, but by the time she gets to kindergarten, she’ll have eaten a wider variety of food than her father did at age 18.

This is my duty as a parent. Its my job to teach her right and wrong, love and respect for herself and others; and that includes eating and enjoying food, not scarfing down comfort.

Hypocrisy, Thy Name Is Mars   Permalink

Thursday, September 6th, 2012

Mars, Inc., the company that makes Mars bars, has tried to distance itself from the unhealthiness of the deep fried Mars bar.

There’s absurdity in this.

Forget that filled chocolate bars in a style similar to the Mars bar style are generally regarded as less-than-healthy snack. Even unhealthy snacks are okay in moderation. There’s far more to this though.

Some Background.

The most widely accepted definition of “chocolate” is cacao mass (cocoa powder) mixed with varying degrees of cacao fat (cocoa butter), and sugar (generally cane sugar). Many countries have a required minimum of 20% dry cacao mass in order to legally carry the term “chocolate”. Milk chocolate must contain dairy ingredients (milk powder, milk, etc.). White chocolate (if local laws allow it to be called so), is cacao fat with milk and sugar. Vanilla or Artificial Vanilla are generally allowed as well.

Cacao beans are roasted, ground down and the fat separated from the solid. What you end up with is about the same amount of dry and fat ingredients. The dry solids (cocoa powder) accounts for most of the taste of chocolate. So aside from chocolate itself, cocoa powder is used in baking ingredients and other chocolate-flavoured foods.

The fat component (cocoa butter) is remarkably shelf-stable, as it contains many anti-oxidants that keep it from easily turning rancid. Aside from being used in chocolate, it’s also quite highly prized and commonly used in the cosmetics industry.

This means that while the food industry takes most of the solids, the cocoa butter is fought for by both the food industry and the cosmetics industry. And simple economics tells us that greater demand means greater costs and lower supply.

Cocoa butter is not as necessary for most of the flavour of chocolate to be conveyed. It’s benefits are shelf-life and texture, but it does have unique flavours of its own. This is why white chocolate doesn’t just taste like sweetened fat.

Now here comes the WTF part.

While Mars is attacking the unhealthiness of deep fried Mars bars, Mars Inc. is a member of the Chocolate Manufacturers Association. Nestlé, Hersheys and other smaller companies are also members. This group has tried several times in the past to lobby the U.S. FDA to have the definition of “chocolate” changed, and they did this quite aggressively. Why? So that it can be manufactured with less expensive, less healthy ingredients.

The Chocolate Manufacturers Association has asked for several changes to the definition that would include dairy substitutes like soy or almond milk, sweeteners instead of sugar, and most heinously, partially hydrogenated oils in place of cocoa butter.

Basically, a “milk chocolate” bar could be comprised of cocoa powder, shortening, soy milk, and aspartame. This mixture then introduces a few other problems:

The Dilemma

1) Texture. Chocolate’s texture is rather distinct. Its crisp, but also soft. Firm, but silky and easily melted. These qualities don’t exist in many foods, and aren’t easily simulated.

2) Structure. This is somewhat tied to texture, but also stands independently. Much of chocolate’s structure comes from cocoa butter’s ability to crystallize. It helps make what should be a soft semi-liquid into a crisp, firm solid. This firmness is only obtained through a tempering process. Sugar too adds to this structure.

3) Flavour. While not strong, Milk and Cocoa Butter have very distinct and complex flavours that may be hard to simulate.

The Solutions

The flavour is likely the easiest to simulate from a food science aspect. But what once only potentially contained vanilla or vanillin as a flavourant, will now likely contain tens or hundreds of additional volatile compounds to simulate the lost flavour of milk, cane sugar and cocoa butter.

The structure and texture will be more difficult to replicate. As soy or almond milk are thinner than dairy milk, thickeners like guar gum will likely need to be added so that the melted “mocklate” will have the same viscosity in the mouth. Because milk has its own natural emulsifiers, additional lecithin might need to be added to keep the product from separating at room temperature. If time is no problem, chocolate can be conched for longer, creating smaller particles requiring less emulsifiers. But the big chocolate bar manufacturers already rely on lecithin for many of their products because they can already reduce cocoa fat by 8% by using it, so it’s likely they’ll just use more. Unfortunately, lecithin is not completely flavourless, and can be tasted depending on the amounts used.

Crystallization is an even harder beast. Many fats crystallize; the problem comes in having the fat crystallize at the right temperature and to the right crystal shape—Shape determines texture. If a similar crystallization is not possible, then it’s likely a textural facsimile will be created through messing with density and viscosity using stabilizers and thickening ingredients.

Artificial sweeteners don’t have the structure of sugar, so they would need to be buffeted with additional structure like isomalt (a low calorie sugar-like alcohol with similar crystallization properties).

Another point to consider is that with the change in ingredients and the usage of additional flavours, it may not be long before the solids (cocoa powder) too are reduced and artificial flavouring used to replace lost flavour. Imagine, “chocolate” that is closer to being artificially-flavoured chocolate Crisco.

The Hypocrisy

Chocolate is high in polyphenols like catechins and procyanidins and they exist mainly in the solids (cocoa powder). These antioxidants are known to help reduce the risk of cancer. It isn’t just the solids that have a bonus though; cocoa butter has just as many health benefits

Cocoa butter contains a unique polyphenol called cocoa mass polyphenol (CMP). This particular compound inhibits Immunoglobin-E (IgE) in the body. IgE is an antibody that we develop whose main purpose is to attack parasites. But there are a great number of people whose bodies over-produce IgE, and it becomes a major player in anaphylactic immune responses like severe food allergies and asthma. So to put it in layman’s terms, by suppressing IgE, regular eating of chocolate can keep some people from dying (or at the very least reduce the symptoms).

In addition to CMP, cocoa butter is about ⅓ stearic acid and ⅓ oleic acid. Oleic acid is the heart-healthy good fat found in Olive Oil that works to reduce LDL (bad) cholesterol levels. Stearic acid is cholesterol-neutral, but the body can metabolize about 10% of the stearic acid into oleic acid.

Cocoa butter sounds like a wonder fat, doesn’t it?

Damn right it is.

The CMA wants to be able to replace this great fat with Partially Hydrogenated Vegetable Oil. Partially Hydrogenated Oils are high in Trans Fatty Acids (Trans Fats). And what do Trans Fats do to the human body?

Cancer and Heart Disease.

So exactly why does Mars think it has a right to tell people not to eat deep fried Mars bars?

IO9: How Alcohol Gets You Drunk   Permalink

Monday, September 3rd, 2012

If you were ever wondering the science behind insobriety…

Weights and Measures.   Permalink

Friday, August 31st, 2012

On this site, I try and always present things in metric and with weight measurements.

Why?

The short answer; consistency.

The long answer:

Imperial measurements (and their US derivations) were great in their time, but they’re not terribly good for consistency’s sake; especially on a global scale. Aside from issues with scalability (quick, how many ounces in 14 gallons?), some units are entirely different in different countries.

(NOTE: I have rounded off some measurements to the hundredth or thousandth decimal point to avoid long strings of numbers.)

Gallons vs. gallons.

In the US, there are two different volumetric measurements for a gallon. One is 3.79L (fluid), the other is 4.4L (dry). Why? Who knows. And then there’s the imperial gallon which is 4.546L, fluid or dry. A liquid gallon between the US is only 83.3% an imperial liquid gallon.

How many ounces in a pint?

If you’re in the US, it’s 16. If you’re in the UK, it’s 20. The UK pint has 20% more in it. Sure, some may already know this in regards to beer, but if someone in the US follows a recipe for a blueberry tart from the UK, and it asks for a pint of berries, there’s a problem. Or a pint of milk, likewise.

Okay, so gallons and pints aren’t used that much in home cooking (but they are still used in catering and restaurants).

What about cups? They’re pretty common, right? There out to have been a standardized cup by now, yeah?

In the US, a cup is 8.33oz (246.4mL) but a cup is regarded by US law as being 240mL. To confuse you more, a cup was originally defined as a half-pint, or 8 oz (236.6mL). Wait you say, a half an imperial pint is 10oz, so is an imperial cup 20% larger as well? Yes it is, at 284mL. In Japan, a cup is defined as 200mL, except when you’re talking about a “gō” which is the more traditional measurement also referred to as a cup in English translations. It’s a piddly 180mL. Even more annoying, other countries have tried standardizing on a metric-based, round number cup at 250mL. To insult common sense even more, some countries actually use household tea cups as a standard of measurement.

Ounce for ounce.

Let’s get smaller and look at fluid ounces. Because they’re fractional units based on larger ones, they too have varied worldwide. In Imperial, a fluid ounce is 1/160th of a gallon, but in the US, a fluid ounce is 1/128th of a gallon. And we already know that US and Imperial gallons are different, so ultimately we can guess that ounces are different too. And we’d be right. An imperial ounce is 28.41mL. In the US it’s 29.57mL. And because they’re wacky, for food labelling purposes they use a round 30mL to define an ounce.

And of course, there’s ounces as weight. At least there’s been some standardization on that. Well, maybe not. Because there’s the avoirdupois ounce (regarded as the standard) which weighs 28.35g and the troy ounce, which weighs 31.1g.

If you’re confused about measurement systems, you’re not alone.

A gram is a gram, the world around.

In Metric, there is only one base-10 unit of measurement for each category, with greek fractional prefixes differentiating (kilo, giga, pica, milli, etc.) larger or smaller quantities. In addition, relative measurements are also tied to one of the most common substances. 10cm³ = 1L = 1kg water. This makes scaling much easier, and offers nearly infinite room to move.

If you’re a merchant and selling locally, a pint will always be a pint, and an ounce will always be an ounce. Globalization mixed with measurement systems that don’t match up meant that a pint wasn’t always a pint and an ounce wasn’t always an ounce. Something needed to change. So countries started adopting the metric system en masse. Over the course of about 100 years most of the world had switched.

I didn’t forget about weight.

The reason my recipes use weight for non-liquids is pretty simple; packing of volumetric measures. As an example, 250mL of flour can weight anywhere from 135g to 170g, depending on how it’s packed.

Because of this, if you do everything right in a bread recipe, but pack your flour measurements too much, your bread will be dense and dry and may not even rise. This makes weight measurements far more accurate.

Want to be a better cook? Buy a scale and use it, always.