Posts Tagged ‘french’

A Classic Sitcom Joke   Permalink

Friday, November 16th, 2012

[NOTE: Having a baby has taken away a lot of the time I was previously able to dedicate to this site. I have over a dozen half-written posts, a hundred recipe photos and many, many ideas for other posts. My distinct, super-heroic ability to ramble on and turn what should be 200 word posts into 3,000 word dissertations means that I end up focusing a lot of time on the actual writing. This likely will not change, so I just need to find more of that elusive, unicorn-esque thing they call time. Don’t give up yet though——I do intend to post more often as life allows.]

In the world of television, soufflés would seem to be the most difficult and fussy food ever created; they appear to require master skills and they will deflate if you so much as look at them funny. Fortunately, sitcoms aren’t exactly the paragon of truthiness and TV shows very rarely gets the life of a cook right (except maybe these ones).

Soufflés are rich, yet light and airy. Eggs, flavour ingredients and technique are the basics. And if you make them, despite the fears the odds are they’ll turn out just fine.

Speaking of fears, the common ones are that soufflés deflate easily, and that “fat deflates a foam”.

Both are loads of crap. Yes, crap.

Firstly: A properly made soufflé (which is not hard), seldom just deflates with anything but time; and time stops no soufflé from deflating. The whole reason they inflate is because the protein structure of the egg white allows it to hold onto bubbles easily. Heat “sets” the bubbles in place, and then they expand when they’re heated up, quite like a balloon. Expanding hot air stretches the bubbles and give soufflés the impressive lift that they’re known for. But as that hot air in those bubbles cools down, they shrink back down to their original size. This is the whole reason soufflés must be served straight out of the oven for best results. If a soufflé is deflated by the time it hits the table, odds are it took too long to get there. Here’s a little (though very limited) trick: Soufflés will expand again when reheated. That said, they’ll never expand as much as the first time, and too much reheating can turn the structure tough and eggy, so be careful.

Secondly: Fat does not deflate all foams. Consider this; if fat deflates a foam, soufflés wouldn’t work at all. Once egg whites touched egg yolk (and other fatty ingredients), it would start to deflate. Whipped cream, which contains a large amount of fat, also foams quite nicely. Both egg yolks and milk/cream have natural emulsifiers in them. This keeps the fat from interfering much with the water-based portions. Without emulsifiers, fats would of course, modify the surface tension of the liquid you’re whipping and interfere with the creation of bubbles (which is why it’s added to things like apple juice to keep it from foaming). But we don’t have to worry about that. If you get a little yolk into your whites, it’s not the end of the world. Once whipped in, all will be fine. Just don’t over whip your whites, yolk or not. Because that is evil, and makes for a lousy product.

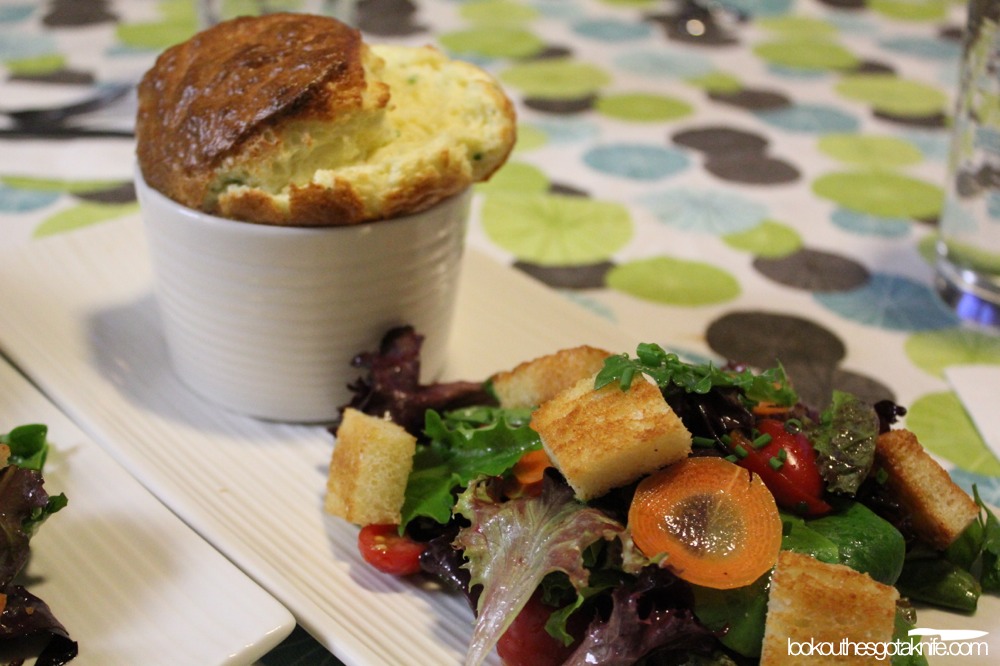
Chive & Gruyere Soufflé

Ingredients:

55g (~1/4 cup) unsalted butter, plus a little extra for greasing
50g (~6 tbsp) all purpose flour
310mL (~1 1/3 cup) 2% milk, cold
60mL (~1/4 cup) dry sherry
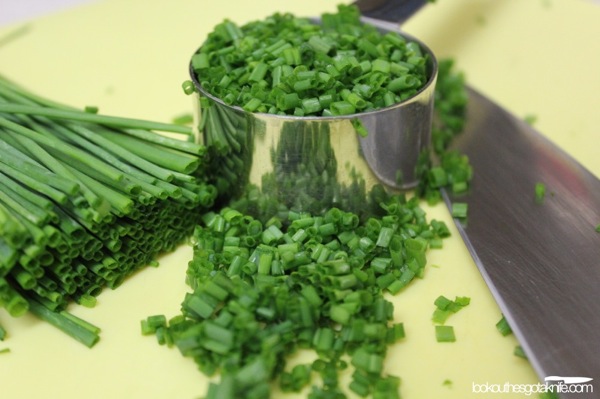
12g (~1/4 cup) chives, chopped
6 egg yolks
8 egg whites
2g (1 tsp) kosher salt
0.5g (1/4 tsp) ground white pepper
120g (~1 cup) finely grated gruyere
30g (~1/4 cup) finely grated parmigiano reggiano or grana padano, plus extra for dusting
pinch cayenne pepper

Equipment Required:

4 8-9oz ramekins (taller styles will give better lift).
a sheet pan.
a whisk.
a hand-mixer or stand mixer with whisk attachments (or one hell of a beefy arm holding a whisk).
a medium, heavy bottom sauce pot.
a stainless steel, glass or copper mixing bowl, capable of holding at least 3L or more.
a fine grater for grating fine cheeses (a microplane is best).
a cutting board and knife, for chopping chives finely.

Re: White pepper; its use in this recipe is purely aesthetic. It’s just so there aren’t little black specks throughout your soufflé. If you don’t have it, use a slightly smaller amount of black pepper as it’s slightly hotter.

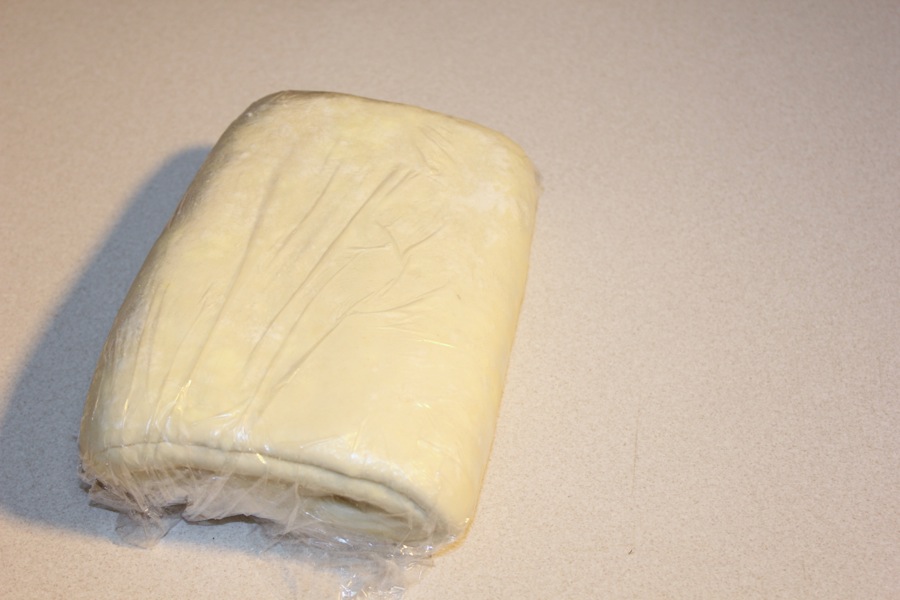
Re: Sherry. Use cheap stuff for this. Honestly, the XO Pedro Ximénez stuff is too good for anything but drinking on its own, and its subtleties would be lost through the cooking process. If you don’t have sherry, you can always just use some dry white wine instead.

Directions

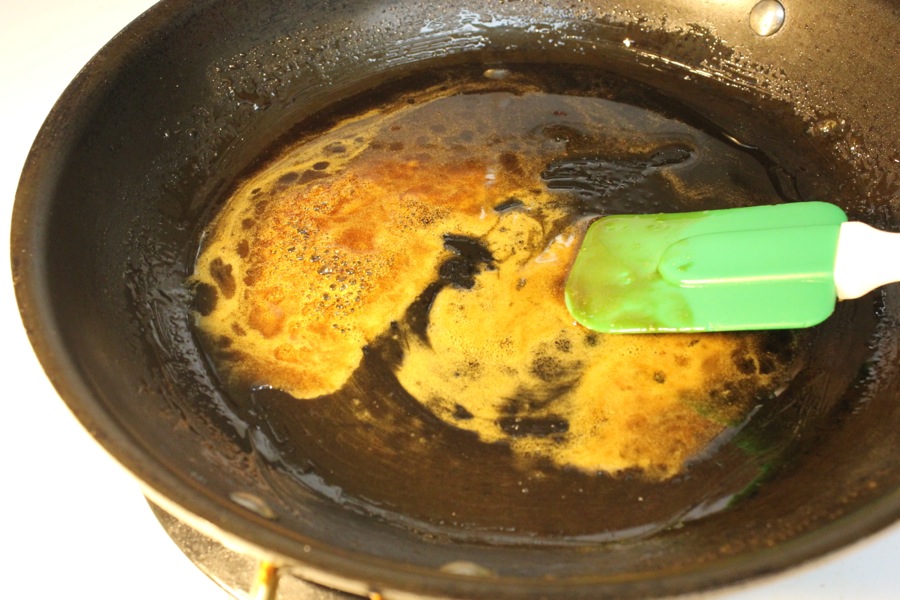
1. Preheat an oven to 220°C/425°F. In a medium sauce pot over medium heat, add the medium butter in a medium fashion. When fully melted, stir in flour to make a roux. Allow to cook for a few minutes, stirring regularly. Avoid putting colour on it.

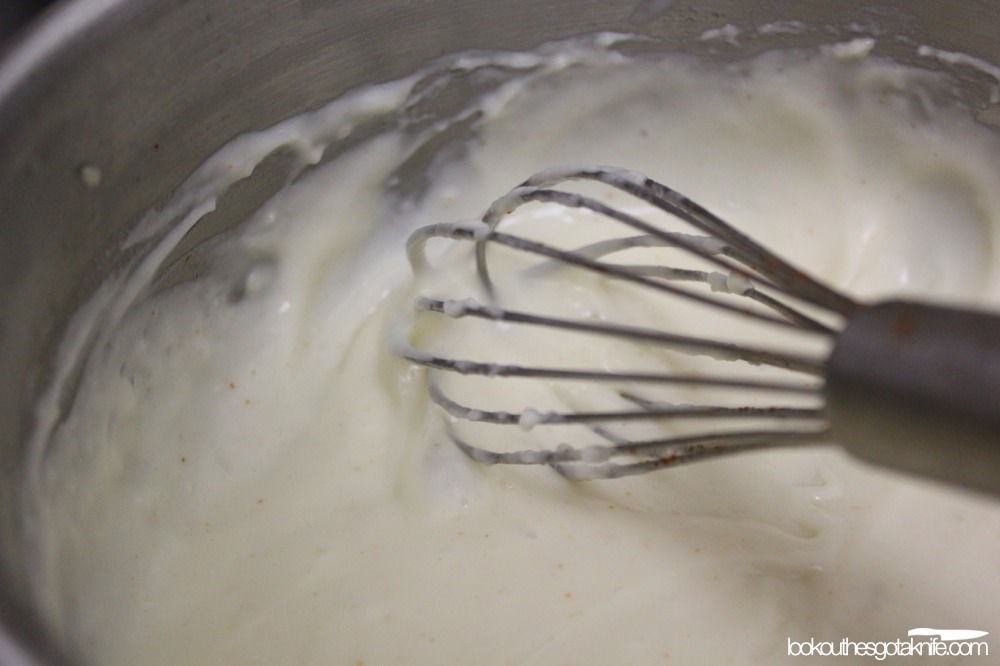
2. Add the cold milk and sherry, whisking until roux is fully incorporated. Raise the heat and bring just to simmer, stirring and scraping the sides regularly, until thick and smooth. This should take just a few minutes. The béchamel should be silky and not floury. If it is, keep cooking it dammit.

3. Remove from heat and allow to cool slightly. While this is happening, you can separate your eggs from their yolks if you haven’t already. Except that the recipe already called for them separately, and we do read recipes, don’t we? That means you should’ve done it by now, you slacker. Add the grated cheeses to the béchamel, stir lightly and allow it to sit and melt.

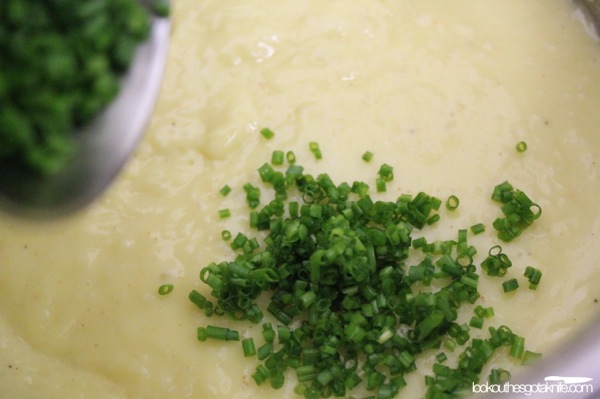
4. After that small wait, stir the cheese in completely until incorporated. Adding the cheese should have cooled down the sauce to lukewarm. If it is still hot and steaming, let it sit a bit longer. When cooled, whisk in your egg yolks, chives, salt, white pepper and cayenne pepper.

NOTE: At this point, you can set the yolk/bechamel mixture and egg whites into the fridge in separate containers for no more than two days. Allow them to come back to room temperature before continuing.

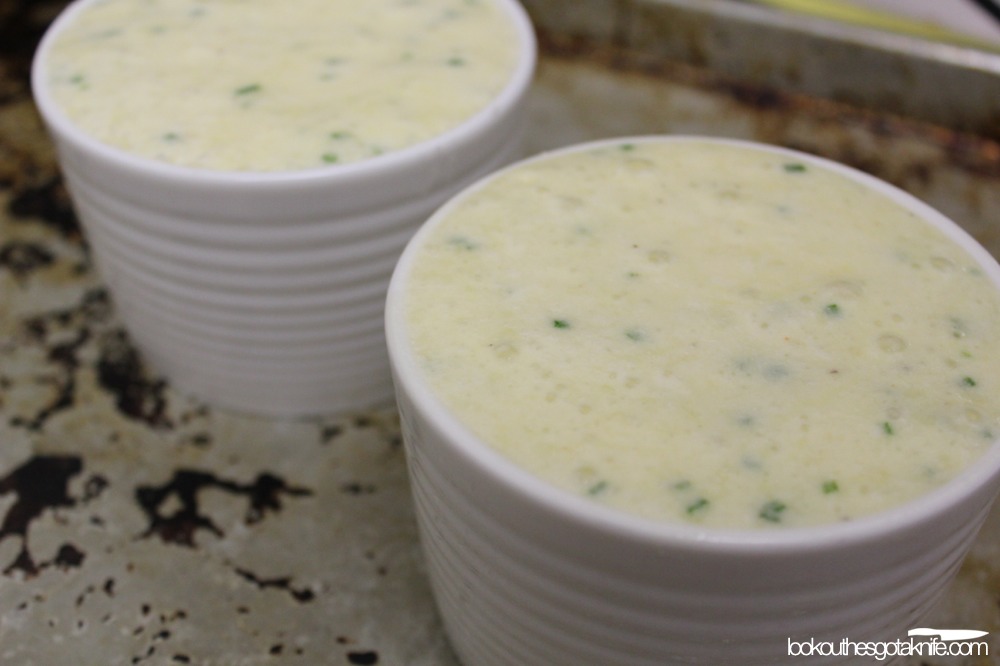
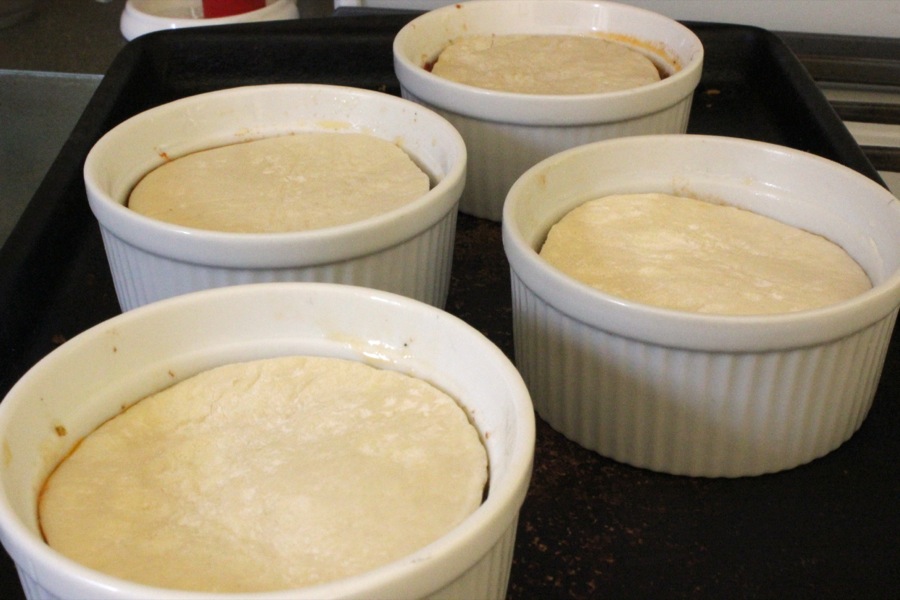
5. Using the extra greasing butter, grease the interior of four 8-9oz ramekins. Add finely grated parmiggiano reggiano or grana padano and coat the butter as completely as possible.

6. With a hand-mixer or stand mixer (or if you’re a masochist, with your arm and a whisk), beat the egg whites until stiff and fluffy (stiff peaks stage). Fold the whites into the yolk mixture in thirds, making sure it’s all incorporated before adding the next third.

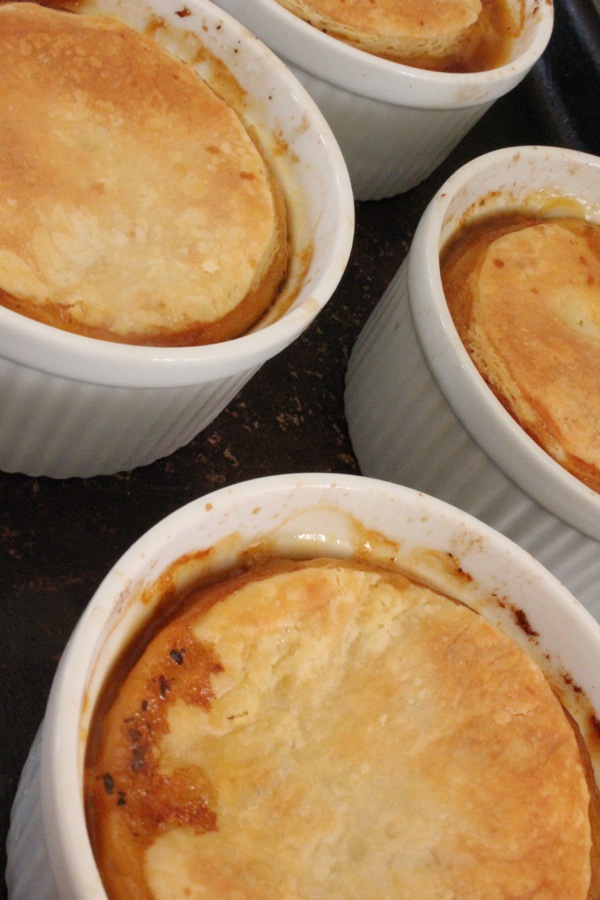
7. Pour the egg batter into the greased and cheesed ramekins, right to the top. This is a thinner soufflé batter, so top-hat tricks won’t easily work on it. Don’t worry anyway, this recipe is a grower, not a shower. Place filled ramekins on a sheet pan and into the oven. Immediately turn the temperature down to 190°C/375°F and bake for 22-25 minutes, until well risen and still slightly wobbly.

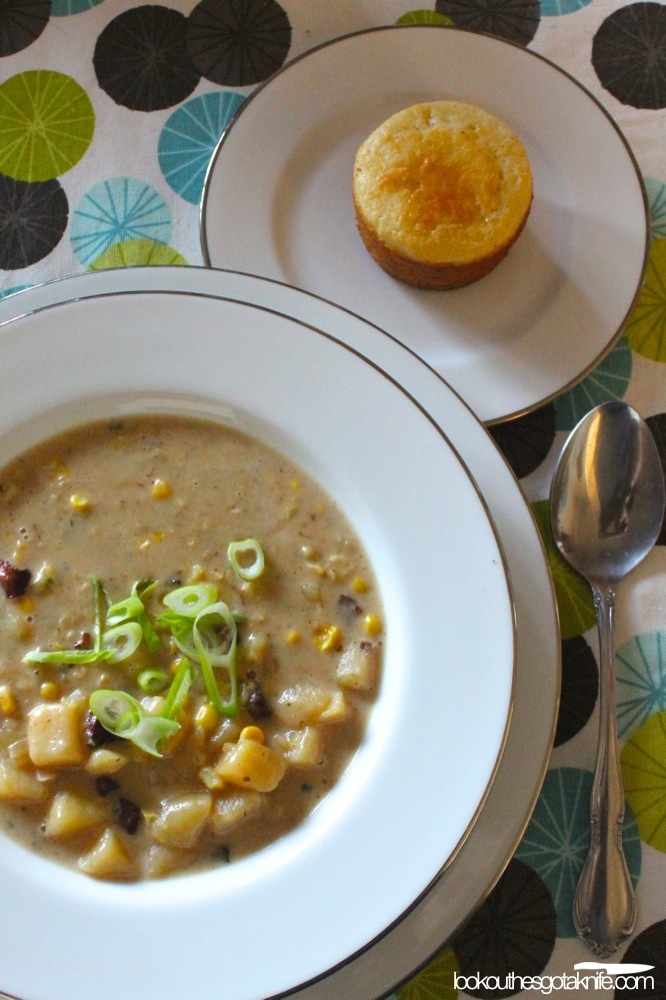
8. Serve immediately. Like, don’t even think about it. Launch it molten hot into your mouth. Chase it with a dainty salad, like the one in the pictures.

Recipe: Corn Chowder   Permalink

Saturday, August 18th, 2012

It’s mid-August, and that means that we’re hitting the peak of corn season in this part of North America.

Go shuck yourself.

But why would I want to talk about corn? Corn’s bad. Well, at least it’s been portrayed that way in the last decade or so. And there’s good reason for thinking unkindly of this absurdly mutated grain. There’s corn’s over use as cheap filler, high fructose corn syrup, etc. Most of corn’s problems can be attributed to the massive subsidy given to corn farmers in North America. If corn weren’t subsidized, it wouldn’t be cheap (the full cost of growing it would be reflected in the price), and thus there’d be less incentive to try and turn it into anything and everything. Sadly, when a food is cheap, this is a pretty common occurrence in the food industry.[1. Dragon fruit (AKA Pitaya) is expensive to produce and ship, and are often $7-$8 per one piece of fruit. Thus, dragon fruit appears as pretty much only dragon fruit.

Apples and pears are cheap to produce, thus apple and pears are used as a filler in everything from Fruit Roll-Ups to jams. Their mild taste lends particularly well to being covered up with artificial strawberry flavour and other fake stuff.]

Despite corn’s abuses in fakery, we can’t forget that it started out as a pretty humble food. Like rice was to Asian cultures, and bread was to Europeans, corn was an important staple for American indigenous cultures. It was so important that when the Spanish showed up, they left the Americas with holds full of corn. The unfortunate part is they forgot to take the process of nixtamalization with them, and killed themselves with pellagra.

Silly conquistadores, nixtamalization is for Aztecs!

Worry not, today’s sweet corn varieties don’t need to be specially treated before eating; though cooking is highly recommended as it can be rather bulky in the digestive system. Cooking will break down some of the starches and make it a little easier to digest. ‘Cause we all know that, uh, forensically speaking, it’s already pretty easy to tell that outer bran doesn’t get digested all that well in the gastrointestinal pathway.

Don’t give it more reasons by eating it raw.

Corn doesn’t have to be relegated to canned side dishes, tex-mex and something you serve on the cob at barbecues. The fact that it works well equally in sweet or savoury dishes means it can be quite a versatile ingredient that can be used in a wide range of applications. Even as the main star.

I love corn chowder, and I’m of the belief that this dish started out because someone misheard the word “clam” for “corn”. They’re pretty much the same dish. Bacon? Check. Cream or milk? Check. Potatoes? Check. Onion? Check. Clams/Corn/Clorn? Check.

Despite being so associated with New England, chowder is undeniably French in origin, ingredients and flavour. The soup itself has existed in Europe for a long time, and the word is generally thought to come from “chaudière”, which is the French word for a large cooking pot. The first time the word was used for a soup is apparently by Breton fishermen in Newfoundland.

That’s right. Fuck you New England. Booya!

Sorry. Canadians aren’t allowed to be patriotic. I’ll go hide in the corner for the remainder of this recipe.

Corn Chowder

INGREDIENTS:

100g (3.5 oz) pancetta, salt pork or unsmoked bacon, cut into small cubes.
150g (5.3 oz) onion, finely chopped
325g (11.5 oz) corn kernels (use whole cobs; 3 should do it)
1 clove garlic
10mL (2 tbsp) parsley, roughly chopped (should yield about 5mL/1 tbsp)
3 parsley stems
1 bay leaf
6 peppercorns
500mL (2 cups) chicken or vegetable stock
335g (11.8 oz) waxy potatoes, peeled and diced to 1 cm (a small ½ in)
250mL (1 cup) 35% cream
5mL (1 tbsp) flour
salt to taste
green onion, thinly sliced, for garnish

EQUIPMENT:

1 heavy bottom dutch oven
1 large sauce pan with lid
1 spoon (wooden is best)
1 roasting pan or sheet pan, preferably lined with parchment
1 sharp knife
1 large cutting board
8cm (3 inch) square of cheesecloth
kitchen string

DIRECTIONS:

1. Preheat an oven to 400°F. Put the parsley stems, bay leaf and peppercorns into the center of square of cheese cloth. Bring up the corners and tie with a piece of the string to make a sachet. Set aside.

2. Shuck the corn and cut the stem ends flat. On a large cutting board, stand the cobs up on end and slice off the kernels. Set them aside for now and keep the cobs.

3. Place the now kernel-less cobs on the pan and roast them in the oven until they’re turning nicely brown (about 20mins or so, but keep an eye on them them as the high sugar content means they can burn quickly).

4. When the cobs are nicely roasted, combine them with the stock and sachet in a sauce pot and place over medium-high heat. If the cobs are too big to fit, cut them in half. Put a lid on the sauce pot; we don’t want to lose any of that liquid or flavour. If it boils, turn it down to a simmer. Doing this to the cobs will help give the soup a subtle toasted corn flavour.

5. In a dutch oven over medium-low heat, render the pancetta until it’s dark mahogany and crispy. Pull the pan from heat, drain but reserve 5mL (1 tsp) of the rendered fat. Set the pancetta aside. DO NOT clean the pan of any of the lovely darkness left on the bottom of the pan. Unless of course it’s burnt to a black colour. Only then should you clean your pan.

6. Add the onions to pan with reserved fat and return them to the burner. Set the heat on medium low and sweat the onions down until they’re soft.

7. Stuff the corn into the stock pot and cook for about 5 minutes stirring occasionally. Add the garlic and stir constantly for about 1 minute, then sprinkle in the flour and continue stirring for about another minute.

8. Remove the cobs and sachet from stock, and pour it into the dutch oven along with the potatoes. Check the salt level and season accordingly. Bring it up to a simmer, stirring occasionally. After about 10-15 minutes, add the cream and let it continue to simmer.

9. Take the dutch oven from the heat when the potatoes have softened and have reached a stage of being edible. Add the fresh parsley leaves. Check the seasoning and re-season if necessary.

Serve hot, garnished with green onion. With bread on the side. Corn bread is nice.

Makes a scant 1L (1 qt).

Recipe: Tomato Tarte Tatin   Permalink

Monday, June 25th, 2012

Tarte Tatin, like many classic French desserts is simple, yet tastes complex; and it’s made during the height of fall, when apples are at their peak. A large cast iron pan is placed over medium heat. Sugar and butter are cooked to a caramel and then apple slices are tightly packed into the skillet. A pastry is placed on top and the whole shebang is baked until golden brown and flaky. When cooked, the entire pan is inverted over a plate or platter, revealing a slightly crisp bottom crust and translucent apples coated in the most delicious dark caramel. More modern interpretations use puff pastry, but other than the method for making the pastry, it hasn’t changed.

And it’s easier than apple pie. No, really.

There’s no thickening agent, no additional spices. No crimping or latticing of crusts, nothing. It is, at it’s simplest, five whole ingredients (including the pastry): Apples, Sugar, Butter, Flour and Water. Maybe a pinch of salt somewhere in the pastry, if you’re feeling un-French.

Why should it be that this glorious cooking method be left to only Apples? Or greater yet, only sweet items? It’s not, and shouldn’t be.

I had the idea to make a Tomato Tarte Tatin earlier this year and went hunting. I was able to find a recipe, but felt it needed some tweaking. I think my changes elevate the recipe and enhance the flavours, bringing out an intense tomato flavour.

Tomato Tarte Tatin

1kg (2.2lbs) fresh, ripe roma (plum) or san-marzano Tomatoes
Puff pastry (regular unsweetened pie pastry does fine in a pinch)
46.7g (3 tbsp) granulated sugar
15mL (1 tbsp) aged balsamic vinegar
45mL (3 tbsp) white wine vinegar
30mL (2 tbsp) light olive oil
2 cloves fresh garlic, finely chopped or grated (no jar stuff!)
0.3g (1/4 tsp) dried oregano
0.6g (1/2 tsp) dried basil
3.7g (3/4 tsp) salt
1.7g (1/4 tsp) fresh ground black pepper
fresh basil for garnish (optional)
butter for greasing

Non-Food items needed:
4 6-8oz ramekins
1 knife
1 cutting board
1 large bowl
1 rolling pin
plastic wrap (optional, see note below)
1 baking sheet, big enough to hold four ramekins.
1 large, oven-proof skillet
1 pair kitchen tongs
1 spoon (wooden or otherwise)

1. If you’re making your own puff pastry, you should have done that hours ago before you started into this recipe. Alright, go do that now. I’ll wait. Otherwise, go to the store and get some. For what it’s worth, making your own isn’t hard, just time consuming. Oh, and preheat an oven to 135°C(275°F).

2. Wash, dry and cut tomatoes in half lengthwise. Using a paring knife, cut out the white core of the tomatoes. Taking out the cores isn’t absolutely necessary, but it produces a better product.

3. Using a small spoon, remove seeds from tomato halves. Any other blunt-tipped instrument—like a lobster pick or a small finger (preferably your own)—should do just fine.

4. In a bowl, toss the tomatoes with salt, pepper, oil, garlic and herbs and then set them aside.

5. Into a large oven-proof skillet over medium heat, add sugar and shake the pan several times to spread it out. Without any stirring or additional shaking, let the sugar melt and eventually it will begin to turn golden.

6. When the sugar is the colour of dark honey, remove pan from heat and add vinegars. It will likely steam and sputter, but this won’t last long. Place back on heat and with constant stirring, the sugar will eventually dissolve.

7. When the sugar is dissolved, remove the pan again from the heat. Pack in the tomatoes cut side down. If they won’t fit, make them fit, dammit. Put them in the oven until the tomato skins begin to wrinkle (about an hour).

8. While the tomatoes are baking, roll out the pastry dough to roughly 1/4″ thick. Using a round cookie cutter with a press and twist motion, cut out discs of pastry and set them aside in a cool place.

9. Butter the ramekins and pack them with cooked tomatoes, placing them skin side down and tight together. Try to get as little liquid in the ramekins as possible. If the tarts are to be cooked immediately, raise the oven temperature to 220°C(425°F).

10. Once all tomatoes have been packed into ramekins, place the pan over medium high heat and reduce the liquid to a thick syrup consistency, almost like molasses. Spoon the syrup over the tomatoes, diving equally between the ramekins.

Note: at this point, you can wrap up the pastry discs (with layers of cling film, wax or parchment paper between them) and the ramekins, put them in the fridge and hold off baking them for up to 48 hours.

11. Gently place the pastry discs on top of tomatoes. Avoid pressing down on them. Put the ramekins into the 220°C(425°F) oven for 20 minutes or until the top of the puff pastry has a nice light mahogany colour. Allow to cool for several minutes before proceeding.

12. Run a knife along the inside edge of the ramekins, loosening any pastry or tomatoes that may be stuck to the sides. While holding the pastry down with one finger, tip the ramekins lightly and check for liquid. If it seems excessive (i.e., will leave a huge freaking puddle on the plate) tip off any excess. Using all your speed and dexterity, flip the ramekins over onto individual plates. Allow them to sit upside down for a few seconds before unmolding.

Serve warm with parmesan cream spooned over top and some nice dressed summer greens or vegetables. Now would be a good time to garnish with some fresh basil, whole or chopped.

Some might balk at the use of dried herbs, but in a situation where long cooking times are concerned, many of the bright flavours that fresh herbs offer are volatile and lost upon application of sustained heat anyhow.

Parmesan Cream

250mL 35% cream
45g (about 1/2 cup) finely grated parmiggiano reggiano or grana padano
salt to taste

1. Pour the cream into a small sauce pan and place over medium heat. Reduce it to 1/2 the original volume. Remove from heat.

2. While still hot, sprinkle in grated cheese. Stir until it’s fully incorporated.

3. Season to taste with salt and keep warm until it’s time to use it.

If you’ve followed directions, you should have something that looks like this: